Tampilkan postingan dengan label DIY. Tampilkan semua postingan
It's been awhile since I've gotten down and dirty with a DIY project and I jumped back in big time with this one! It was SO fun! :) 

My whole family thinks I'm nuts by the way. Husband came home from a business trip and son came home from school to this happening...they know by now to expect this. 

I've talked about the changes I've wanted to make in our son's bathroom for years now. I mentioned in January that THIS was the year we were going to make it happen. My plan was to add a window in the back room first, and then determine if I wanted to take the wall down:
Two room bathroom makeover

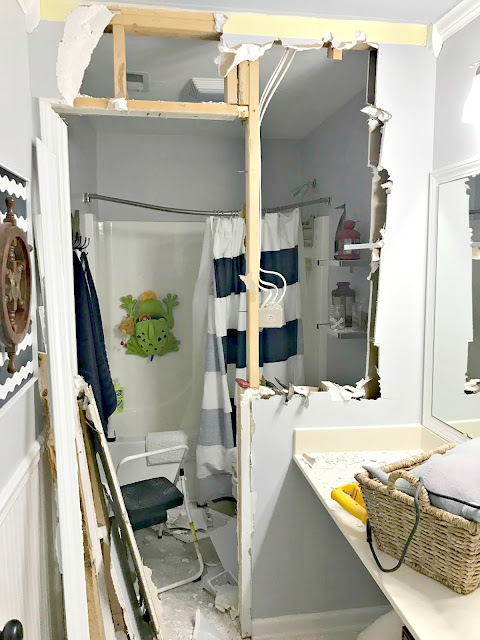
But I knew all along I wanted to take it down...I hate it. Loathe. So yesterday I got a wild hair and did just that. Sometimes I'll sit on a project forever until I just bite the bullet and just jump in. I knew I could make some progress on this room and still have it function, so I went for it. 

And man, was it fun! And messy! I loved it. :) 

I knew there was some electrical in the wall, but didn't think there would be any plumbing. I was right...kind of. I started on the toilet/tub side of the wall (in case there was no way to take it down and I would have to patch it up) and made a hole...and immediately saw it. DRATS!:
How to check inside a wall before removing

It's a vent to the roof. I'm not sure if it can be pushed back into the wall, but even if so I don't think the expense is worth it. So I immediately figured out a solution, which I'll show you in a bit. 

I used a flashlight to look both up and down in the wall to make sure there was nothing else to worry about and kept going. 

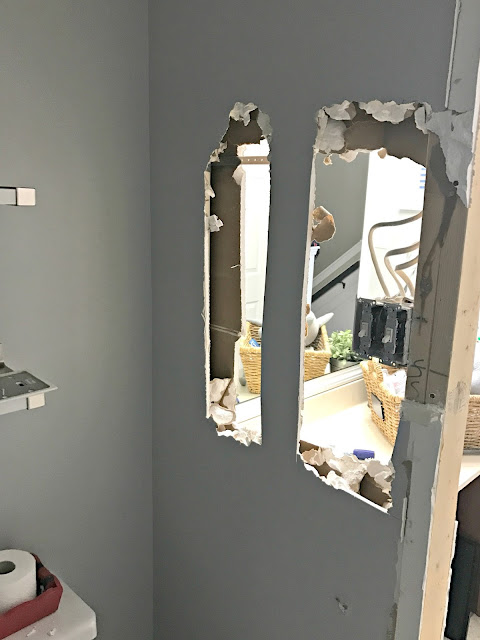
A professional would be a little more deliberate (clean?) with the way they did this, but I went the easy/messy route. Using a hammer, I pounded through the drywall: 
How to remove drywall

And then I used a saw to cut through it. I did it in sections so it's not the cleanest of jobs, but it will all be fixed later: 
Saw for cutting drywall

There are so many drywall fixes that will have to happen in here, I wasn't worried about perfection. I knew how to take down a wall from when we did this in our family room years back. 

Once I saw that light coming into the dark cave in the back I was SO excited: 
How to remove a wall

The more I removed the happier I was. Whoot!:
Removing wall in bathroom

It was about here where I realized something -- I wasn't sure I wanted to take the WHOLE wall out. I was planning on it all this time but I really liked the idea of a small pony wall there. So I used (affiliate link) this reciprocating saw to start cutting through the studs, and I liked the idea more and more:
Removing wall down middle of bathroom

How to take down drywall and studs

Ignore the sad droopy shower rod. That's on the list. And yes, I left all of the stuff in the room and it was fine. I wiped off the dust onto the floor and then swept it all up. It was actually a quicker clean up than I thought it would be. The mess was welcomed though -- I was so thrilled!

Here's a closer look at the vent...
How to deal with vent in bathroom wall

My plan is to add a stud in front of it and then drywall around it. I may wrap it with stained wood to make it look like a beam -- I'll see when it's drywalled if I want to do that or not. I'm actually not so sad about the vent, because it gives me a good stopping point for the tile behind the mirrors that I plan to add. 

The pony wall will be shorter than this (guessing around three inches shorter) and I'm going to pull the studs out at the end and take it back about five inches:
Pony wall in bathroom by toilet

I didn't want any wall there initially but now I don't mind the idea of a short one. It will still offer a bit of privacy, but again, I'm not sure if that's really needed? I mean, you'll just shut the door. 
How to remove a wall in a bathroom

BUT I think because we have to keep that little bit on the right, it makes more sense to have the half wall there. It would look odd to just have that small wall going down the middle of the room by itself. 

And I've seen all kinds of great ideas for adding storage in bathroom pony walls too -- I may consider something like that!

It only took me a couple hours to get it to this point! Today I plan to take down the door trim and stud on the left side of the room and I'm excited about that too -- I think that will really complete the open feel. I'll take down the wood on the ceiling too, and I may go ahead and cut down the width of the pony wall so I can be done with this step. Here's a look after I finished cleaning:
Removing a wall to open up bathroom

GIDDY!! 

The opening will be much larger by the time I finish up today. Can't wait!! My arms and wrists are already killing me so I just want to get this part done. The next step will be getting quotes for some electrical and plumbing work. I'll be sure to share the process with you every step of the way! 

I had to laugh as I looked back at my inspiration photos I shared years back -- this room is set up nearly the exact same way as how ours will be!:
Bathroom renovation with pony wall

So weird that this is one I shared! Ours won't have the header at the top, but the bump out on the left and the pony wall are exactly how our room will look. And we're adding a window (longer and thinner than this one) to the top of the shower wall. 

I'm so excited to get this moving -- I have NO idea how long it's going to take me but like always I'll be doing it in smaller increments for budget reasons and so we can still use this room along the way. (Although I've told our boy he can't use the back part until we get that electrical back in the wall -- hopefully soon!)



These are my favorite kinds of projects/posts my friends! Quick DIYs that are easy to replicate and aren't going to break the bank. This one is especially easy! 

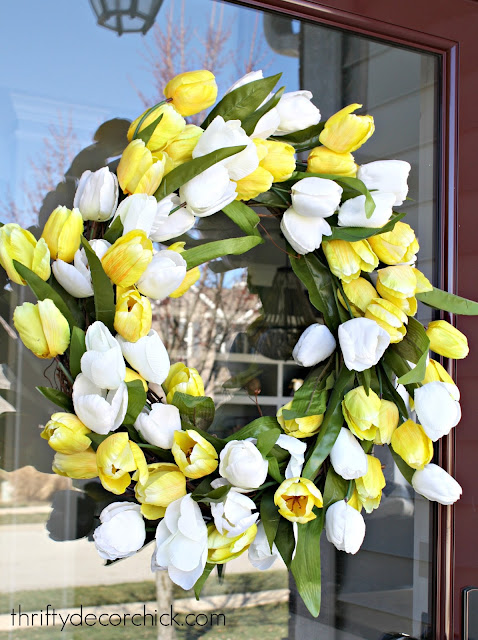
I found this tulip wreath and fell. in. LOVE with it: 
Full white and yellow tulip wreath

But the price? Seventy dollars?? 😳 It's gorgeous but I knew I could make my own. 

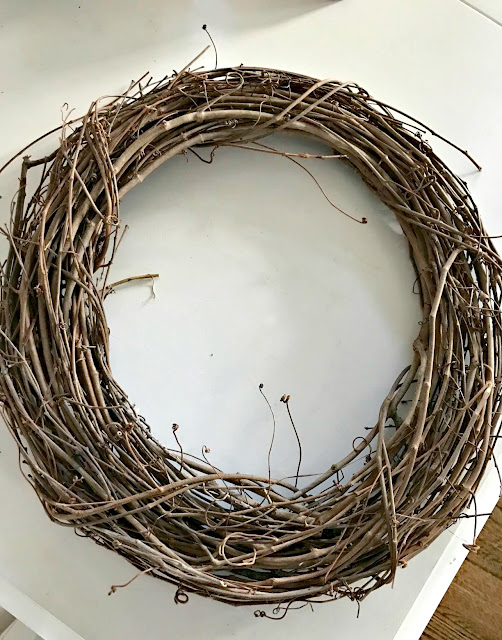
I gathered my supplies -- this grapevine wreath I had already. I recommend grabbing one when they're on sale (I believe this one was $5 after half off). I love these because they're SO easy to stuff with seasonal items:
Grapevine wreath for spring DIY projects

Then I went to Hobby Lobby because their fake flowers were half off. I grabbed way more than I needed just in case (they're usually half off every other week so I wanted to make sure I had enough): 
Affordable fake tulips

So pretty! 

I used my wire cutting pliers and started cutting the stems off the bunches: 
How to cut fake flowers

Then you just stuff them in! It really is so easy. Just place them where you want. 

I thought it looked pretty with just a couple bunches on there:
How to make your own spring wreath

But I wanted a fuller look so I went with six bunches total: 
DIY large tulip wreath for a fraction of the cost

LOVE it! Mine was $24 and is even bigger than the one online. Score! 

I used six bunches at $4 each. I had the wreath, but as I mentioned, you would easily come in under $30 for a very full and large wreath. If you go with a slightly smaller grapevine wreath you'd be able to make due with fewer flowers too. 

I use a Command hook to hang my wreaths on the glass door. This is what I use and it's made for wet locations. We don't get any of the elements on the door, but I used it just in case. It's stayed up for years and held HEAVY wreaths: 
How to make your own tulip wreath

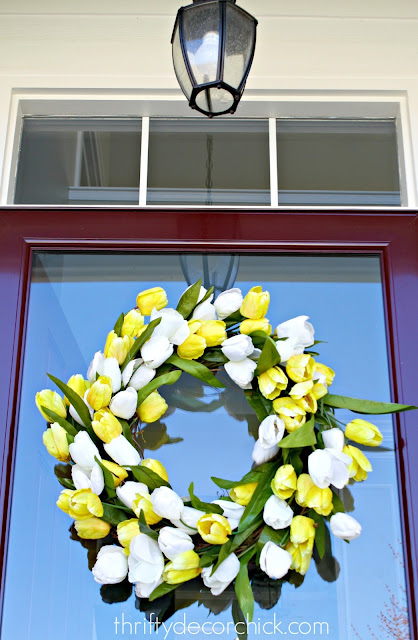
It's hard to get a photo of the glass door without me in it. ;) You don't want to see me in my comfy pants so here you go: 
DIY white and yellow tulip wreath

SO pretty! I just love it! Mine measures about 24 inches across, bigger in some spots. You can make it bigger or smaller with your placement of the tulips. 

Of course you can use any fake flower or greenery for a wreath like this! I love that I can take them out, keep them for next spring and reuse the wreath for summer. It takes maybe ten minutes to add the flowers in once you've got them cut. 

If you don't want to DIY this wreath these are some BEAUTIFUL options. I'm so ready for spring!:  
Yellow and white tulip wreath Amazon


Yellow and white tulip wreath


Dark and light pink tulip wreath

LOVE the pink!

Light and dark pink tulip wreath


Affiliate links included for your convenience! 

So I've used a LOT of tools over the years and feel comfortable with all of them. But I still get intimidated when I use a new one! (The tile saw made me sweat the first time, till I realized how easy it was to use!) If someone is interested in learning how to use a new tool I tell them to do two things -- do a ton of research (blogs are a GREAT resource 😉) and take your time and "get to know" the tool before you use it. 

When I'm trying something for the first time I take my time unboxing it and putting it tougher, and read all of the paperwork that comes with it. This helps to ease me into it and makes me feel more comfortable. I also look up videos to see how people use the tool. 

Recently the folks at Dremel asked me to share a DIY project using their Dremel Maker Kit and I was honored they asked...but nervous to try something new!:
Dremel maker kit review for burning and cutting wood

I laugh when I think about that because I feel totally comfortable using my huge compound miter saw but these little Dremel tools were intimidating me. I think it happens to everyone -- and I think it's a good thing because you don't want be overly confident when you use a tool for the first time.

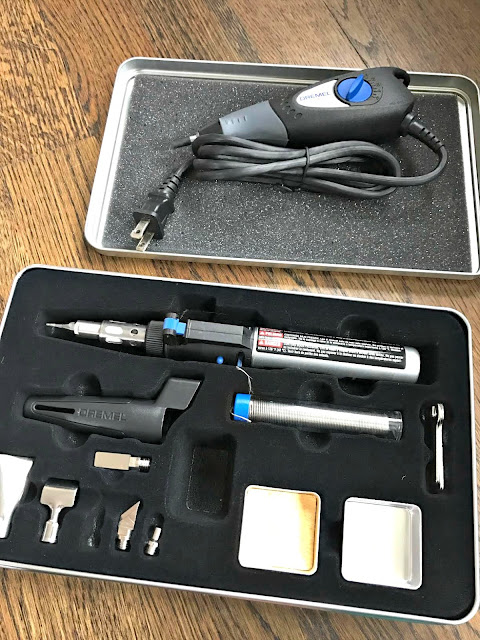
This maker kit comes with three tools -- the Dremel 200 rotary tool, which can be used for a variety of DIY projects. The Dremel engraver is for engraving stone, metal and wood. And the VersaTip soldering torch, which I was most excited about, is for burning into wood, soldering or cutting: 
Dremel three piece tool set

I had a project in mind and I knew either the engraver or the VersaTip would work:
Dremel tool kits

I worked in the garage on a large scrap piece of wood and started trying them out (after reading all the materials on operation). 

I tried the engraver first and it was so cool and incredibly easy to use: 
Dremel engraving tool

I knew right away this wasn't the look I wanted but I am thinking of ways I can use this one on metal or glass in the future. 

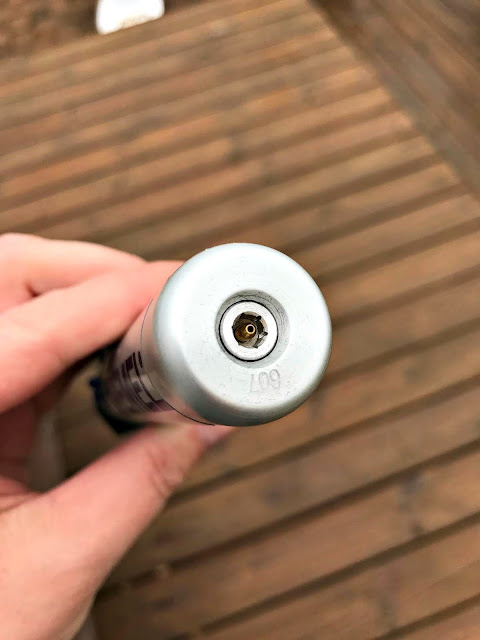
I really wanted to give this project a burned look so I decided to try the VersaTip instead. You need to fill the tool with butane -- we already had some for filling our candle lighters. You flip the tool upside down and then press the butane nozzle into it. It only takes a few seconds to fill it up -- you'll feel the canister getting cold: 
Butane Dremel wood burner

You need to let the butane warm up a bit and then it's ready to use! 

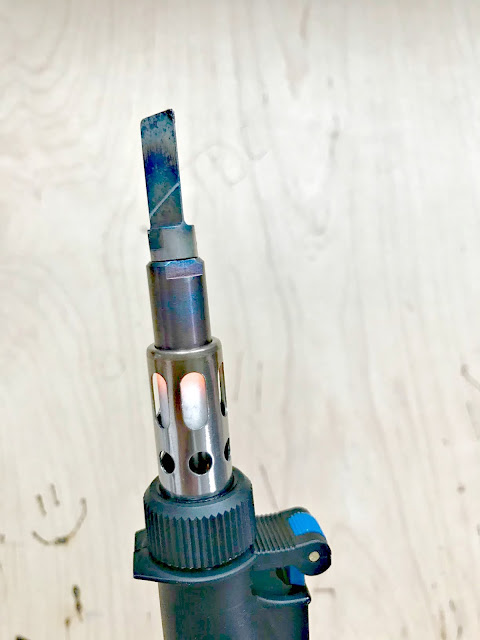
It was incredibly easy to operate -- there's a safety switch but once you flip that up it's just like a lighter. You'll hear the torch start burning and you'll see it as well: 
Dremel VersaTip for wood burning crafts

You can smell the butane a bit -- that's another reason you may want to try this project outside. It's not overpowering by any means. This tool comes with a bunch of tips for different projects -- from cutting to soldering to burning. I found this one above to be the easiest for this project. 

On a side note -- I was thrilled to learn that I can use this tool for caramelizing foods as well. I've always wanted to try making creme brûlée at home and now I can! :) 

Once I was comfortable with using the tool, I printed out what I wanted to burn into the wood. A friend of ours is getting married later this year and I thought this would be a cute addition to their gift. I LOVE adding a handmade or personal gift for weddings or baby showers and used to do it a lot. I'm trying to get back to that. :) 

I found a package of wood slices at Michael's for this project and taped the image onto the wood: 
Burning wood with Dremel tool

Then I traced the letters with a pen to transfer the image to the wood like I showed you how to do here

On some of them I found it was helpful to trace the imprint with a pen before I started with the tool. I took the paper off (don't leave it on there with a flame!) and started burning the shapes into the wood:
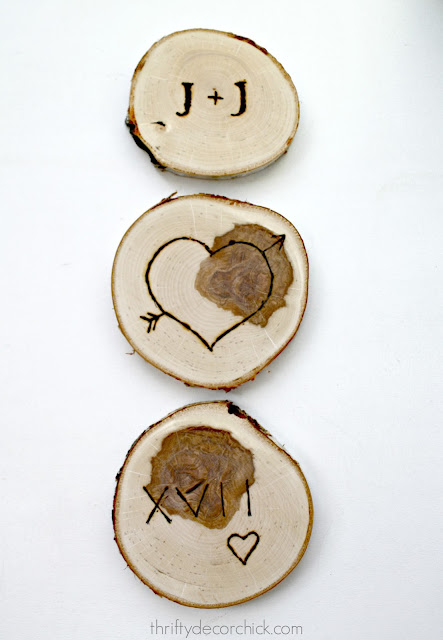
Wedding gift wood coasters

This is not a quick project -- you'll want to take your time and be methodical about it. I started with a lighter hand to get my shape and would go back over it to get the darker burnt look. 

I think they turned out SO cute. I'm kind of in love with them. In my head I made these planning to gift them as coasters so I added a couple layers of wipe on polyurethane:
DIY wedding gift/craft

But really, they could be used in so many ways!

I added some felt stickers to the bottom of each one so they don't scratch: 
DIY wood slice coasters

I tried to do wedding-type images -- their initials, the heart (like one you would see carved into a tree) and the Roman numeral for the day they're getting married and the year: 
DIY wood slice wood burning craft
I think they'll make great coasters! But they could be used in so many other ways too -- I could see them as super cute ornaments if they decide to drill a hole into the top of each one. I also think they'd be fun as art in a shadow box or placed on top of a black background in a frame. They could also be used as small trivets for dishes -- there are so many uses!

I just think they're plain cute and I smile when I see them. The bride and groom are a fun young couple and I hope they'll enjoy them too: 
Wood burning craft/gift with wood slices

I'm so glad I tried this tool and got over being intimidated by something new. Of course after I used it I realized how easy it was! We have a Dremel cutting tool that I've used in the past but this set is more for precision crafts and items where you want to add more detail. I highly recommend it if you are interested in doing those types of projects. 

Have you tried this tool for any crafts or DIY projects? I though it was fun and it wasn't nearly as intimidating to use as I thought it would be. I felt comfortable with it within minutes of trying it out and burning the wood was fun. My mind is swimming with ideas for future projects! Now I'm off to make creme brûlée! ;) 


Hello there! First of all, I know there is a weird redirect going on with my site and I'm trying to get it figured out. I'm still here! Go ahead and click through if you get the notice and hopefully I'll have it fixed shortly. 

You all have been so helpful the past couple of weeks! If you missed my review of our family room sectional earlier this week, check it out here. You all had some great ideas that may be helpful for you those of you with similar issues. I've already tried adding a pillow to our cushions and it made them way too thick, but I'm going to keep working on it. 

I have a whole post planned soon about the best way to hang your TV without seeing cables and cords everywhere (safely). But this post goes into more detail on how we hid our electronics in our family room. I didn't want to have the components out if we could help it and this was a perfect solution! 

When we took down a wall and extended our family room years ago we had to build our gas fireplace out into the room. Usually there's a little "dog house" bump out outside that your fireplace sits in, but ours had been a corner fireplace. Adding that bump out would have required permits and a lot more time. 

Since the fireplace was going to come out into the room anyway, I figured out a solution to reconfigure kitchen cabinets (like I do a lot in our house) and make them into built ins to hide the electronics:

I didn't do that part personally -- the guys we hired expanded them in the back so they would be deep enough to hold the electronics. We used upper cabinets because the lower ones were too deep for what we needed. I had them extend these to 18 inches deep instead of 12 inches like the original cabinet. 

I later cut the center part of the doors off and then installed metal sheeting so the components could breathe: 

I love that the sheeting lets air flow, but also still hides the items inside pretty well. The best part -- the remotes still work! 

Here's how it looks inside: 

THIS is important and I will go into this more at a later date -- do not run power cords through the wall. I learned years ago this is NOT the correct way to hang a TV. We had an electrician/AV professional install the proper outlets and plugs behind the TV. (Power and receptacles for all HDMI, etc.) 

I had the fake wall built above the fireplace so I could recess the TV back into it and have it sit flush with that wall when it's pushed back:

I love that you don't see the wires behind the TV or the mount when the TV is in it's regular position (it also pulls out, swivels and can go up or down). I highly recommend this little trick if you are considering hanging your TV -- especially with a mount that pulls out!

The other cabinet is pure storage which is awesome! Those fabric covered bins are from IKEA and I have all our extra remotes, phone accessories and random electronic stuff inside. I LOVE having this storage in the family room:

I love even more that there is empty space in there! :) 

This fireplace wall is the focal point of our family room for sure. I think it turned out so well. The fact that the electronics are hidden away makes it even better:

I still haven't hidden the subwoofer, but now it doesn't even bother me. Years ago I was going to  build some kind of cover for it, but now we hardly notice it.

These DIY tricks are what completely transformed this wall -- it's another spot in our home that looks good but also functions wonderfully as well.

Here are some more helpful projects from this wall if you are interested!

How I used $13 to panel the wall behind the TV:


And I just did this again this morning! I share how to clean the (inside) glass on your gas fireplace

It's actually quite easy! :) Ours gets yucky every year and this helps tremendously! 


Hello all! Hope your weekend was wonderful! Our weather continues to be oddly warm and is supposed to be near 70 this weekend! I can't remember a weirder winter in Indiana. It's been awesome, but I do wonder if the winter weather is going to hit in March. 😬

I've mentioned a few times I've slowly adding more color into our home lately. I was craving it in the new year and have been making small, easy changes to do just that. One spot in our kitchen was calling out for it -- the window seat (one of my favorite spots in our home):
Window seat in bay window

You can see all of the details on how it was built here. I have dreamed of a window seat in my home for most of my life, and now we have two! :) 

As you can tell, I love the color blue. I knew this would be a lovely spot to add in a little something more. I went shopping, not sure exactly what I was looking for, but I knew I wanted more color. I wish I had the patience to order fabrics online -- if I planned better I think I could do it but most of the time what I do fall in love with is CRAZY expensive anyway. 

SO. Went shopping. And found a combo I loved
Green and blue fresh fabrics for spring

The left is called Cove End Palm (Robert Allen) and the right is Gem of the Sky Indigo (P. Kaufmann), both from Calico Corners. Although the print still had a lot of blue, it had plenty of other colors to pull from too. I wanted to mix in one more fabric as well but didn't find anything I loved.

When I got home and got the pillows finished up, I realized two sets of the previous pillows worked great with the new ones. I ended up keeping all of them: 
Mixing and matching fabrics

The blue stripe was previously a larger pillow and I cut them down and made them smaller to match the rest. 

When I saw them all together I was in love! I still have my blue but with some more color thrown in too:
Blue, green and white pillow combo

And I can easily add something else with more color if/when I find another fabric I love. Pillows are SUCH an easy way to change up your decor -- whether you make them or buy! I think they are one of my favorite decorating accessories. 

I also love having more pillows on the seat -- it feels like I should have always had this amount because of the size: 
Kitchen window seat with pillows and sconces

Their similar size works much better too. I know many of you want me to put a cushion on here and I will eventually -- it's definitely the plan. A friend was going to make it but with the shape of the seat she didn't feel confident. She recommended someone else but I know it will be an investment. Now I'm considering trying it myself. We'll see. :) For now I don't mind it without. 

I had to laugh because when I made the first few pillows for this seat years ago I had green mixed in. The fabric was slightly more modern and I used lumbar pillows, so I ended up switching to the square sizes. I absolutely LOVE green and blue together! It's such a lovely combo! 

The blue with the pinstripe is fabric from Joann's (they still carry it) and the white with the large stripe were made from West Elm napkins. Here's a photo with our Valentine's banner up. :)
Built in window seat with pillows

New throw pillows are an easy way to update your space, don't you agree? When I'm craving a change that's my first stop. 

I've shared a bunch of easy pillow ideas over the years! Check out the link below each picture to find out more!
Inexpensive DIY seasonal pillows

How I make Pottery Barn pillows for cheap!

Basic pillow sewing tutorial -- it's easier than you think!

Easy way to make pillows -- with placemats!


Popular Posts