Hey all! Some of you may have noticed that Blogger was down for awhile this week, and when it came back up, my last post lost all of it’s comments. So if you left a comment with a suggestion (I’m looking for perennial ideas), I would love it if you would add it to the comments again. (I reference them later!)

Speaking of referencing ideas. ;)

Many of you have asked how I organize all of the DIY project ideas that fill my brain. You know, those ideas that pop into my head right as I’m falling asleep and then keep me awake at night. (For reals…it’s sad.)

If it’s something I want to make sure not to forget, I’ll write it down on a notepad. I have one I’ve written ideas on for years. But many of my projects are born from inspiration I see in magazines or online.

Up till a couple weeks ago, my main method for organizing those was a binder:

image

I showed you my loverly binders on this paper organizing post – and one of them is filled with pages I tear out of magazines. I have four categories – walls/art, holiday, general projects, and general decorating ideas.

Some ideas I’ve had in there for years, like this project:

And I’ve had the supplies for it all that time too. ;) Need to get on that.

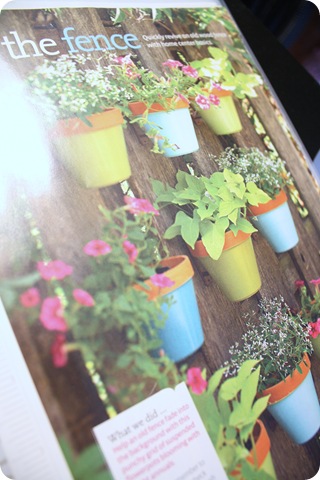
I love these fence pots:

fence post planters

And I look at them every summer and haven’t done it yet. ;)

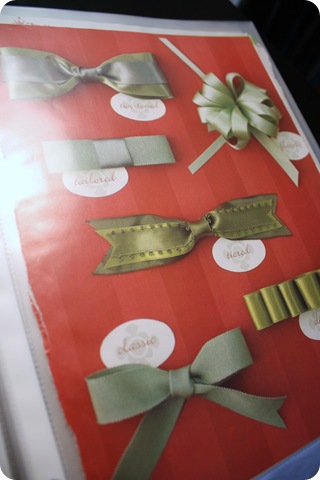
I keep lots of how-to’s, like this one for all types of bows:

IMG_4812

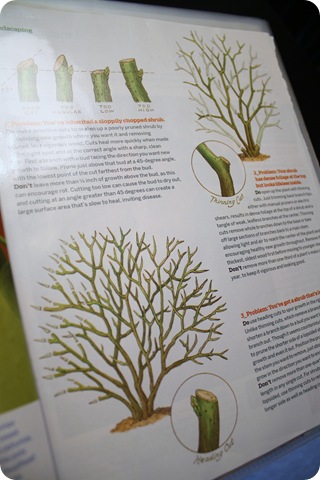
And this one for the proper way to prune a bush:

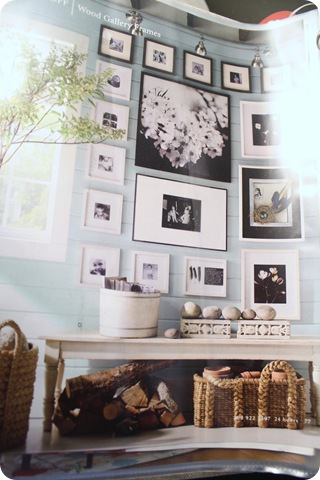
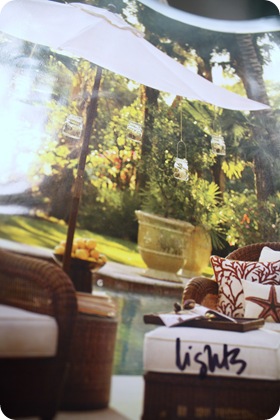
Most of the sheets are just pictures of beautifully decorated spaces. This Pottery Barn gallery wall is one of my favorites:

IMG_4811

Love those lights at the top!

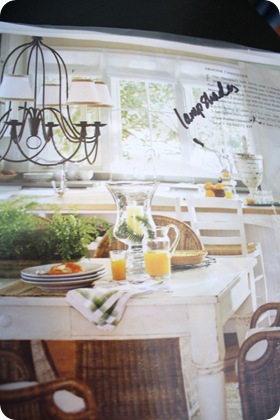
Every once in a while I’ll look back at my filed pictures and wonder what in the heck I wanted to remember. So I started writing on the pages:

IMG_4819 IMG_4820

The binder is stuffed FULL with ideas. But the problem is, I rarely have a few extra moments to sit and peruse my pretty binder. And if I do have an extra few minutes, you know I’m usually painting something. :)

Then I heard about Pinterest. It’s such a FUN way to organize and categorize all of the inspiration I find online:pinterestview
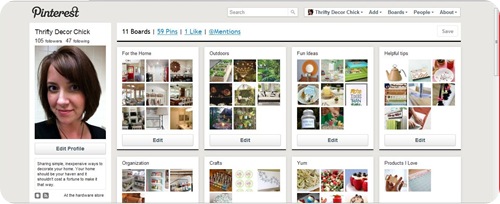
I was so scared of it for the longest time – it seemed like it would be so complicated and all…technical. Me and techy don’t mix. ;)

But I tell you what – I had it figured out in about three minutes and I haven’t stopped “pinning” since.

When you sign up you just drag the “Pin It” icon up to you tool bar and whenever you’re online and see something you love, it just takes a click on that little button. It pins it into the category you specify, just. like. that.

You can also follow others and see what they’re pinning, and I find most of my ideas from those I follow. It’s awesome. I’ve already found SO MANY beautiful projects I want to try!

Like outdoor projects:

Or fun stuff, like how to make moon sand:

The stuff is evil, but the Bub loves it.

There’s all kinds of helpful tips I didn’t know about, like how to remove a stripped screw:

A bunch of yummy recipes and ideas:

fourth of july strawberries

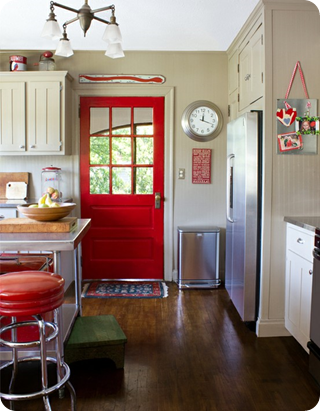
And plenty of good old beautiful decor ideas:

red door kitchen

I LOVE that red door!

My favorite part is that it saves the permalink when you save from your computer – so you just save it to your account, and you can always go back later to see more details.

You can also load pictures from your computer and if you have an iphone and the new app, you are supposed to be able to take photos and load them, although it hasn’t worked for me yet. :)

Although many bloggers use it – I think it’s a great resource for anyone! I have a girlfriend who does does a lot of etsy searching for the fantastic birthday parties she throws for her kids. This is a perfect way for her to save those ideas!

It really is SO FUN. It’s easy to get sucked in though – you’ll go in for two seconds and be on for an hour. And all of the sudden I want to search the Internet for every idea I’ve ever had, just so I can pin them. ;)

The only kicker is you have to be invited by someone who has a Pinterest account, or you can request an invite on their site. I hear that takes a few days to come through though.

If you would like a invite, send me an email and I’ll try to send you one! I’m not sure how many I can send out, but I’ll invite as many as I can (and as many as I can get to!)

So there you have it – two ways to organize the inspiration! One for the magazines, one for online ideas. I’m definitely referring more to the online method now that I’m using Pinterest.

**My friend Beth created a great tutorial on how to use Pinterest! Check it out here.

***I have no affiliation with Pinterest, I just love it. :)


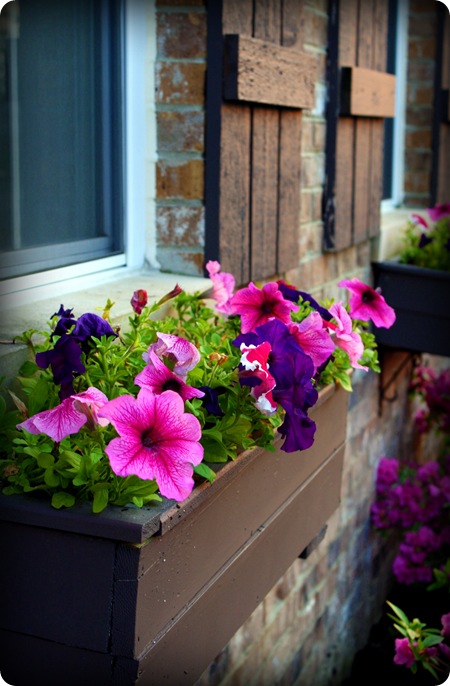
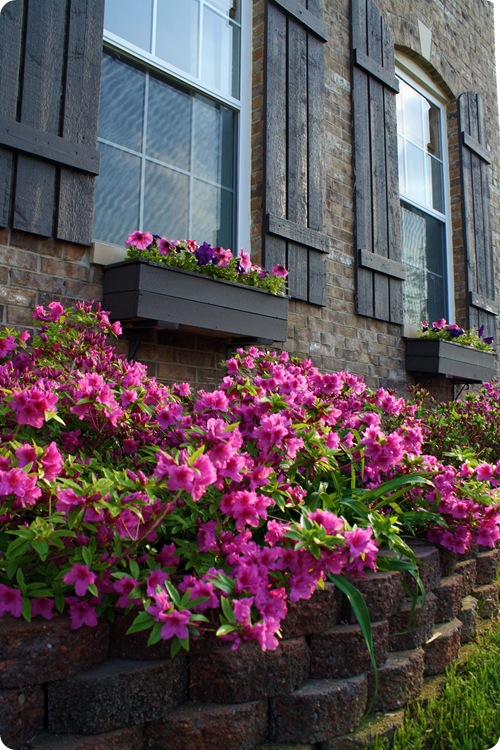
brown window boxes
Well hello there! Hope you are having a wonderful week!!
I. tell. you. what. – the weather (in Indiana anyway) is freakin’ me out. I am pretty sure it was high 40’s last week, and today we hit 93. Good. NESS.
It’s also rained about 50 out of the past 60 days. (You think I kid.) And now that it’s not raining, it’s 90 degrees. GOOD. NESS.
So anyhoo, we have a list a mile long of projects we want to accomplish outside, but we haven’t be able to get to much. But between the heat and the rain, I’ve finally finished one project that was high on our list.
The summer after we moved into our house, I did a TON of work out front. The first project was to pull out the low lying junipers the builder planted across the front of the house:
junipers
And they just looked WEIRD. Way too low and not enough of an impact for our house. 
In their place I planted azaleas…beautiful azaleas! I’m kind of half and half with my plant success – roses and hydrangeas hate. me. Lilies and azaleas and I get along fabulously. 
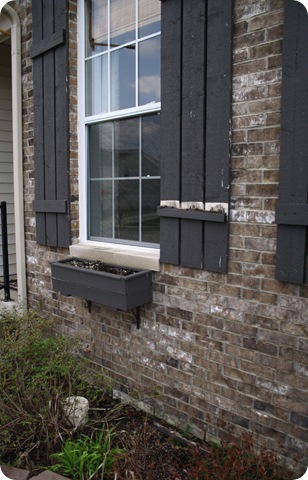
Last month (on a rare decent day), I started sprucing up the front of the house again:

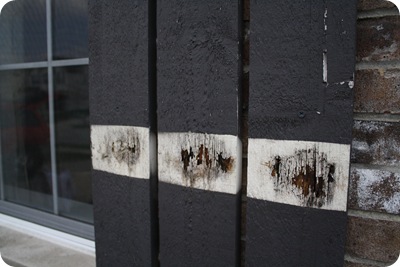
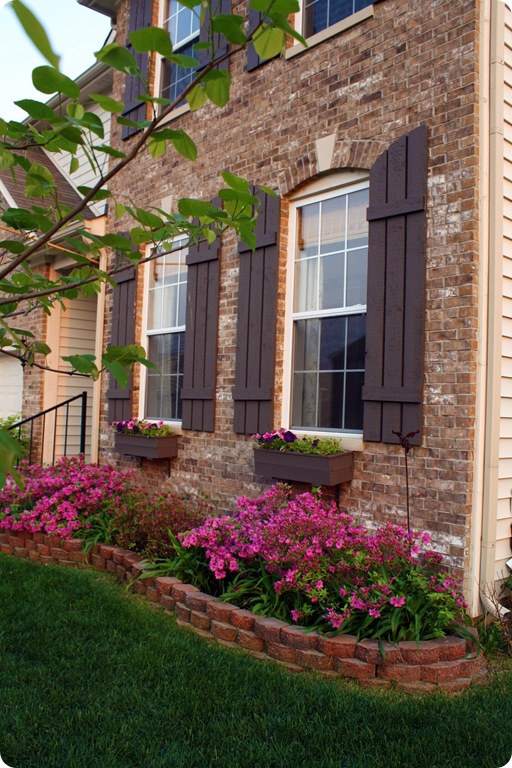
As you can tell, it needed it. ;) Our shutters were looking a hot mess. We haven’t touched them in seven years and they desperately needed to be repainted.
I started by removing the broken slat --
And then I power washed the shutters, installed a new piece of cedar and then repainted both sets of shutters.
I used a brown paint from our little deck revamp last summer, and it’s SO close to the original brown of the shutters, but not exact. So I went ahead and painted the window boxes again too:

I usually plant the wave petunias in the boxes, and I wish I would have done that this year. They always end of spilling out of them so beautifully! These haven't done much. ;)
I wanted to add some potato vine (vinca vine is too skimpy) – but I can’t find it anywhere.
I finished the spruce up by clearing out the dead stuff and weeds:

And then I waited for Mother Nature to do her part:
azaleas
She done good. ;)
I mentioned a couple of summers ago that a little varmint had been digging into my azaleas and eating the roots. I lost my middle bush to this little booger, and it’s taken me two years, but I finally found the same type of azalea in a decent size to replace it:

It’s actually two plants, but whatever. ;)
I’m hoping with some Miracle Grow and some lovin’, they’ll catch up to the others.
But for now, I’m thrilled, because projects one through five of 485 are DONE!
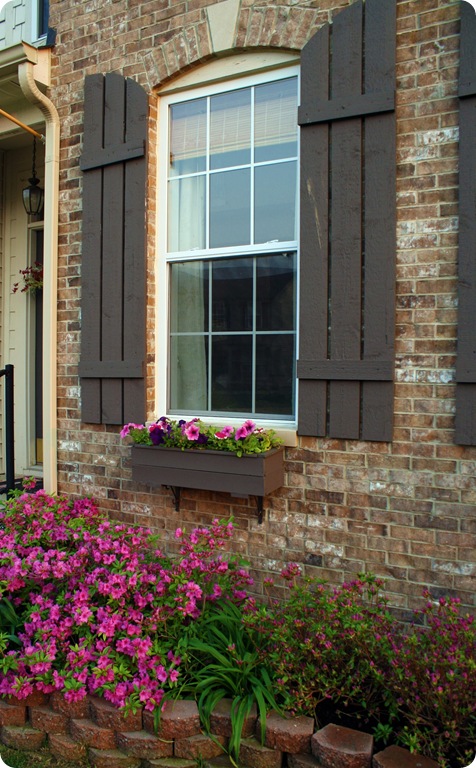
Doesn’t it look SO much better?:

I tried spraying the little birdie artwork off and it won’t budge. ;)
Perfect timing bird.
Now…I just need to find a brave soul to get up there and paint the shutters on the second level:

Can you tell they are just a tad darker? Hubby swears you can’t even notice it but then again…he KNOWS ME. :)
I can’t wait to start the rest of the outside projects – but it will have to be next week because it’s supposed to rain for the next FIVE days. At least the grass will stay green!
Have you tackled any landscaping projects yet? What is your favorite perennial? One I won’t kill? :)

Well hello! OK – I’m finally back with the down low on the book nook closet. Sorry it took me awhile, but I wanted to make sure I got to all the details and plenty of pictures!

First of all – I was totally flying by the seat of my pants throughout this whole thing. If something didn’t work quite right I just figured out a way to fix it. It’s SO not perfect.

And secondly, and probably most important…I have to send out a big BOOYAH to my Stink Eye Sis.

Remember when we cleaned out the garage and she kept yelling at me every time I wanted to keep a piece of scrap wood? How she even spray painted the ones in the trash can so I couldn’t pull them out again?

Well…this WHOLE bench was made with scrap wood only – so I’m doing the BOOYAH dance. Serving up a slice of BOOYAH. Would you like a sip of BOOYAH with that?

Excuse me, I’m back. Anyway, I was really excited.  :)

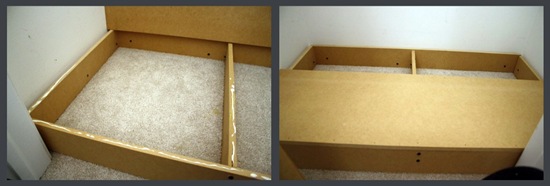
I started with the base, and this part was all scrap mdf from this staircase project.

I’ll show you pics and then explain:

Base

I did my measurements and laid everything out to make sure it would work. Then I started securing everything to the walls with long screws.

I did not take the baseboards off. Our baseboards are practically soldered onto our walls, so they stayed. And they gave me a good strong base to secure the mdf to.

I added the center support and screwed in in from the front (it split the mdf a bit, which is OK.) On the back part I just screwed it in from an angle.

Then I covered it with slats of scrap mdf:

how to build a bench in closet

I used a bead of wood glue first, then my nail gun to secure it along the frame.

You can see that I didn’t use one big piece of mdf – I was trying to use what I had, so I just cut them to the right length and made them work.

Then it was on to the bench! I used more scrap mdf for this one too:

how to build a bench seat

I did this one very similar to the bottom base. The main difference was finding the studs – as many as possible! And our closet only had three – one on each wall.

I was a bit concerned that three wouldn’t hold up my booty, so I added screws in the corners (where I knew the closet was framed) to get some more support. I held up the center braces with brackets I had in my stash.

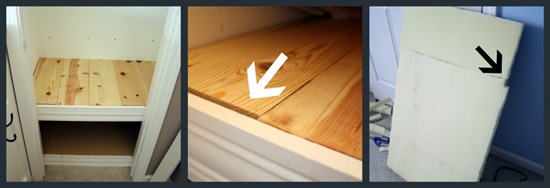
Then I took wood from our old DIY sofa table (I took it down a while ago) to make the seat. I installed them in that direction (coming out from the back of the closet) because five of those boards just happened to fit perfect that way.

If you don’t have scrap wood for a project like this, just have a piece of wood or plywood cut to the exact size of your bench. (Hardware stores will do this for you!)

Because I installed the wood that direction, and I was working around the door frame inside the closet, the wood didn’t match up just right at the front. I used a piece of scrap wood from our powder room across the front:

closet bench

But there were still gaps. I thought I could cover that with the seat cushion, so I just cut the foam with a little bump out so it would cover all the gaps.

I made the cushion like I make headboards, like I showed you here.

I even used scrap foam (I scored a big roll at Goodwill a couple of years ago) for the seat cushion!

BOOYAH. ;)

Because I didn’t have a ton of studs to work with, I was a bit nervous about the stability of the bench. I sat on it over and over and it was fine, but wanted to add a little somethin’ to make it even more sturdy.

Dad suggested a couple more supports against the door frame:

support for bench

And it did the trick! I have no doubt this will hold up to many sits for many years. :)

(And no, I didn’t fill the holes under there.)

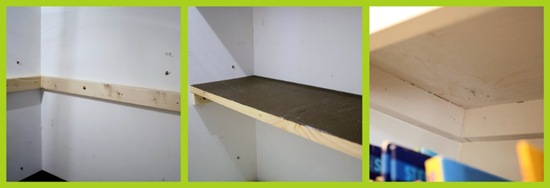
The bench was DONE – so it was onto the shelves. I used a 1” x 2” piece of wood to build a bracket:

DIY book shelves

Then I used more scrap wood from the sofa table (hence the brown!) and nailed it into the “bracket.” I finished it off with a piece of mdf on the front, and then just painted it underneath so it melted in with the wall.

**If I was really good (and patient) I would have covered the bottom with another piece of wood…but I’m not. :)
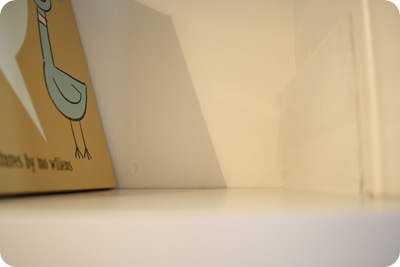
There’s a few issues I hit as I went through the process, and I figured them out along the way. The first was covering where the hinges and the strike on the door frame were.

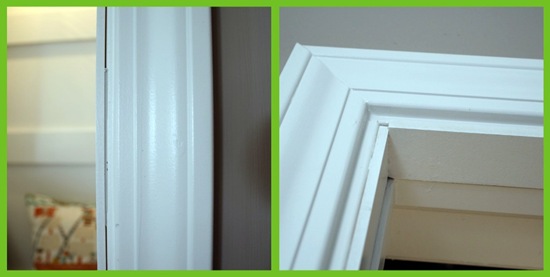
I got a couple of pieces of the thin lattice boards (like I used for the Bub’s “board and batten”) and nailed them over the frame:

frame

The top piece was another scrap, so it’s a tiny bit thicker. I caulked the hinge part (picture on the left) and still need to do that a bit more up in the corners.

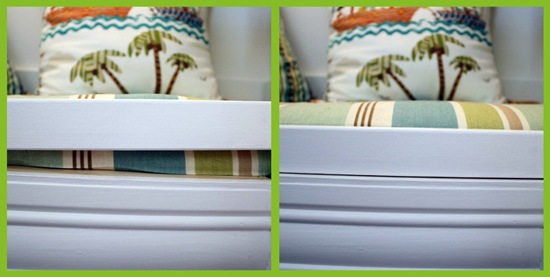
My cushion idea (cutting the foam to hang over a bit) worked pretty well, but then my (not good) cutting job on the foam was showing through and it was driving me crayyyyzay. (It was ragged and you could tell.)

I found more scrap wood, cut it to the exact right size, and then wedged it into the door frame right in front of the cushion:

pirate pillows I didn’t even nail it in. It stays put!

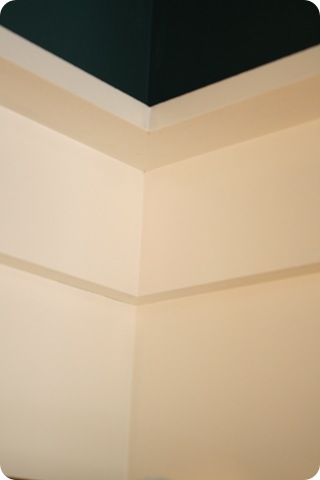
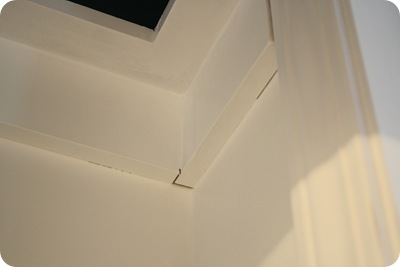
Usually I miter the corners of the mdf at 45 degree angles, but this time I just butt them up against each other and it worked great!:

You can see how they meet up from underneath:

I still need to caulk a few spots, but this gives you an idea.

I didn’t continue the mdf around the back of the bookshelves:

I knew it would take up valuable book space. And you can’t see back there with the books anyway. :)

Now…for the goodies – the sources for the cute stuff!

The light was from Menards for $12, but I was at Lowe’s today and found this cutie for about $18:

The basket was from TJ Maxx (already had it) and the “book” label was a cheap chalkboard from Joann’s that’s been in the basement:

The “NOOK” letters are cardboard, also from Joann’s, and spray painted in Pistachio spray paint (from Valspar I believe?)

The fabric is from Joann’s as well – I only need a bit so it was less than $10!

Oh, and the cutie pirate pillows were a HomeGoods find a few weeks ago, $10 each. I love how all of the colors came together!!

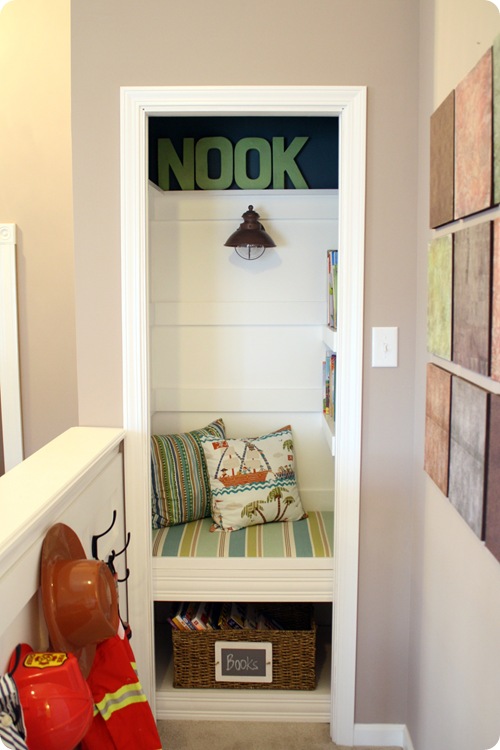
Throw all that together, and you get the cutest book nook I ever did see:

book nook Whew!! :)

I am playing with the idea of a drape off to the side – hubby thinks it would be so cool. (For the Bub, of course.)

I hope that helps! It was NOT hard! I promise you. It just took time and patience. I’ve never built anything on my own, and this went so well for me.

And I had a blast doing it!

If you have any additional questions, please let me know and I’ll answer them in the comments!

Thanks again for all the love on this project!


Hello there! I hope you all had a lovely Mother’s Day weekend! We had such a wonderful time, and the Bub and hubby completely spoiled me. :) I am SO LUCKY to have them.
I got a few beautiful pictures from a hike one of my best friend’s and I took with the kids:

stairs2 steps2I think they may have to go up in the office. Someday…when I finally finish it. ;)

Last week my bloggy friend Camila (of Effortless Style) highlighted a day in my life at her In Her Shoes series:

If you’ve ever wanted to get a glimpse into a day in my completely normal, not exciting, but I love it life -- you can see it here. Thanks Camila!!

Finally, I need to announce the winners of the Stello and Dot $50 gift cards! The lucky chicks are Jill D. (jnjdavenport(at)yahoo(dot)com) and Karen (karen.rudicil (at) woodemnvalley (dot) org).

Congrats ladies!! Please email me and I’ll get you connected with Summer!

I’ll be back tonight with a how-to on the book nook!


Hey all! First of all…WOW! Thank you SO MUCH for all of the sweet comments on our lovely little book nook. You made my week. MONTH! Anyway, thanks again. It thrills me to no end when you tell me I inspire you. :)

I know I promised a how-to on the nook and everything I did inside, but I have to do hold that off till next week. I still need to take a few more pictures and our week has been so crazy, I’ve run out of daylight more than once. And you know how I hate the night time pics. ;)

So tonight, I wanted to show off a blogger I’ve been meaning to tell you about for a while. Cassity’s site is AWESOME.

Have you heard of Remodelaholic? If not, you’re in for a treat. Cassity and her hubby are a force to be reckoned with. I am in awe of their ideas…and their follow-through. And I love how they are able to reuse basic items to make something beautiful.

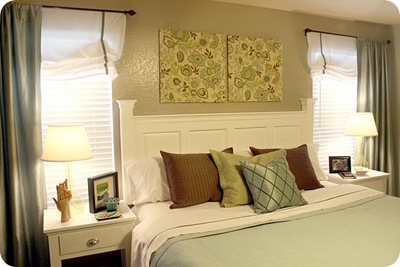
Case in point – this gorgeous headboard is made from…wait for it…kitchen cabinet doors:

headboard

Isn’t it lovely?? And you won’t believe the cost! Really. It was only $15. Cassity’s instructions are detailed and easy to follow – go here to see more of this project.

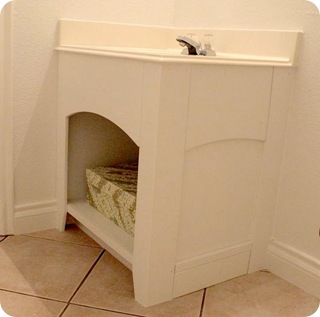
I absolutely loved how they transformed a builder basic bathroom cabinet from this:

image

To THIS:

IMG_2002

Ack. I LOVE the added character! Go here to see the post on that project. 

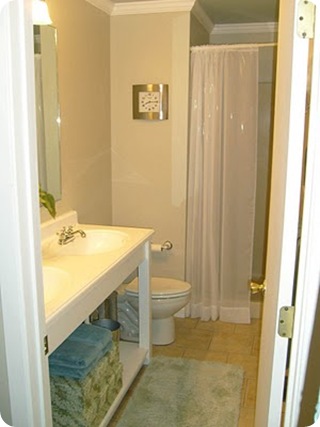
I also love this next bathroom vanity, and it would be PERFECT in our bathroom. Because I’m like, 15 feet tall, our master bath vanity is SO stinkin’ low. It drives me mad.

I’ve been thinking about a new vanity, and the potential options…and I think this one is going to win out:

DIY bathroom vanity

And with Cassity’s graphics, I feel like I could totally do it! (With the help of my Dad, of course.) I can’t WAIT to try this!!

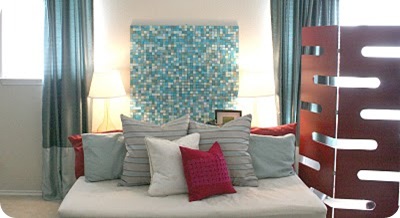
I adore her version of this Pottery Barn mosaic art:

She did it on her own, in a beautiful blue color:

mosiac art

But those aren’t tiles peeps. ;) Go here to see how she did this for way cheap.

Remodelaholic also showcases some amazing projects out there in blogland. I find so much inspiration there.

As soon as I saw this one the other day, I emailed it to hubby immediately and begged him to bring home a music stand:

How-to-build-a-tripod-lamp-recycled-project

I mean, if anyone has access to those, my band director hubby does. ;) Isn’t that fantastic?

Head over to Remodelaholic (love that name!) and check out all the inspiration. But make sure you’ve got some time…you’ll be looking around for awhile. And then your hubby will tell you to JUST CALM DOWN – he’s bringing the music stand home already!! ;) Sheesh.

I’ll be back this weekend with a fantastic giveaway!

**If you’d like me to show off YOUR blog, send me a quick email with pics, links and a brief description of your favorite projects! Put SHOW ME OFF in the subject line.


Popular Posts