First of all, I need to announce the lucky winner of the Pick Your Plum giveaway! That lovely lady is Kristen at kristenmadson (at) gmail (dot) com. (Please email me at thriftydecorchick (at) gmail (dot) com!)

Congrats Kristen! What will you do with that extra $100??

This week I have all kinds of RANDOM running through my head – and some of that random will be spit out onto this post. :)

First of all, there’s that little event called the Royal Wedding. Heard of it? No? You must live under a rock? ;)

I’m not really into all things royal, but I can’t help but get swept up in all of it. I mean, they’re so cute and young and in love (I hope!) – it’s just fun to watch.

Because the ceremony will be held in Westminster Abbey, it has me all nostalgic about our trip to London a lifetime few years ago. There’s so much amazing architecture there, but my favorite place – hands down – was Westminster Abbey.

You can see a peek of it here to the right of Big Ben:

Big Ben

I took that one from the top of the London Eye. (So cool!)

There was a wait to get inside, but when you have this to look at, the wait was fine with me:

The intricacy and detail was astonishing. Just unbelievable.

That domed area under the cross looked like this up close:

Westminster Abbey

It absolutely boggled my mind that this was created about 1,000 years ago (give or take). I find it completely fascinating.

If I remember right, we couldn’t take pictures inside (that may be why I don’t have any!). But I’ll never forget it.

Here’s a photo I found online:

That’s just one small portion of it – it’s about 10,000 square feet. :)

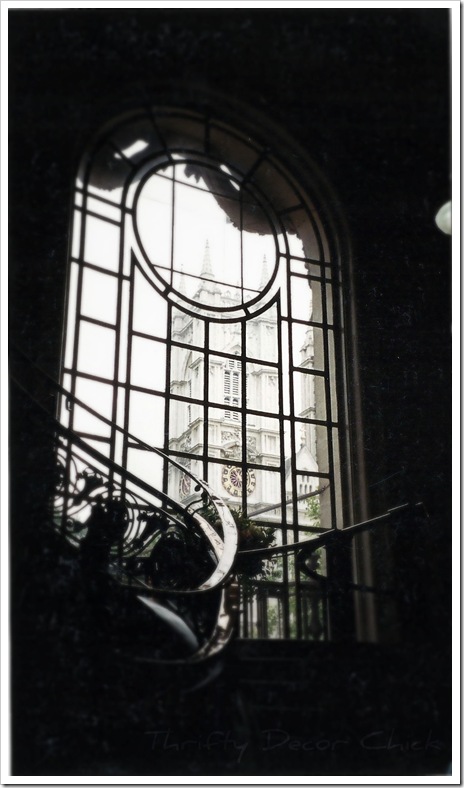
We had an event at a nearby church and I got this picture through a window, with the Abbey in the background:

These are scans of pictures, and I’m SO sad because this photo is in such bad shape. I played around with it in Picnik and that’s as good as I could get it for now.

I can’t wait to see the four hour coverage of the ceremony!! ;) (Set your DVR for early tomorrow morning if you’re interested.)

Onto news around these parts – I FINALLY decided on a sofa for the family room. GoodNESS…it took me a while. I shopped around even more (after my last post), and was thisclose to putting our deposit down on a sofa from Macy’s, but then ended back with this one from Arhaus:

You may remember I originally was going for the slip covered version, but in the end, knowing thyself won out. I KNOW any wrinkles in the cover would have driven me batty. And the cleaner look of this sofa just fits the style of our family room much better.

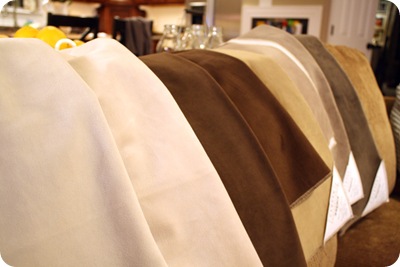
I’m going with a microdenier fabric – a version of microfiber. And it’s as soft as a bunny’s butt…I’m not even kidding you.

**I’ve never touched a bunny’s butt, but I’m guessing it’s pretty darn soft.

Now…I just need to decide on the color:

I don’t know what’s easier – buying a sofa off the floor (like we’ve always done) and seeing the color on the sofa but not in your house, or being able to take a sample of the color home…without the sofa. ;)

I was planning on going lighter, but I luuuuurve that chocolate color. Hmmm…

Do you have a light sofa? Love it, hate it?

I had a recent hair travesty that I had to share with you all – it was that bad. If you follow me on Twitter, you heard about my very unfortunate hair cut a couple of weeks ago.

I took photos just to show how bad it was. :)

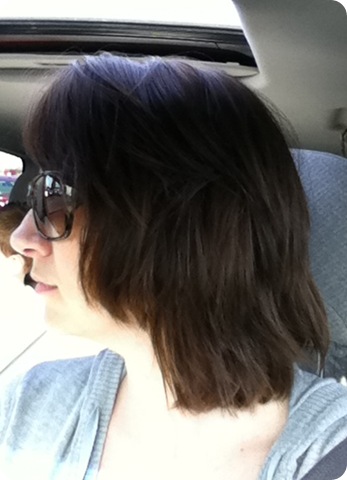
This was the cut from the side (this was just a few hours after the cut):

2

Isn’t that pretty?? What in the ??????

I was so upset once I realized how bad it was, I ended up cutting off most of the length myself that night.

You know – getting rid of the mullet.

I thought it was looking much better, till I washed it the next day and looked at the back with a mirror:

And then I realized why the hairdresser didn’t show me the back of my hair after the cut. :)

This doesn’t even show how bad it really was. It was destroyed. (And I didn’t cut that part – just the bottom.)

I usually don’t get worked up about this stuff, but this time I was just slightly concerned. :) I wore my hair in a pony for a while, then got it fixed at a very unlikely spot…Big League Barber.

Yes, where my hubby and son get their hair cut. :) One of the girls there had fixed a bad cut before (I have bad luck with hair and cars) and she did such a great job then, I asked for her help again.

I LOVE HER. It’s shorter than it’s ever been now, but I love it!:

thank you big league barber

Excuse the self portrait taken in a bathroom. :)

Now I think it was all meant to be. And I’m going to keep going back to the stylist at Big League – especially since the cut was only $15!! WHOO!

And finally, we are sending out big prayers to those affected by the recent tornados. As Hoosiers, we’re no strangers to this weather, but the devastation always takes my breath away.

This video will absolutely make you shiver. How terrifying.

As always, you can text “REDCROSS” to 90999 to send a $10 donation. It’s such an easy way to help. Or of course, go to the Red Cross site here to find out other ways to donate.

It sure puts a bad hair cut in perspective, eh?

Praying for everyone!

Now I must end my random thoughts with a message a friend posted on Facebook this morning. It really resonated with me and I wanted to share it with you all:

thisisyourlife

I don’t know the origin of this poster, but I know I. LOVE. IT. This is my mantra, all wrapped up into a few sentences.

I have a feeling this will be going up on a wall in our house…somewhere. :)

**A lovely Facebook reader said this is the Holstee manifesto. (Thanks Sheila!)

Thanks for listing to random (deep?) thoughts…by Sarah.

Don’t forget about the Before and After Party coming up this Monday! Let’s start May off with a bang! (Post will go up late Sunday evening.)

Have a great one!


Hey all! This week is going by SO FAST! Can you believe the weekend is almost here?

If you’ve read this here blog for a while, you know I share the fails along with the good stuff. And sometimes there’s a project that’s not necessarily a fail --  it just doesn’t work the way I had hoped.

Case in point – the DIY memo board in my office:

I showed you how I made it back in January. After I finished, I hung it up, admired it, and then stuck my first pin in to hold up a reminder…and the hives started.

The pin put a huge hole in the beautiful fabric – the fabric that pretty much inspired the whole room. The fabric I LOVE that I do NOT want to have meeeellions of holes in.

Breathe Sarah.

:)

I tried different pins, and again with the hyperventilating.

The fabric I used on my old board worked fine:

I know that one looks a hot mess – it was on it’s last leg. :)

Anyway, that fabric was thinner, so it did fine with the push pins. The new fabric, notsomuch.

Because I really wanted to have a memo board I could actually use…I had to figure out a new way to go about this project.

It finally came to me, in the form of magnets.

And it only took three months (who’s counting?) but I finally got it done. Again.

I picked up a sheet of metal at Lowes that was the perfect size for what I needed. YES! No cutting necessary. Until I got it home and realized they put the wrong tag on it – and it was six inches too long.

I don’t have metal snippers of any kind, but I was determined to not go back to the hardware store again – so I tried our do-it-all scissors…and they worked!:

We LOVE these things – they cut through just about anything. Including metal. ;) Who would have thunk? (You can find them at Bed Bath and Beyond.)

I used plenty ‘o Liquid Nails on one side of the metal sheet:

And centered on my piece of foam:

I wrapped it with the fabric – again. And secured the fabric to the back of the board with hot glue. Again. :)

Then I used my nail gun to nail it onto the back of the frame:

If you attempt this, you could use either the foam board (for push pins) or the metal (for magnets) – you really don’t need both. I just used the foam because I had it, and it made it easy to attach it to the back of the frame.

When I was done, I realized the frame needed just a little somethin’:

And decided it was time to stress a little and do a little distressing:

I always sweat when I do that, even though it’s no big deal – if you sand off too much, you can just touch it up with paint.

But I do always stress. :)

I finished it up (again) by adding a coat of poly to protect it:

And now, it’s finally ready to do it’s job:

For reals this time!

I made some DIY magnets by taking some cute scrapbooking brads and little magnets:

I just took off the “brad” part (they twisted right off) and glued a magnet on the back:

So I finally have a spot to put all of my memos…you know, cause it’s a MEMO board.

DIY memo board

Not a sit empty for three months cause you’re going to ruin it if you use it. :)

I still don’t know if it will stay in that spot – it’s convenient, but it depends on how much I put up there. (These were just random things I had nearby.) If it gets too cluttered I may move it across the room.

I’ll live with it for a while where it is and see how I use it. But now, at least I can USE it:

board and batten office

And not just admire. It’s function over form around these parts. :)

You may have noticed…no, I still haven’t painted the board and batten. Soon. I swear. I’m mentally preparing myself.

Let’s just focus on how far it’s come, umkay?:

Now…onto filling holes, caulking, priming, painting, filling holes, caulking…whimper.

Hold me.

:)


How to decorate above cabinets
Hello all! How was your Easter weekend? I hope it was wonderful. :)
We had a great one – as you can tell by the tuckered out Bub and dog:
cuties
:) Adorable.
I get asked a lot how to decorate one spot in particular – and it’s a tough one. High spaces in particular (plant ledges, above armoires) are hard, in my opinion. And the kitchen cabinets are no exception.
Our cabs aren’t super tall – we went with the basic height – so we have a ton of space above them. I tried leaving them nekked, but it just looks so unfinished and bare. And I love having a little somethin’ up there to add some personality and color to the kitchen.
I know some don’t like the decorating over the cabinets idea, and that’s cool. I really don’t need to know. Really…it’s OK.  :)
Last week I finished up another item on my kitchen to-do list…and it was a LONG time coming. I started our mini kitchen redo last May, and the looming one year “anniversary” is kind of kicking my booty in gear. I’d love to have everything checked off my list by the year mark.
You can see in this old pic that I had stenciled sayings above the cabinets:
Cherry cabinets black tile
I had a Tuscan theme going in the room and I chose words like “Family and Friends” and “Wine and Food” in Italian.
But a beadboard backsplash doesn’t exactly scream Tuscan, so I’ve wanted to get rid of those words foreva now.
So I started priming:

And I figured it would be an easy project, but like pretty much ALWAYS, one thing turned into another. That is how I roll.
Two coats of primer and two coats of paint later, and you could see where I had touched up the paint:

I was hoping that wasn’t going to happen, but it did so I rolled with it. :) I repainted the area above the cabinets with a quick coat of the lovely Sisal color from Ralph Lauren (Home Depot can still mix it for you!)
LOVE this color.
And then I moved onto another project I’ve been wanting to address for some time now – updating and rearranging the accessories on top of the cabs. And I wanted to get it done without leaving the house. (Or spending any cash!)
I started with Goodwill frame I’ve had for ages:
Goodwill frame
Brand new baby!
I found a Target placemat a couple of months ago that I loved, and knew just what I was going to do with it:

It’s plastic and was only $1.99.
I cut it to fit the frame, and ended up with this:
placemat art
So cute!!
You can see my little secret for propping up stuff up there:

Our little-used NYC book and my old AP Stylebook have a use again!
I only use old paperbacks, but on occasion Hubs will ask where a book is and I’ll answer, “Did you check above the cabinets honey?”
No lie. :)
That’s what it’s like living with me. He loves me so. (He must.)
:)
Anyhoo, next I focused on the blinding green tray I spray painted back here:

It. was. BRIGHT. Sheesh. Pretty much as soon as I did it, I wanted to change it.
I pulled it down and sprayed it with some yellow instead, but that pesky “S” was still showing through. So I thunk and I thunk, and came up with a (free!) fix to cover it.
I took some poster board, cut it to the size of the inside of the tray and then used a stencil to dress it up a bit:
Decorating above kitchen cabinets
It is SO not perfect – but remember it’s up high! And it was FREE. Me likey. 
I may get a piece of plexiglass cut to fit over it eventually, but it’s not going to be used so for now it stays as is.
I had to keep at least ONE word up there – the Italian was gone, but I had to add one more that’s near and dear to my heart:

Yes, I love to eat. I needed to proclaim my love, loud and clear.
These are cardboard letters from Joann’s (you can find them online here too) and they’ve been sitting up there unfinished for months. First I tried covering them with fabric, then paper, and then realized they were way too busy.
You can’t go wrong with good old black. :)
I saw this cage at Stein Mart a few weeks ago and couldn’t resist it!:
EAT letters
It was $20 and they had a smaller size too. LOVE!!
I also picked up this cutie little stool a few months ago (for $12) at TJ Maxx:

UGH, I love it! It matches the blue tray I used in the living room. I love how it pulls out the blue in the little cafe curtains I made a couple of weeks ago.
Some of the pieces I’ve had for a long time – the pear art used to be a wrapped canvas:

I cut it out and framed it in an IKEA frame.
Last year I picked up the round platter from IKEA as well:
How to decorate above kitchen cabinets
And the herb crate was a little DIY project from last summer. I adore that little crate!
I learned while working in the decorating biz that your eye should travel up and down when looking at accessories, and I try to apply that above our cabinets:
Tips for decorating above kitchen cabinets
One tall thing, one shorter thing, one tall thing…you get it. ;)
Because we have so much space above our cabinets, I try to go with larger pieces to fill it:
Best tips to decorate above kitchen cabinets
And like any hard-to-decorate space, I always say to be PATIENT. Areas like this can’t be forced – it’s the kind of thing you fill as you go, when you find items you love, that are the right size, that apply to the space. (Trays, baskets and platters for a kitchen.)
You may notice one more little change…the ball started rolling and I couldn’t stop it.
I resisted, but it always wins out. :)
I FINALLY installed the crown molding in this space:

And I’ll tell you more about that when I finish the other half of the room (the family room).
I’m SO glad to have this done! Or at least up. “Done” is a bit of a stretch. :)
crown molding in kitchen
I may add a little detail to the bottom to chunk it up a bit, but for now, I’ll be happy if I don’t see our ladder again for a very, VERY long time. :)
So that, my dears, is how I decorate above our cabinets! If our cabs were taller, I’d do a lot less – probably wider, fatter items. But I love it and will probably not touch it for another year or five. And my kitchen list to-do is dwindling – WHOO!
How do you deal with up high spaces? Do tell!

I've also added accent lighting above the cabinets -- to see how to do that (the easy way) check out this post. See more updates to our kitchen since this post here and more of our home here

Affiliate links may be included for your convenience. 
SaveSave

Hello all! I have a quick, fun announcement about an upcoming linky extravaganza!! :)

I’m joining up again with my bloggy gal pals Kate, Layla and Rhoda for FOUR fun linky parties sure to get you in the mood for the summer! We had a blast putting together our Holiday Home party, so we thought it fitting to do a warmer version:

Spring_Summer_Link_Party_New_Badge


The linkies will be spread out over two weeks, so we wanted to let you know way ahead of time. Layla will host the mantel shindig, Rhoda will cover recipes (I need to COOK?!), Kate will take care of general outdoor decor/ideas and I will kick it all off with a spray paint par-tay.

Cause what screams summer more than getting out in the fresh air and spray painting?? Nothing, I say. :)

So start thinking up projects you want to share, and we’ll see you on the 17th!! 


OK, I know I’m not the only one who daydreams about winning the lottery. I think about the healthy college and savings accounts we could create, paying off our house and of course, because I’m a house nut and nuts for our house, I think about all the projects we would do around here.

It makes me giddy!

But there’s a little bitty issue. We don’t play the lottery. And like we’d actually win if we did.

DRATS.

So unless money starts falling from the sky, I will stick to dreaming. :)

But I do love thinking about it. What would we do to our house if said cash fell from the sky? It really doesn’t have to be meeeellions. Just a few extra grand. I’m not picky!

I’ve had a mental list for years. You know, just in case. :)

I would start in the kitchen. Because I like our cold food COLD -- call me crazy.

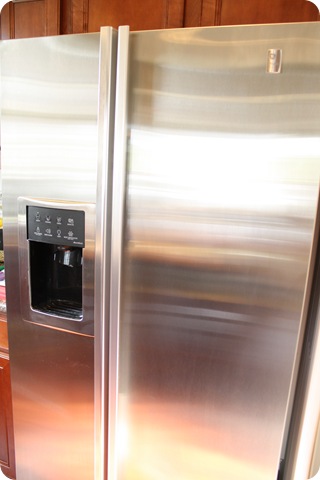
Our fridge looks great:

(Actually, most days it doesn’t look nearly this good. I cleaned for you.)

But the freezer door doesn’t stay shut anymore. Pretty much daily I’ll open it to find a layer of ice forming over everything. And the whole side by side thing is great, if you like to visit the grocery every three days.

Cause that’s all the food that will fit:

Of course I’ve found a way to smash the box of mini ice cream drumsticks in there. ;)

Me at the grocery store:

“Meat to make dinner or ice cream drumsticks? Meat or drumsticks? Hmmmm…drumsticks please.”

My priorities are crystal clear. :)

And you’d think the door not closing is due to my fantastical freezer organization, but it’s not. The food isn’t the issue. The door just doesn’t seal unless we close it just right.

I dream of one of these beauties:

With big, wide drawers for frozen stuff. Big enough for a pizza! Or FIVE. Whatever.

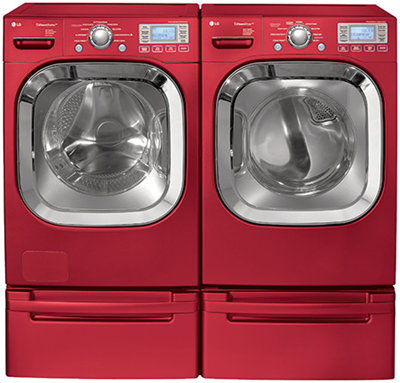
My appliance dreaming continues into the laundry room. Sometimes I feel like the only house left in the country that doesn’t own a set of these babies:

in my dreams

And Ugg boots. The only house without a fancy washer and dryer…and Uggs. :)

But our seven year old set is still kickin’.

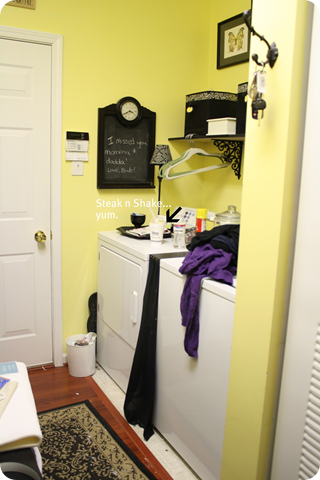
Can you tell I cleaned for you in here too? No?

I’ve pretty much given up on this space. :)

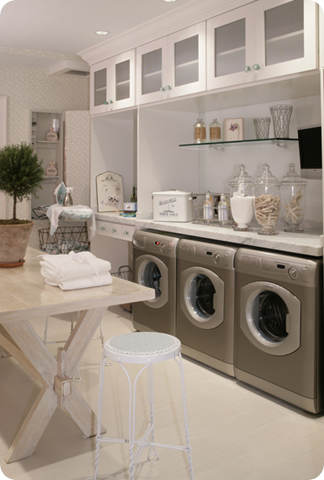
I’ve mentioned before we plan on  moving our washer and dryer to another spot in the house, and it would be awesome if I had mucho dinero to turn it into this:

I don’t ask for much people. Three washers? Pushaw…I MUST HAVE THEM.

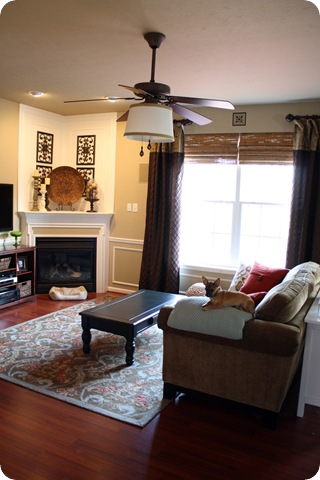
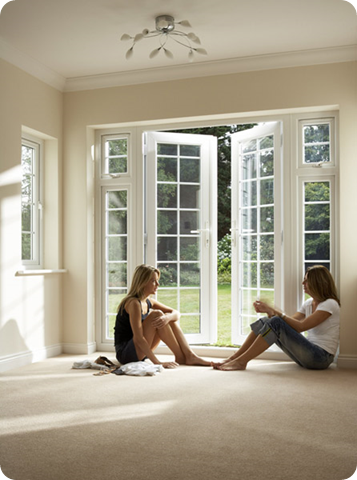
You know our family room has been a thorn in my side since day one. I dream of pushing out our window wall about five feet:

And installing some beautiful French doors instead:

image

And if I could buy the skinny, I’ll take that too. :)

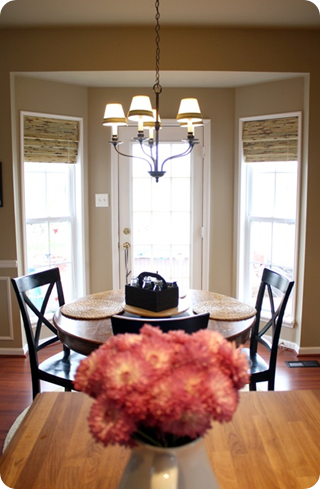
Since we’d have the doors there (can you tell I’ve thought this all out?), we wouldn’t need the door in the kitchen bay window anymore:

kitchen bay window

It can get a bit tight maneuvering around our kitchen table, so I have to keep our chairs pushed in all the time to move around comfortably.

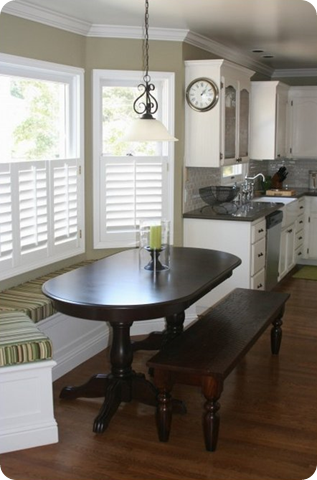
But with our money-from-the-sky, I could create my dream bay window, with bench seating all around:

bay window seating

Isn’t that beautiful? Loverly! I can just see it!

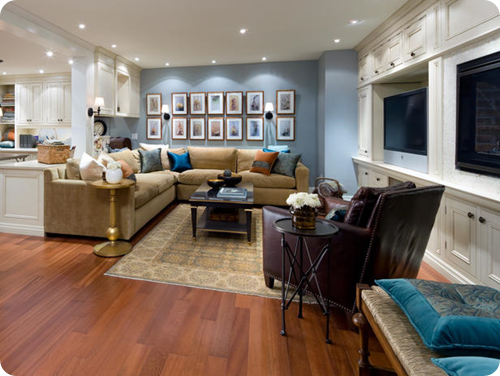
And because money wouldn’t really be an issue, let’s throw in a finished basement, just for kicks:

candice olsen basement

And if Candice herself could come help me decorate it, that would be fun too. ;)

Well, that’s my short list. I haven’t even touched the outside. My outdoor plans include trying to fit a pool in our tiny backyard. I have it all figured out in my head and it totally works. :)

You all know how much I adore our house by the way – I’m full out in LURVE with our home. I appreciate every inch of it, but it never hurts to daydream, right?

So what would be on your short list if you had plenty ‘o cash to spend on your current home? Not a brand new one – the one you’re working with right now. Or have you made one of your daydreams a reality? Do tell! I am SO determined to get our washer and dryer moved – I can barely contain my excitement!!

P.S. You will now have the Barenaked Ladies song playing in your head all day. You. are. welcome. :)


Popular Posts