Hey there! We've had a busy week soaking up some summer activities…our time off is coming to a close soon. This week alone we visited the Indy Children's Museum, explored downtown, saw a movie and took a trip to Kings Island. Such a blast but I'm ready to relax a bit today! (If you are interested in visiting our fun city, check out this post and this one for my tips and our favorite places.) 

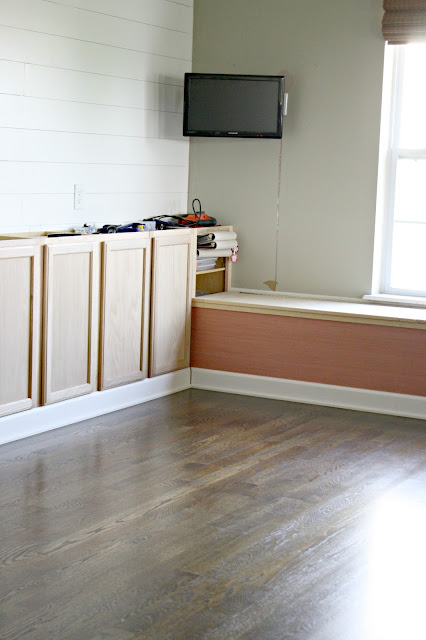
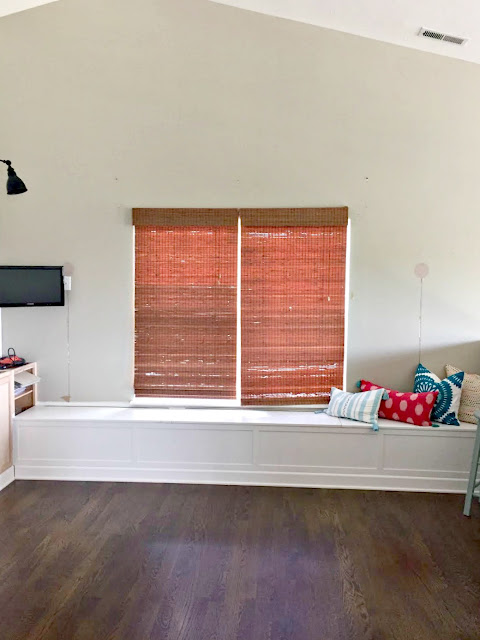
I'm back today with a quick and easy project that I finished up in the loft last week. I'm pretty excited about it! Last time I shared this space I had this empty space above the window seat
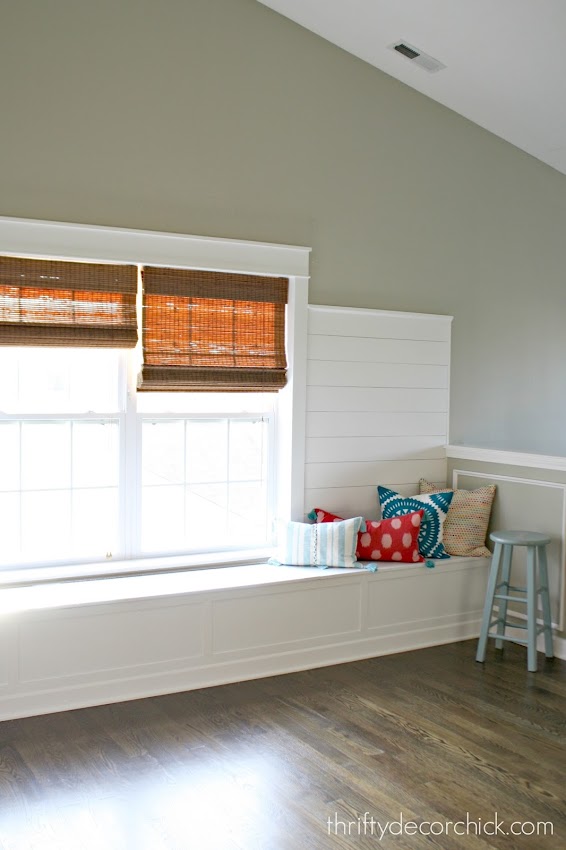
window seat with pillows

I've known all along exactly what I wanted to put there -- a gift wrap station. :) I'm all about form and function and I knew this would be cute and serve a purpose in this space. 

I hardly spent anything on this because I used old trim from this room for the frame. You can definitely put this directly on the wall but I wanted to make a little bit more of a statement and I had the trim anyway. 

I had plenty of wall space but didn't want it to go too low -- that corner is already my favorite spot on the window seat and I didn't want to worry about hitting my head. :) Turns out you can fit quite a few rolls in a small space. I ended up with 24 inches tall by about 34 wide: 
how to make a wrapping paper holder

Most gift wrap is 30 inches wide but Christmas wrapping is sometimes wider so that will just depend on your needs. 

I nailed the trim directly on the planks and then cleaned it up -- putty for the corners and holes and a couple coats of semi gloss paint: 
wrapping paper station on wall

The next part was super easy. I picked up some dowel rods in the 3/8 size (again, any size will do, just make sure they don't bow with the weight of the paper): 
dowel rods for wrapping paper holder

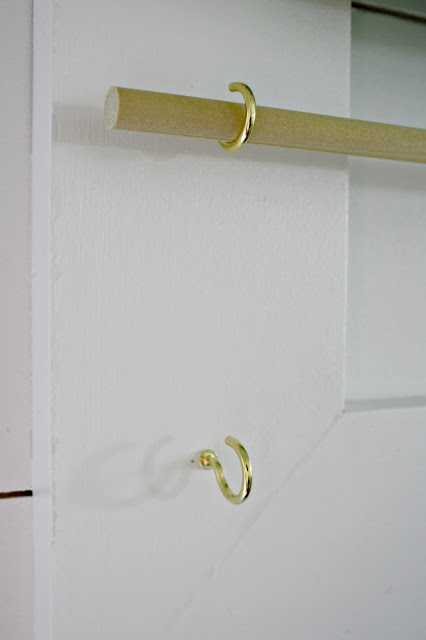
And a couple packages of gold cup hooks
hooks for wrapping paper

Make sure your rods will fit in the hooks! Mine were 7/8 inches so it worked perfect. 

I did some trial and error to decide on the layout -- I knew I wanted six up there so I measured out every 3.5 inches. I held my measuring tape up and marked those distances down the length of the trim, making sure each one was in the middle: 
how to make your own wrapping paper station

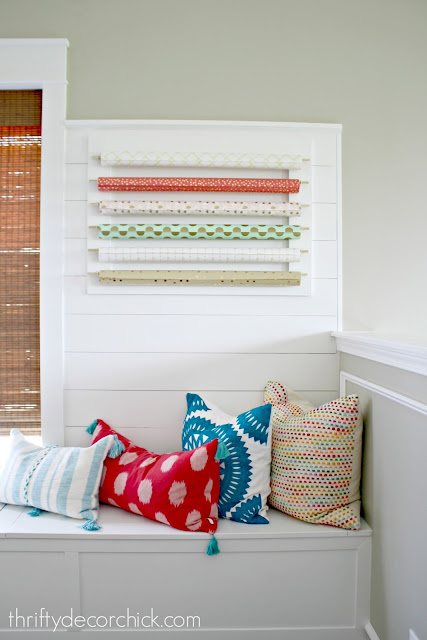
Make sure you do the exact same measurements on the other side. Then you've got yourself a super cute display that functions great as well: 
wrapping paper storage for wall

OH I just love it!! So cute! Of course I got it up and decided I needed a few new rolls of paper to make it even cuter. :) I couldn't resist. 

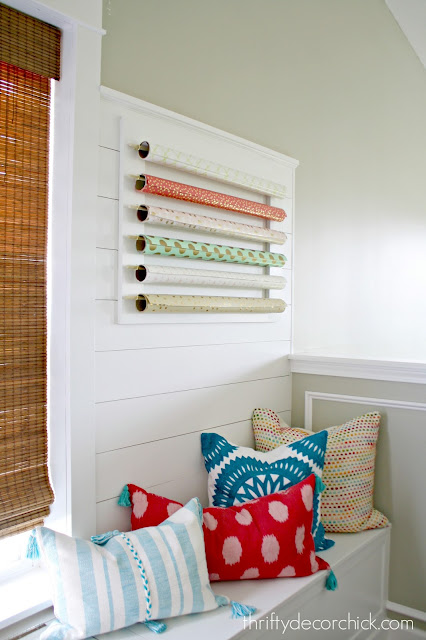
I love the pops of color against the white wall. I'm starting to love how everything kind of "sings" against white. I don't think all white would ever happen in our house but I can tell I'm going to like it in this space: 
DIY wrapping paper storage

To access the paper I can either pull the wrapping out from the wall and cut it where it is, or it's easy to take them down. I will probably just take them down when I need them. 

All in all this was only a $10 project since I had the trim, and as I mentioned, that's optional anyway. 
DIY wrapping paper holder

Not gonna lie, I'm already thinking about how cute it will look with Christmas paper! :) 

There you go -- a simple, inexpensive project that you can adjust to your needs. I absolutely love mine and am happy I was able to put that space to use. 

Have a great weekend my friends! :) 

Affiliate links included for your convenience!


OK, well I lied. ;) I said I wasn't going to share more of the loft redo for a week or so but I was a beast this weekend. I mean, BEAST. We didn't have much planned so it was great to have tons of time to dedicate to this space. I made some major progress that I'll share with you this week. 

My goal was to have this space done by the time school starts and my time is quickly dwindling. I'm going to try really hard to get it done but I doubt it will happen -- I lose four days out of town for a conference. Who knows? Maybe I'll pull it off. None of the remaining projects are hard, they're just busy work. 

SO. Last I left you, I had installed the baseboards throughout most of the room, including the window seat: 
Craft room makeover progress

Here's a view of the other side: 
Craft room makeover

My first project was to trim that seat out with the same trim I use all over our house. I seriously use this stuff everywhere. It's called sometimes called lattice and it's very thin. I always get pine: 
Lattice trim

Menard's has wider sizes than anywhere else I've found -- this one is 1 3/4 inches wide. The other hardware stores carry thinner sizes. You can see all the ways I've used this stuff around the house here and I also used it on our extended kitchen island. It's the perfect detail to finish off projects (and it's cheap!).

I did a simple look on the window seat -- I framed out the front and then just put three smaller vertical pieces down the front to create panels. Then I painted the whole thing in out in semi gloss paint. I use semi gloss for all trim and built ins:
Trimming out window seat

I was SO happy with it when I was finished and couldn't wait to get to the next part: 
Craft room makeover progress

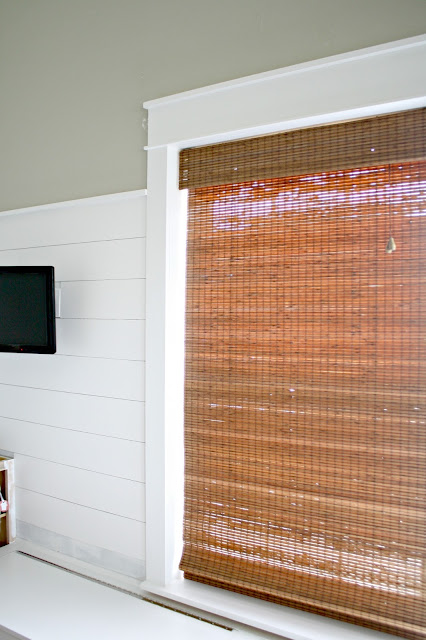
I pulled out the old window sill and then trimmed out the window with my DIY craftsman trim like I showed you how to do a couple years ago. I lowered the bamboo blinds back down inside the window frame (they were hanging above the window before) and it helped tremendously. It looks so much cleaner now! 

For years I had plug in sconces flanking the windows and when I took them down the old pink paint color was still there. Plus, I used my cord covers on the wall and they had been up so long they ripped the drywall off. I knew eventually I would address it so I've left the walls like this for years. Good times. 

I'm SO happy those spots are covered up!! I used the same planked wood as for the the large wall for these smaller areas: 
DIY shiplap walls

This look will continue around the room as well. Here's a look at both sides with the new window trim:
Simple planked walls

I added some trim to the tops and each got a few coats of paint and caulk to hide any imperfections. Told you I was in beast mode. ;) I didn't work out for three days because stepping up and down off of that window seat was plenty. 

It looks SO LOVELY. I'm thrilled with the progress in this space. Here's a closer look at the simple trim on the window seat: 
Simple way to trim out built ins

And the new trim on the window: 
DIY craftsman window trim

I don't have a table saw so I had that bottom wall piece cut down and will install it today. 

I also finished up a little DIY project for that wall to the right last night, but I'll show you that later this week: 
Window seat with tons of storage

I still need to do some minor things like touch up the wall paint around the window (I had so many holes in the wall from moving drapes and art around over the years) and make or find some more pillows, but other than that this wall is done and I LOVE it. OH and cushions…not sure when those will happen though. 

Many of you asked about those pillows and I found them all at HomeGoods. I'm going for fun and a bit girly in here and the colors look beautiful against the white: 
Bright colored pillows

White shiplap walls

I worked hard on this room over the weekend…I continue to see my vision coming through and it's so fun. I've really enjoyed working on this space!

Here's a before of this corner of the room:
Cabinet storage in craft room

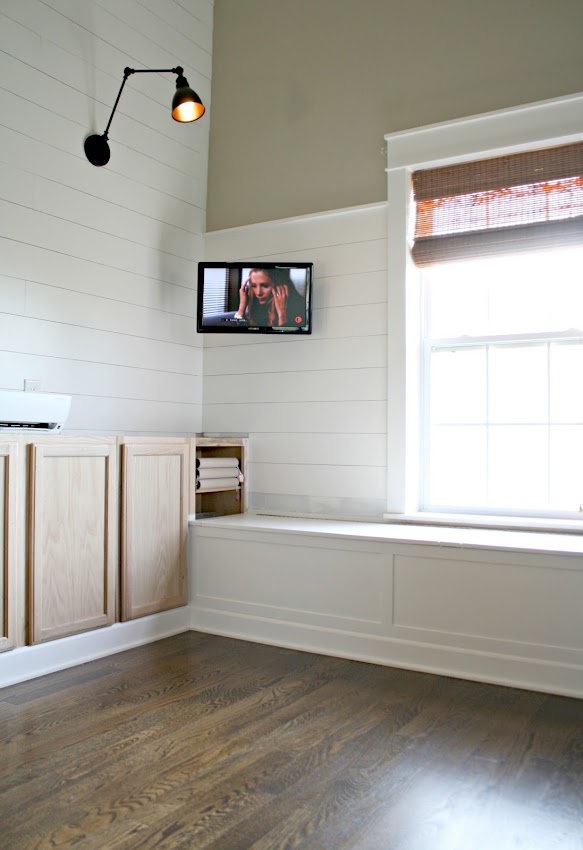
And here's how it looks now:
Wide planked walls

That open cabinet will get a door once I cut it down and rework it. 

Here's how this corner looked last week:
Building a long window seat
And how it looks now: 
Window seat with storage

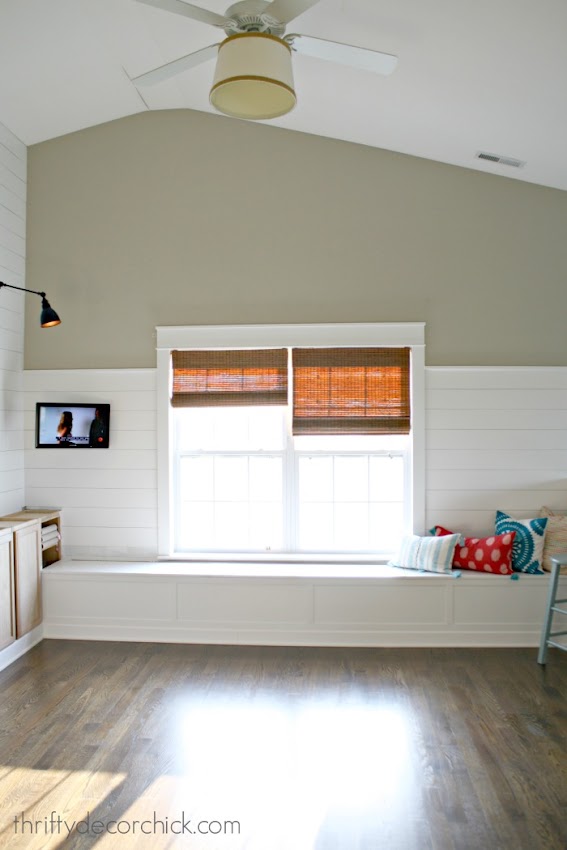
And the wide shot, before we had the floors put down: 
Craft room redo

And the progress so far!: 
Craft room redo progress

OH my goodness, I love it! I'll share my little project on the wall to the right later this week -- any guesses what it is? :)

If you have any questions about the items or projects in this room please let me know! Here's the posts on this space so far.

  1. Removing baseboards the easy way
  2. New floors and craftsman door trim
  3. Window seat and a planked wall
  4. Scones and tons of storage

SaveSave

What's up and happy Friday! I've got a quick post for you today with an item I've been meaning to share with you for some time because we love it so much. 

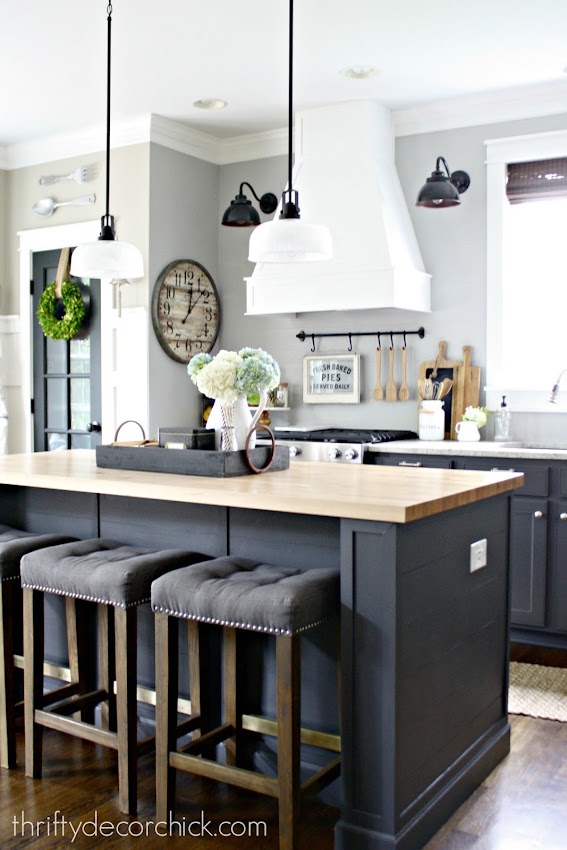
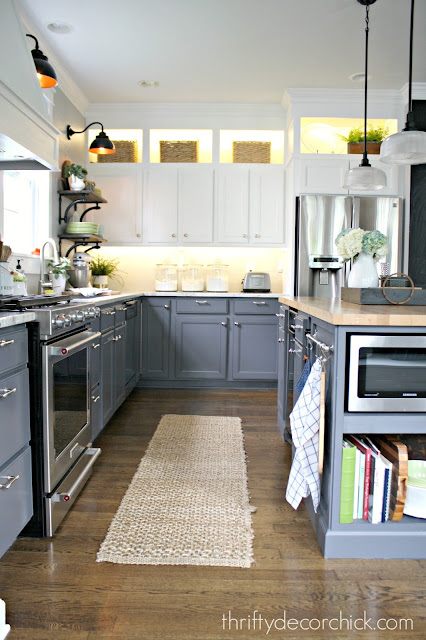
I was reminded of it when I shared this photo of our kitchen earlier this week: 
dark gray island in kitchen

It's the outlet on the side of the island, but it's not just any outlet. It's an awesome outlet. ;) 

First up, I know it bothers some of you that the outlet is white on the dark island. Honestly I don't even notice it -- it doesn't bug me. I've tried painting outlets before and they always end up getting scratched up and become a mess, especially one like this that we use so often. 

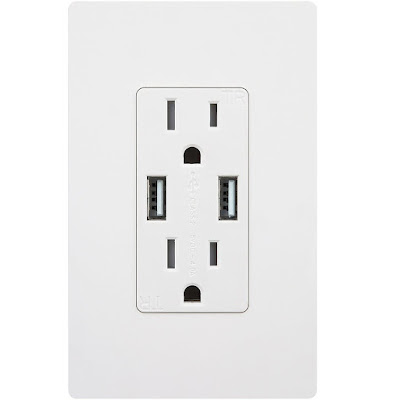
If it was a regular outlet it would be easy to change out to a darker one (but nothing matches this dark gray anyway), but as I said, this one is special. ;) There are two usb plugs in addition to the regular plugs: 
Outlet with usb for charging

So you can make any spot with an outlet into a charging area -- with no plugs. It's crazy convenient, no more searching for the little adapter when you need to charge gadgets! We use this one ALL the time. 

I got this (the brand is TopGreener) from Lowe's but this is the same one online: 
Outlet with usb charger

It's nice if you have little ones because the plugs are tamper-resistant. This outlet does come in a few other colors online but I didn't find those in the store. Also, they say it charges super fast (faster than a normal adapter) and I have to agree. 

It's installed just like a regular outlet -- if you know how to do that it will take a few minutes. If not, it's a matter of disconnecting a couple wires from the old outlet and inserting them into the receptacle. Make sure you turn off the power at your breaker! (They give you photos to follow at that link.) 

Obviously these are more expensive than a regular outlet but by the time you buy two or three adapters you make up the cost. I plan to add one of these in the loft to create a charging station up there as well. We love it! 

As you know I like to share items that work well and this is one of them. Have you tried one of these outlets in your home? Have a great weekend my friends!!


Affiliate link included for your convenience! 

I've been hard at work in the loft but as it seems to go during this stage, it doesn't look like a whole lot of work has been done. I'm showing you anyway because I'm excited about it. ;) After this it may be a bit before I share this room again because I have a couple smaller projects (trimming out the window and the window seat) to do, then next big one is continuing to plank the walls around the room, including the window wall and the hallway. 

I was a bit giddy the other day when I started actually putting stuff away. Everything has been in a huge pile for months now and it was starting to make me itch. The window seat has three large spaces with separate doors: 

I couldn't have planned this better! I mean, everything fits so well, with some room to spare. Lurve. Those doors still need hinges but it's functional for now. I will not be painting the inside by the way -- I never paint the insides of cabinets or seats. 

I built up the rest of the cabinets and installed them together and into the wall -- this is a tedious process and when I do it things are rarely completely flush and even…nothing a sander and some caulk can't fix though. #caulkismybff. 

I used the cubby boxes from my old DIY craft table inside and they work great. I have all of my crafts divided by category so it's easy to get to what I need. I plan to label either the outside of the cabinets or the inside with what each bin has…I haven't decided how I'll do it yet: 

Remember there will be desk/craft table coming out from the middle of those cabinets, so that will offer some awesome work space. The cabinet doors are set up to open so that I can access those that will be underneath the desk easily…and I'll put rarely used craft stuff like seasonal items in those cabinets anyway. 

I finished off the planking at the end of the wall and just a little thing like that makes it feel so much more finished to me: 

Obviously the baseboards help too! When everything is painted and hardware is on, these will look so much more custom.

Many of you had questions about this planked wall on my last update. Here are a few tips -- 
  1. This stuff is super thin so if you have any imperfections on the wall make sure you get those taken care of. If there's caulk or anything that will raise them up even slightly, scrape that off.
  2. Make sure you have breaks/cuts in the wood at the studs so you can nail them in securely. (This goes for any wood on the wall.) 
  3. I don't recommend using glue for any molding or wall treatment unless you are absolutely positively sure you will NEVER remove it. It is a total pain to try to fix drywall that has glue damage. I know this from experience. :) This stuff is so thin it doesn't bow like thicker wood does and that helps a ton to keep it flat against the wall. 
  4. If you do use glue, make sure not to use a ton because again, this stuff is SO thin. Any big globs will push it away from the wall and may make it look wavy. 
  5. Make sure you paint the wall behind the same color as the planks. You can use a roller to paint them -- don't use a ton of paint on the roller so it doesn't fill in the spacing. If it gets between the planks I use a razor or something to clean out those spots. If you don't push super hard with your roller you really shouldn't have too much of that. 
I hope that helps to answer your questions! I have a ton of planking left to do in this space and once you get the wood cut down it's a really simple project. 

I finished the baseboards and shoe molding around about 80 percent of the room, including around the window seat: 


I have the other side of the room to finish up but that involves a lot more cuts so I took a break. I can't even tell you how much more finished a space looks with baseboards! It felt like a huge step to get this installed. 

I was so excited about the progress the other day I picked up a few pillows for the window seat:

This will be a FUN craft space and where I work a lot so it's going to go more girly than I've done in any other room. I'm so stinking excited about it. :) 

Here's a layout I created over a year ago and not much has changed: 

At first I was going to add tall built ins next to the windows but decided against them and I'm glad I did. You can see how the desk will come out to the middle of the room (this scale in this mock up is bigger than what our actual room is). 

Someday we'll get a sofa for opposite side of the room but that will be down the line. For now I've been taking TV breaks on the window seat. I lay at the end and tilt the television and it's pretty awesome:

Here's a full view of this side just after the floors went in:

And here's what it looks like now:

Aren't the lights fantastic?? Love them so much! 

I'm so excited about what I'm putting on the wall above the cabinets! I think it's going to be striking (and functional) -- but it won't happen for awhile. Gotta get the big stuff done first. So far our weekend looks pretty quiet so I'm crossing my fingers I can get a lot done!

My vision is slowly but surely coming together and I love that feeling. If you have any other questions about the planking, installing the cabinets or anything else, please let me know! 

HEY there! What a fun weekend that was! I ended up getting a ton more done in the loft last night -- all of the cabinets are built up and installed and that was a BIG job. I also got everything put away in the cabinets and seat storage -- it is glorious! I have room to spare, whoot! Today I hope to work on baseboards and trimming out the window seat and maybe the window itself as well.

I'm totally digging that space and it's really starting to match the vision I had all these years! I have said it a million times, but I find when I really take my time and let the ideas develop in my head the spaces come out better than I could have hoped.

One of the rooms where that showed the most was our kitchen renovation that I completed last fall. I've been meaning to update you on some of the key pieces and since we've lived with it for about nine months now, I figured this would be a good time.

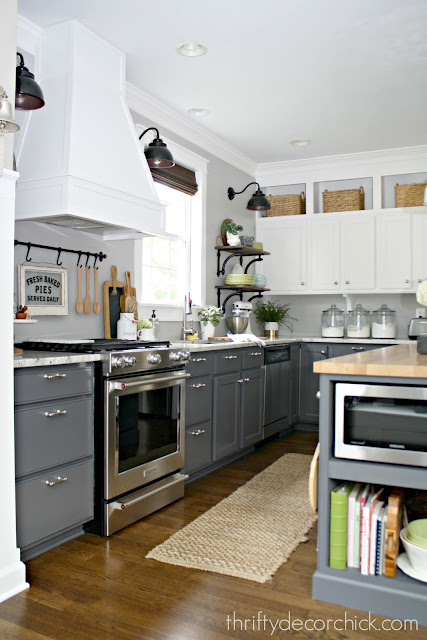
This renovation took me almost a year -- in the summer I'm usually a sloth so not much happened over those months, but overall it took a long time. We paid cash for everything and I did about 85 percent of the work in this room:
two toned kitchen renovation

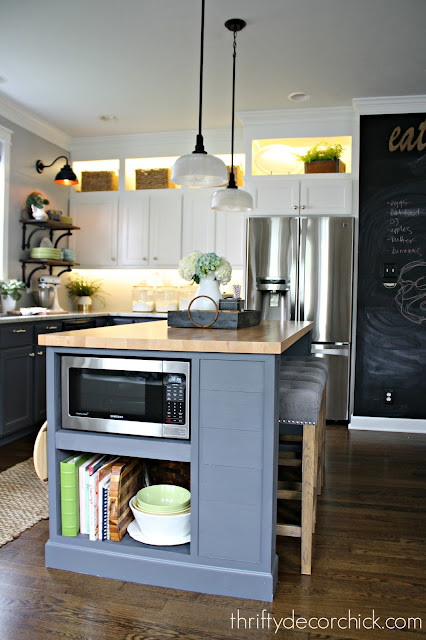
My first project was extending the kitchen island and I'm still so thrilled with it. The larger surface area is FANTASTIC for baking and cooking and entertaining. If there is one thing I'd recommend doing, this would be it:
extending a kitchen island

I used our old island and built off of it. It now has wine storage and the end holds the microwave and more storage. We also can sit at least three at the island -- four if you pull a chair up to the end. The butcher block has held up well and I love the warm wood against the cabinets. It does show wear easier than other countertops, but I'm used to that and love it. You can't be a stickler if you want wood countertops. :)

Speaking of that microwave, I think that's the number one question I get -- how do we like having it lower?:
putting microwave in the island

I LOVE it. It took my husband longer to get used to it but now he doesn't mind it. A couple things to consider -- we don't use our microwave a ton. Maybe once a day, if that. Also, I'm tall and I still find it more convenient. I shut the door with my knee when I'm taking stuff out. :) The biggest thing is I think it's easier to get food in and out -- with really hot dishes maybe not so much, but as far as safety I think pulling them up and setting them down on a surface is easier and safer than pulling them down from up high. 

I was melting chocolate the other day and it was SO nice to be able just stand there at the end of the island and check on it over and over. And overall it's wonderful to not have it as the focus in the room. (Most new people to our home can't even find it, ha!!)

Another little adjustment I made early on (and I'm so glad I did) was to move the island away from the walls a little bit: 
Gray lower cabinets white uppers in kitchen

It just makes it feel more spacious in here and when we have people over it's easier to move around. I wouldn't move it too far -- we have our trash compactor in the island so I like that it's close enough I can just turn around from the sink to get to it. But moving it out has made the room feel bigger and easier to navigate. 

OH! The other question I get a lot is about that rug! It's from Target and I love the rug but DO NOT vacuum it. It will fall apart, I learned that fast. We still get random tufts that stick up occasionally and I just cut them off. I know you're not supposed to do that but there's no way around it -- and surprisingly it's held up well. 

We invested in two splurges in this kitchen -- the slide in oven was one: 
DIY vent hood over stove

I LOVE IT. It's so easy to operate, easy to clean and it cooks and bakes great. I love the look of it too -- not having a back to it makes the whole kitchen look more custom. I'm also happy that we went with a vent hood that vents outside -- I feel like it does help to get rid of smells quicker. 

The countertops were another splurge but I shopped around and actually found what I wanted for $1000 less than my first quotes, so do some checking. Honestly, I hesitated a bit to go with a hard surface. We had laminate that looked like granite for years and I really loved it. I was afraid I'd break a bunch of dishes knocking into granite but I haven't done that once. It was another addition that really amped up the whole feel of the kitchen. 

One thing I didn't consider is that the counters are about an inch thick, so our already deep sink (which is a MUST if you are redoing your kitchen) got even deeper. It wasn't undermounted before so it was an adjustment for me to get used to at first. It felt SO deep when I would wash dishes: 
River White granite countertops

Now I don't notice it, but it was a big adjustment at first. If you are really tall (I'm 5'9", my husband is 5'11"), then you may not want to go too deep with your sink. I wouldn't give mine up for one meeeellion dollars though. Also, having an undermounted sink is a gift from the heavens, no lie. Being able to wipe crumbs right into the sink without it getting stuck around the rim is fantastic! 

One thing to consider -- if you are making smaller updates like we did years ago with our sink and faucet, consider something that can be used down the line if you upgrade again. I specifically went with a sink that could be undermounted, even though we didn't do that until years later. 

I get asked about the backsplash a lot too -- I went unconventional with that and it's been awesome. It's so easy to clean and I feel at ease using it behind the stove top as well. It's hard to see the planking in photos, that's the only thing that bothers me. But in person it's obvious and gives the kitchen some farmhouse feel:

How to extend kitchen cabinets to the ceiling

The biggest undertaking in here was painting the kitchen cabinets -- I'm SO SO glad I decided to tackle that myself. I hesitated thinking it would be too much work and honestly, it takes time but it's not a ridiculous amount of work. The biggest hassle is waiting between coats so it takes a good week to two weeks to do it correctly. (Side note, this is their true color. They lean a little blue in some of my pics.)

A few weeks after the reno I shared an update on the cabinets and how some of them had not cured even that long after. I had anticipated that but was still surprised. I'm happy to report that they are now wipeable and scrubbable and there are zero imperfections beyond what I first saw. 

One thing to mention -- if you decide to paint your cabinets I recommend you put hardware on them. Especially at first until they fully cure (but don't put them on too soon -- I waited and then didn't tighten them for weeks). The less you will actually handle them the better, and using hardware will keep them looking beautiful for a long time. 

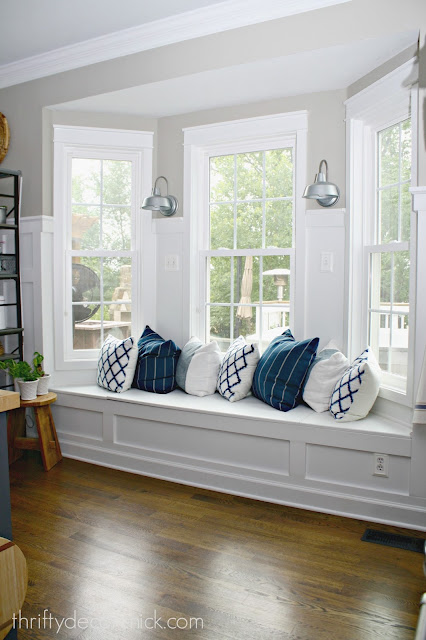
The final thing I'm SO happy we did was part of a bigger project years ago when we moved things around in the family room. Our old back door used to be in the middle of this bay window and things were so cramped over there: 
Window seat in bay window

That area was where our kitchen table used to sit and when we shifted everything over it allowed this area to be transformed. That window seat is one of my favorite spots in our entire house. I absolutely, positively adore it. AND it offers tons of storage. 

I have been keeping mental notes of what I've wanted to share with you all these months and I think I hit them all! If I missed something you're curious about please let me know. ALL of the sources for items and projects in this room are linked in this post. We didn't move any plumbing or cabinets and that helped with the budget a ton. I shared a breakdown of the whole renovation here

And because I can't resist, here are a few before photos to show you how different this kitchen looks now...


Popular Posts