08.38
admin
DIY, guest room, Inspiration, master bedroom, shopping
No comments
Both are close to being done but the guest room is closer. I had a few updates done to the room a couple weeks ago, including adding an overhead light (which is amazing after going without all these years!) and crown molding. It was the last room in the house other than the mudroom to get that trim and it finishes off the space nicely.
Now to the last big project in that room -- the nightstands. I tried hard to be cool with mismatched nightstands my friends. REAL hard. I can't do it. I am a lover of symmetry and I have to have matching nightstands.
So of course finding two matching in the style I want is not easy. When it comes to nightstands I love a dresser look -- and for a year now I've searched Craigslist for "small dressers" to no avail. Sometimes I can find one, but never two with the look I wanted. At least for what I was willing to pay.
Last year I did some digging on the IKEA site and found two options -- one was the Rast and one was the Tarva. Both are labeled dressers and both are available with three drawers. The Rast was out of stock at our IKEA so I ended up looking at the Tarva for our master bedroom to see how I liked them:
I loved this version too, with the simple hardware in the middle and the wheels:
I also liked the contrast of stain and paint -- this is always a great look:
Again with the wood trim -- love that! The added base around the bottom really makes a big difference too, right? It helps to beef up this small dresser.
The Tarva is a little bigger and the ideas for this one are endless too! What a great idea for a small desk:
I think this would still be a great nightstand and would do double duty!
There are overlays you can buy for IKEA furniture -- have you seen those? They have tons of options from very ornate to small details like this one:
They are an added expense (some get pricey) but would be a great way to update it if you aren't a big DIYer.
I LOVE how the just a simple cut to the legs of the Tarva completely changes the way it looks:
It looks fantastic paired with the long, modern hardware (these are cabinets pulls you can find at the hardware store).
Great ideas, right? I will most likely go more traditional with our dressers, but I don't want to do the same thing in each room. I plan to change it up a little and I'll be sure to share what I do! Spring break will be a perfect time to tackle at least one set! (Putting them together was enough DIY for me for the time being!)
Have you used either of these dressers in your home? If you've done your own hack feel free to leave a link in the comments. They are such a great, inexpensive option for pretty nightstands -- I'll let you know over time how they hold up!
07.21
admin
art, Decorating, master bedroom
No comments
Hey hey! Well, the birthday week continues with a little something for a couple of you. From HomeGoods. Whaaaat? (Said in minion voice.)
Yes.
HomeGoods asked me and a few other bloggers to share how a few small changes can change up a space in our home. My challenge was in the bedroom – their survey found the bedroom is the No. 1 room in the home that negatively impacts people’s mood. Interesting! They challenged me to change up a spot in our bedroom just making small changes. This was hard for me – no spray paint, no tweaks. Just decorate.
Thing is, I love our bedding (from HomeGoods, shock) so I needed to focus on a different area in our master. I walked into the store and found my inspiration right away!
The space I wanted to focus on is the mantel – earlier this year I changed it up with some Goodwill art:
Soooo. I like it at first. It was dark and moody and it reminded me of a special place for my husband and I. But within a few weeks it just got…well, dark and moody. ;) And I love those floofy things off to the side but they were kind of weird up there.
Soooo. This is the spot I changed up. Instead of floofy things I went with classic candlesticks:
I saw that beautiful box with the navy blue accents and knew it was perfect. (You can see my navy blue lamps here.)
The other side is filled with items that were already up there – I just pulled in a navy blue book to bring some of that color to that side:
I changed out the orchid pot too to a darker one (just switched it with another orchid). By the way – see those blooms? Yes, I successfully grew an orchid that rebloomed. GOLD STAR for me. Although I have no idea how I did it, I just noticed one day it was blooming again. Soooo.
I’ve talked about my method for accessorizing a space before and I followed that here – variety in heights and pulling similar colors in throughout. It seems to work.
I also picked up a throw because I clearly don’t have enough throws as it is (that’s sarcasm if you can’t tell):
Isn’t that beautiful? It’s so soft! By the way, the settee and the pillow, both from the HG a while back.
Oh, and I almost forgot the most important part! The part that inspired the whole redo, the big mirror:
Ack! So much better! Eventually I’d like to place some DIY art above the settee but for now I just removed a few of the frames that were up there and love it simpler like this – it can breathe now. :)
By the way, a smart designer once told me not to use mirrors above fireplaces, (because they reflect the ceiling) and for years I fought hard to follow that advice. But I’ve since realized that they’re fine – quite lovely actually. It’s hard to fill that space above a mantel and sometimes a mirror is the very best thing for it. I take it all back – put a mirror up, it’s OK. :)
You’ll notice that these walls aren’t the new wall color yet. That’s because 1.) I’ve been lazy and painting the tall walls sounds as fun as walking on hot coals 2.) I’m still not 100 percent I’m going with the color I picked out.
So there’s my update with a few accessories – it took me all of 15 minutes to change it out. For me that’s a record.
The best part? Two of you get $50 to spend at HomeGoods. I’ve got them right here burning a hole in my desk. So to enter just comment here – have you been to HomeGoods? Did you hear singing the first time? (Every time?) What’s your favorite purchase? Answer any or all or none, just leave a comment (with your email address!). :)
AND if you are so inclined, you can repin from this link and if I get the most pins I’ll get another FIVE $50 cards to give to you all. YES. So there you go. HomeGoods happy, it’s a thing.
P.S. I am having issues with the photos on my blog – they are so crisp and clean for me and then I load them into Blogger and they get dark and blurry. Trying to figure out what the issue is, bear with me!
Disclaimer: I received a gift card to complete this redo. Love of the HG is my own.
07.59
admin
lighting, master bedroom, popular, spray paint
No comments
Hello my friends! How was you weekend? We picked about 15 pounds of apples and one day this week I’m going to try making applesauce for the first time. It should be interesting. Wish me luck.
I got one big DIY project and a small one done this weekend and I’m equally excited about both of them. We’ll start with the smaller one today since it’s prettier. ;)
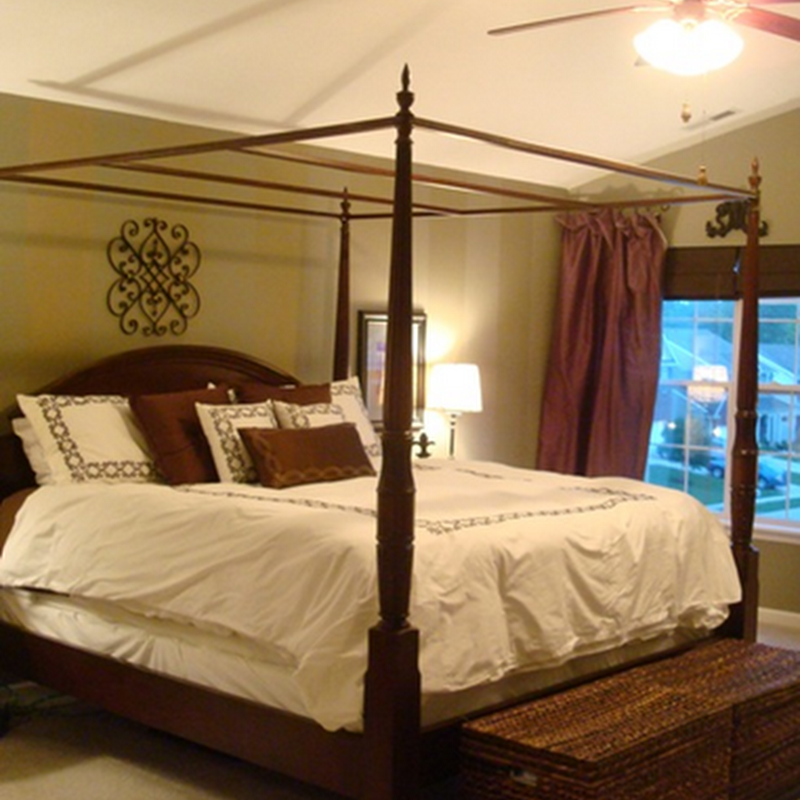
As some of you know, our master bedroom is going through a (sloooooow) metamorphosis. It started with new bedding I picked up months ago and then a DIY headboard and some paint. I still haven’t finished painting because I’m still deciding on the color. It may change. We’ll see.
I’m not one to knock my old decor, because at each point I loved where I was. Does that make sense? Deep. Anyway, I’m changing up our bedroom because I was just wanting a different look. We had the same paint up for eight years and I was itchin’. I sold our bed on Craigslist and I’m trying to use the cash from that to makeover the whole room.
At first I was hoping to reuse the sconces we used for light before:
I did love having the light right above my head for reading. But the only reason those worked was because the bed was so tall – regular lamps wouldn’t work for us (the light was too low). And now that the bed is back near the ground again those sconces looked too teeny. SO. I ended up bringing some brass lamps up from the basement:
To see that nightstand redo go here. Your 80’s nightstand will thank you. ;)
I know many of you dug the brass as it was and I totally get it. I think in a different setting I may almost kinda maybe leave it as is. I’m not quite there with the shiny brass yet (I love an antiqued version, still not sold on this coming back). And they weren’t in the best condition either – they both had some areas that were corroded/worn/not sure what to call it. And both had stickers on them (for YEARS?) that I just couldn’t get off all the way (I had to just spray over them).
So they needed some paint. I just couldn’t decide on a color. I didn’t want to go with a silver because I thought that would be too cold feeling – I wanted to warm up the space a little. The bedding has a blue/grey color in it, and I actually have a color that matches that pretty well – but I wanted more contrast than that.
And then one of you (LilClementine) suggested navy blue and the heavens opened up – THAT was the one. I picked up some glossy navy blue paint the other day and gave it a go. I started with primer – on a shiny metal like this it’s never a bad idea. All I had was a black primer so I just used that:
I knew immediately I was going to like them more painted. I think the pretty lines of the lamp were lost with the shiny metallic. When painted a deeper color you can really appreciate them. I think so anyway.
And then I pulled out the blue. I was so hoping it would turn out like it was looking in my head:
It did. :) I absolutely, totally LOVED it. Brilliant!!
I had some navy blue ribbon in my stash so I just wrapped it around the bottom of the lamp shade to tie it in a bit:
So here’s the thing – the navy blue isn’t in the bedding or anything else in the room really:
But there will be more of it now. ;) The older I get the more I realize things don’t have to match exactly. I think if I had used a color that was a match it wouldn’t have made the same impact. I love how it brings a bit of contrast and drama to the room:
Right? I LOVE them. Now I want to pull some navy into some pillows maybe, or in the drapes? I don’t know, like I said, this room is slow going so I’ve got time to decide. ;)
Yet again…if you haven’t used spray paint to transform something, do it. Today. OK, fine -- maybe later this week if you’re busy. Short, small burst of paint, not long ones. Move it quickly across the surface, don’t concentrate on one spot too much. Numerous quick coats are better than one heavy one.
Next up I need to finish the painting. Figure out what to put above the bed (the mirror just went up there to fill the space for now). Drapes. Recover the bench at the end of the bed. New floors?? We’ll see.
It’s coming along though and I’m really pleased with it (and my navy blue lamps) so far:
What’s the last thing you spray painted that you loved? The best part about it – if you don’t like it it takes just a few minutes to change it again. Seriously the easiest way to change up your decor that I know of.
Hello all! How are you? Thanks for the lovely comments on my last post. ;) We are getting very excited!
Today I’m kicking off my no-spend August with a little redo for the bedroom. We’ve had short bookcases as our nightstands (you can see here) for years, but I wanted to replace them for many reasons – they were too tall for the new bed (and I was afraid I was going to lose an eye on the corner), they were SO dark in the room and the height made finding a lamp impossible. (It needed to be short but still substantial.)
SO. I started looking around. In my mind I’ve always wanted a small dresser on each side – maybe wood, maybe something I can paint. Something with at least a little CLOSED storage for me. (I learned from the bookcases.) I scoured Craigslist for months and nothing was coming up. I checked out antique shops and nothing was the right size and width (too wide). Then I started looking into a more traditional nightstand idea and looked at HomeGoods and TJ Maxx and nothin’.
Then…I shopped my house. ;) Dur. We had two that worked perfectly – I just didn’t think they would work perfectly. So late one night I spent the evening dragging furniture around the upstairs to see what would work. We’ve had an old nightstand in the family for years that has been passed around and it’s been sitting in our guest room:
Here’s the thing. It’s not what I would pick – but it was here and free and I was determined to make it work.
The thing was a MESS. Seriously gross. I wasn’t crazy about the reddish stain and it was destroyed in a few places so I knew that was going. What really bugged me was the hardware, so I took it all off:
It was super easy to get that little jobby off – just pry it off with a flat head screwdriver then pull the nails out.
The nightstand got a VERY thorough cleaning:
I cleaned in all of the little crevices – this is so important, especially when painting over dark wood. You’ll see why in a minute. Grrr.
Because the wood was such a mess I gave the flat surfaces a quick sanding to get that top layer off, then cleaned well again.
I used this BIN spray to prime the whole thing:
I have used this stuff for years and have a love/hate relationship with it. It is GREAT primer and I love that they offer it in a spray. But the spray can SUCKS. Every single one I’ve ever used sucks. No matter how much I shake it, no matter the angle – the spray doesn't come out evenly. It spatters, gets super watery – it’s just hard to use. But I continue to because it’s great when you need great coverage on a hard to prime piece.
OK, so I used chalk paint for the coat of white after the primer. Here’s the thing (that I already knew, thankfully) about using white chalk paint over a deep, dark wood – the pigment can react with the paint and make it pink. So I was cautioned awhile back to always prime a dark wood piece well before painting with that paint. (Usually with chalk paint you can just start painting without priming, but this isn’t always the case with a red/dark tone piece.)
So I must have missed cleaning or priming one spot well because wow, it was a mess. No matter what I did (I primed it, painted it twice, reprimed it, then painted it twice again), some of the pigment was coming through on one spot. It looked nasty. Grody:
Ugh. Gross, right? I was so dang annoyed. The rest of the nightstand looks amazing, so I know I just missed cleaning right there or something. So I got my BIN primer in the can out and put two or three coats over it with a brush (pic on the right) and so far it’s doing much better. I still haven’t even tried painting over it again with the chalk paint because I’m afraid it’s going to bring that nastiness out again.
That part isn’t bright white like the rest of it but I think I’m willing to live with that because I don’t want to prime again!
The holes for the old pulls were so big it was going to be a pain to fill them in, so I ended up just placing the new ones right over the holes:
They were very strategically placed. ;) I’d much prefer them moved in a little bit on the drawer, but I pick my DIY battles.
I already had the pulls – got them for another project and didn’t use them there. I thought they would look so lovely against the white and I love how it turned out:
I’m seriously so pleased with it! I didn’t think I would love it this much!
Next up, the lamps. I have no idea what I’m doing with them yet, but they aren’t staying brass:
They were in the basement and I did a little switcharoo – SO much better this way!
I went with white on the nightstand for a few reasons. I’m still deciding on some accent colors in the room (I don’t want it to be all neutral), so this gives me a blank slate to work with. Plus I had the white on hand.
The big reason was I pulled a pedestal table that used to be in the Bub’s nursery in as the other nightstand. It was a piece I picked up from the unfinished furniture store and painted when I was pregnant and couldn’t bear to part with it. It was already white, so to pull them together I wanted them both to be white.
At first I thought it was going to be too tall, but it is the perfect height and size! Again…I’m trying to use what we have here. I don’t know if these will stay forever (I’d like something more substantial down the line), but for now they work great for us:
Yes, I still need to cut in that wall color by the floor. It’s on my list. A few other things need to happen first. :) And YES, that lamp cord will be dealt with. Buwhahaaaa.
So have you tried using chalk paint over a dark wood piece? How did it work for you? It will never cease to amaze me how paint and new knobs can transform furniture!
The best part – we have two “new” nightstands and I didn’t spend a dime! This no-spend month is going well, so far. ;)
07.35
admin
DIY, fabric, master bedroom, popular
No comments
I’ve made my own headboards (and for friends!) for years – even before blogging. It’s seriously one of the easiest DIY projects you can do and you will save SO MUCH money doing it on your own.
The headboard part I was used to – but I was totally intimidated by the tufting part. I’ve never tufted one because it seemed like it would be hard…but it is not a big deal! For real, it wasn’t bad at all.
So here we go – I new the shape I wanted the headboard to be for awhile, but I just found out the other day that it had a name:
I wanted the Belgrave look, which was totally easy to DIY. First up, Dad came down and we used his truck to pick up a big piece of mdf at the hardware store – it was a big four by eight foot piece and the Lowe’s Guy cut it down for me:
My headboard measures about 43 tall by 78 wide. You'll need to measure your bed to figure out your sizing.
I wish I would have taken pics of how I cut the corners out, but it was so quick. Dad and I just searched the garage for something round (and used my bird food holder). I held it up on the corner and figured out how big of a cut out I wanted, then did some quick measurements to make sure it was even on both sides. Then I traced the bottom of the can and cut one side out with the jigsaw. That first piece is all you need to make the second one – just flip it over and place it on the other corner, trace, and you’ve got a mirror image.
I hope that makes sense – it was so fast I didn’t even think to take pics.
Dad helped me take the board upstairs where I went to work! I showed you how I made the headboard in my son's room and this was nearly identical till I got to the tufting part.
Like that one, I used mattress pads instead of foam from the craft store:
Why this instead of regular foam? One word – cheaper. ;) Foam is a petroleum based product, so it goes up with the price of gas. Which means it’s just going up and up over time. I haven’t even check the price lately but for three inches of foam for a nearly 80 inch headboard wouldn't be cheap. The size was another reason – I would have had to use numerous pieces of foam to cover this and when you use the mattress pad you can get one big piece.
I had one I had picked up on clearance years ago (look for the XL twin sizes after back to school – you can find them for cheap!) but it was too small for this headboard. So I ended up with a bigger size (queen I think?), then ended up going back to get another one to do two layers because I really wanted it super soft. (I found them online for a good price here.)
One of the things I grew to dislike about our old headboard was how hard it was. I mean, it was wood, so yeah. And it had a curve to it so our heads never fit against it. First world problems. This time I made the headboard tall and cushy that we could comfortably lean against it.
Once the foam is down, you want to secure it with a layer of batting or thin fabric. I used batting first just because, again, I wanted this super soft. And I already had some, so that helped too:
Then I used a piece of muslin I had in my stash too, to cover everything again. This just secures all the foam and gives you a nice base for the final fabric.
Speaking of that – after all that I was ready to finish it up – and because I was feeling lazy and didn’t want to drive the extra 15 minutes to the fabric store, I actually shopped the drapery aisle at Target:
I wasn’t sure exactly what color I wanted so I grabbed a few. ;) The two on the left were $17 for a panel – which compared to a couple yards of upholstery fabric is pretty good.
Problem was we weren’t crazy about any of them when we tried them out. One was too light, one was too blah and one was too dark.
Soooo…the next day I went to the darn fabric store. ;) I needed the stuff to tuft the headboard anyway (at first I wasn’t planning on tufting. Scared, remember?) so I took a quick look through the fabrics and found one I LOVED in the suit fabric aisle.
Before I used that I figured out where I wanted my tufts and drilled the seven holes:
I just wanted it to be a simple design and some of the tufting I see is just too much for me. So when I did my math I decided to just do three across the top and four under that. That’s it – anything lower would always be covered by pillows or the mattress so I didn’t even worry about the bottom.
After the holes were drilled I added the final fabric:
By the way, years ago I tried the electric stapler you can find at the hardware store (about $30) and it is kind of a pain in my butt to use. It gets jammed and the staples don’t go in evenly no matter what I do. I always revert back to my regular stapler (above) – it takes more muscle but that’s good for ya. ;)
Sometimes the corners can get tricky, so I’ve always used a simple method – start with the middle, then each side, pulling tight each time:
For the curved corners I just grabbed the fabric and stapled as best I could:
Remember…no one will see this part. Seriously, the back doesn’t matter. Do what you gotta do!
Here is is in it’s (almost) finished state:
Getting there! The suit fabric is like a gray linen and looked so good. Way better than the drapes I picked out – I returned those.
Now the part I dreaded…the (shiver) tufting. So not hard. At all. All the stuff I needed was in the same section at Joann’s. I picked up this waxed thread and it rocked:
It made this SO easy. More on that in a minute.
I grabbed some buttons too – it’s so easy to make your own fabric-covered buttons:
I just used scrap fabric to make them all. Making buttons is fun.
So the tufting was a breeze – I couldn’t believe I had put it off all this time! I did poke myself a couple times, but overall, easy. :) First up, I threaded one of my long upholstery needles and made a little knot at one end, then stapled it to the back of the headboard:
Then I pushed the needle through the headboard, threaded the button on, and pushed it back through to the back. This is where the waxed thread comes in super handy – it kind of held the button where it was while I secured it to the back. Regular thread would slip and be hard to keep where you want it. This worked GREAT.
I would just put a staple in the back of the headboard, but wouldn’t push super hard on the stapler, so it didn’t go all the way into the wood. Then I was able to wrap that thread around it a few times, then hammer it down to secure it. (Pic on the right.)
I didn’t pull each button super tight – I didn’t want it to be a deep tuft. Just a little bit of tuft. And there is an easier way to do this by the way – you can just thread both ends of the thread on the needle with the button already on it, then put it through from front to back and then secure. But that method didn’t work for me because the waxed thread was so thick.
I was THRILLED with how it looked! I finished it up with some nailhead trim along the sides:
The particle board I used to make the headboard was 1/2 an inch thick and I went that size on purpose – so these would have something to grab onto. Any thinner and it would have been hard to get them in well.
I’ve never used the connected nailhead trim (I usually just do them individually) but wow, this made it so simple! The nailhead stuff is $21 for five yards, but I had two coupons so I got it for about $10. :) (I found it here for way cheaper than $21!)
I hung this up the same way I did in the Bub’s room – I just used picture hanging jobbies:
I figured out where the studs were and screwed into those in first, then that determined where I put the hangers on the back of the headboard.
When we got it hung I was so dang happy with how it turned out!:
You can see the nailhead trim better in that pic. From the front you don’t see it as much, but it’s a great little detail when you get up closer. I love it!
You can see there why I didn’t add any buttons any lower too – they’d just be covered.
Many of you have asked about the new bedding – I found it at HomeGoods earlier this year:
It’s by Hillcrest and it was a duvet cover and shams for $40. I had been looking for new bedding for months and just happened to find this, new sheets (they aren’t on now – they are darker and I’ll put them back on later in the fall) and the small pillow on the bed all in one trip. None of them are supposed to go together but I think they work well!
So far with what I made on the old bed, I’ve still got about $300+ to spend – I think I may make money on this redo! That’s what I’m talking about.
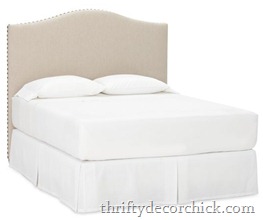
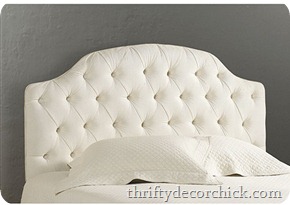
You can find upholstered and tufted headboards all over the place, but I promise you they are not hard to make on your own! It does take some time so just be patient with it. But you will save tons if you DIY this one -- the Pottery Barn bed on the left is $1000 for a king (gulp), the Ballard Designs on the right is $500+:
I think mine looks pretty darn good for less than $100:
Here’s the break down on cost:
Wood: $15
Foam: $45
Fabric: $8
Buttons, nailheads, etc: $25
Total was $93! Aww yeah. And I have wood, foam, nailheads, buttons and thread left over to use on future projects.
If you went with one layer of foam/egg crate that will go down about $20. I had the batting and muslin but only one of those is really needed and they are both cheap. Of course if you skip the tufting that will help too!
Overall I’m so happy with how it turned out. And it is SO much more comfortable than our old headboard. Have you ever made your own? Did you find it easy to do? Have you ever attempted the tufting? Are ya sceered?
**I’m getting more and more done in this room! To see how I updated old nightstands for the room, go here. And see what color I spray painted the brass lamps in this post! You can keep up with all of this room’s updates here.
Some affiliate links included for your convenience.