Tampilkan postingan dengan label bathrooms. Tampilkan semua postingan
Hey all! I'm back today with a quick post about a project that's not so quick. ;) As some of you know, I have painted most of the doors in our home in black. I haven't started upstairs yet (I know it's going to look so good!) and I thought I had finished them all on our main level and basement.

I keep forgetting about a couple -- one in our powder room and one in the basement laundry room. I'm determined to get those done before I move upstairs.

I'm going to try spraying them when the weather gets nicer, but of course this week we have temps in the 20's and snow when the past two months were 60's and 70's. 😡 So...I had to work on it inside.

I think this makes SUCH a big difference and it's not a hard project at all, but it does take some time. I've shared how to paint your doors (interior and exterior here) and you MUST find out if they are painted with oil or latex paint before you start. Most doors are painted with oil so if you paint without primer, it will come off later. Sometimes it will flake, sometimes it will peel. But it will come off and really annoy you. ;)

So I always prime our doors first:
How to paint doors

The great thing is there is no need at all to sand -- just clean it well before starting. And I don't take mine down when painting by hand -- there's no need. (You'll need to tape around hinges if you will see that side of the door.)

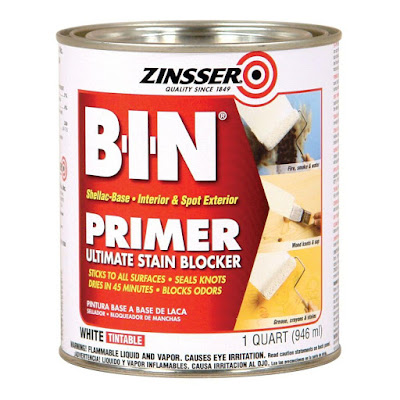
I go into detailed instructions on how to paint a door in that link above, but this is the primer I use: 
BIN primer for painting doors

Because I go dark I have this tinted to a gray. This primer is awesome and is my favorite -- it's super thin and easy to apply, but watch for drips. A small quart of this will last a very long time, you don't need much. It also dries incredibly quick so that speeds up this process a bit. 

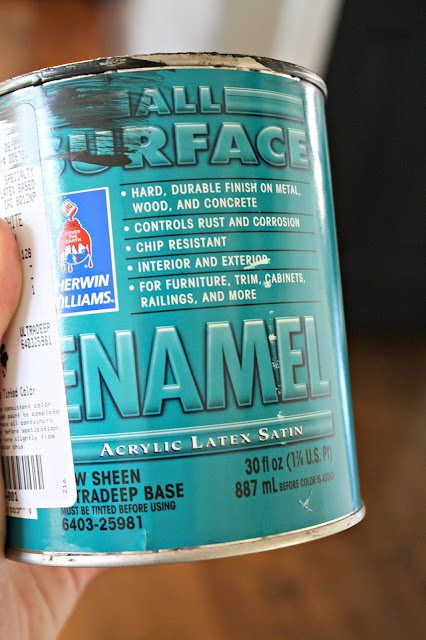
Our doors are all painted in Graphite, it's a very dark gray instead of super black. I have it mixed in Sherwin Williams paint just because I love their stuff. This enamel paint is what I use for our doors: 
Best paint for doors and trim

I use eggshell or satin but most prefer shiny doors, so the finish is your preference. 

One coat of primer, two coats of black and some touch ups and it was done: 
Black door white trim

I am totally in love with the look of black interior doors. Every time I do this I fall in love with them all over again! LOVE!:
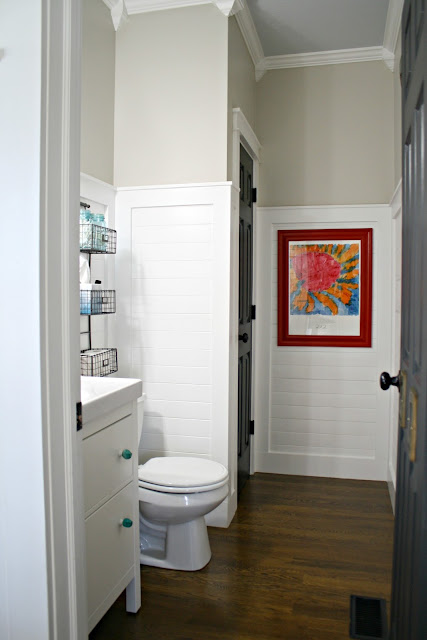
White bathroom with wood floors and black door
Here's more about the powder room makeover and how I planked these walls (that's what us old folks called it before "shiplap"). We went with hardwoods in here to work with the rest of the main level and I have loved them. 

I used a piece of art our son painted as the inspiration for the room -- the accent colors all come from that art: 
White bathroom with wood floors and black door

The white door looked absolutely fine, but after some time I knew I wanted it to match the rest of our interior doors. Black doors are a classic and will never go out of style: 
Black interior doors

Have you painted your doors a color? I love any color on a door -- blue and gray are another favorite of mine. They add dimension and interest to your home for very little money! 

If you'd like to see what this contraption is behind that black door, you can see it here
DIY laundry chute


Hello and happy weekend! It's Friday the 13th, the full moon was yesterday and we're expecting an ice storm tonight. Good day to stay inside I say! 

This is one of my very favorite little details of our home and I can't believe in nine years I've never shared it with you! At least I don't think I have? I've been at this a long time folks! 

This organization idea is hidden away and you'd never even know it was there. We have them in the kitchen and master bath: 
My favorite hidden storage for the kitchen and bathroom

Any guesses? I don't even remember picking these out when we built our house -- if I remember right they came as a nice surprise to us when we moved in. 

They are called tip out trays and they allow you to use that small space behind those upper, faux drawers: 
Tip out trays for hidden storage in the kitchen

They work with nearly all drop in or undermount sinks. And of course with sinks that sit on top of the counter in bathrooms. When we installed this sink years ago with our old countertops I couldn't use the trays because there wasn't enough room. But when we got the granite they must have moved the position of the sink back just a bit because they work fine again! 

They are absolutely AWESOME for the little stuff you need to access daily:
Hidden storage in the kitchen for small stuff

We used to keep our sponges in there until I found these that I love -- they won't fit inside. But regular sponges fit fine and tons of other random stuff will as well. 

In our bathroom we use them for our toothbrushes, toothpaste and flossers: 
Hidden storage in the bathroom

We each have one in our bathroom and I plan to add two more when I work on this room sometime in the next couple of years. They are so convenient and easy to access! 

It wasn't till about seven years ago or so that I noticed they had started selling them in the store -- I've seen them at Lowe's but the best price I've seen for them is on Amazon. (Make sure yours come with the hinges if you buy online!) You can also just buy the trays -- when ours didn't fit with our new sink I just took the trays out and attached them to the back of the cabinet doors. Still great storage! 

If you're handy you can install them yourself, but they do take some patience. To install them where there are none, you'll need to lay inside the cabinet to remove the drawer front and then install them. :) I had to remove the kitchen trays when I painted our cabinets and took photos of them to remember exactly how to reinstall them. 

I highly recommend these hidden storage trays for little stuff you use every day -- I think they're especially helpful in the kitchen! Do you have these hidden gems in your house? We love them and plan to add more! 

Have a great weekend and if you are getting the ice as well, be safe!

Affiliate links included for your convenience! 


Hello there! I hope you had a lovely weekend! We spent the day yesterday at IKEA and Kings Island -- a little something for me, a little for our son, a fun day for all. :) I've been eyeing an item at IKEA for about a year now and I went head and purchased a couple for a future renovation. I don't usually buy that far out but I'm getting excited about some changes I want to make next year. 

I've mentioned that we don't plan on tackling our master bathroom for another couple of years. I know it will be a costly project (even with DIY projects, bathrooms add up) and I want to focus on finishing up another bathroom and other rooms next year. 

But for the first time ever, I'm actually inspired to do at least a little something in this space! I don't start a room makeover until I see the vision of what I want it to be in my head. It's a weird thing for me -- I just can't go into it unless I know exactly how I want the end result to look. Just recently I've been finalizing ideas in my head and decided I will most likely go ahead and tackle some of this room next year. 

It will be in phases -- the vanity area, toilet room and paint will be first. Those alone will be a huge undertaking. The tile and tub area, ceiling treatment and more lighting, and then shower makeover will happen later on. So it will take a couple of years to finish up the whole room but I'm fine with that. This way we can still use the bathroom during the makeover as well. 

My big project will be our vanity area. I picked out all of the finishes in this room years ago but of course my style has changed since. I've never been in a hurry to do this room because it's certainly nice enough and it's really roomy. It functions well so it's just not been high on the list: 
Tornado Watch paint Lowe's

(By the way, the walls aren't THAT green -- the lighting was not great in this pic. The true color is in the photo below.) The only thing that drives me crazy about our bathroom is the height of our vanity. I mean, did we get taller as a population over the past 12 years or what? It's SO very low. I want to raise it up at least five inches, maybe more. I dream of the day I can lean over to brush my teeth and not feel like I'm touching my toes. 

As I said before, the finishes are just not me anymore -- I was really into the dark bronze for so long so every light switch, outlet and all of the hardware is my old beloved…oil rubbed bronze. :) Remember when I sprayed everything that color? I was obsessed! I still love some ORB but in smaller doses:
bathroom makeover ideas

We have tons of storage under the sinks but rarely use it because they are so low and awkward to get to. I may add a skinny storage tower in between the sinks for our everyday items. (I want to get rid of the shelving up there.) My hope is that having the vanity up a little higher will make it easier to access underneath so we won't need any other storage on top. 

So this beauty is what I picked up yesterday for this area:
round mirror from IKEA

It's the Stockholm mirror from IKEA and I ogle it every time I go in. I love the wood trim and the size is quite large -- it may be too large. I got two, one to go over each sink. I have to decide if I want to add sconces by the mirrors or just do smaller lights above -- we only have one light there right now and I'm looking forward to more light for sure.

I do plan on replacing our inexpensive countertops and sinks with something else but not sure what yet. To use these mirrors in our bath we may have to move the plumbing over because the sinks are just a tad too close to the wall for these to work as they are now. Not sure I want to spend the money to do that so these may go in the Bub's bathroom instead -- I told you about my plans for that room here. (I do plan on getting that room done next year.)

I should have taken a photo of the walls in our bathroom so you can get an idea of why I've only painted this room one time. Yikes, they are tall. I honestly can't believe I did it last time since I'm not a big fan of heights. They go up to roof height and we LOVE how open it makes the whole room feel.

I'm planning something lighter for the walls, and I may go with this Sea Salt color:
Sea Salt by Sherwin-Williams
Credit: Studio McGee

I see it a lot and it's a lovely blue green, but it may go too green for me. I've had our gray green walls in there for too long now and don't think I want any green tones at all.

The vanity will most likely go black. I have yet to paint our interior doors upstairs but they will all go black like the rest of the house. I'm considering a sliding barn door but I think it may be too bulky.

Looky what I found -- a dark vanity with a similar mirror to what I picked!:
dark vanity brass hardware round mirror

I love when I get validation about the ideas in my head. ;) 

Here's a look at a similar wall color (this one goes more blue than Sea Salt) with the black vanity: 
black vanity blue walls
Credit: BHG

I think that is such a soothing, pretty combo with the light blue and black!

Earlier this year I made some simple updates to the tub area (during another no-spend month!) and this area will stay the same for now, other than perhaps a new tub faucet and of course the new paint color: 
corner tub design and decor

I'm getting really excited about finally updating this space! So much so I'm forcing myself not to pick up a paint brush and get started immediately. Other projects are calling my name first. :) 

I hope to share a room update with you later this week -- I'm so thrilled with this little makeover and can't wait to show you! 

Have any of you tried Sea Salt? Is it green in person or more blue? 

You can see our smaller bathroom makeovers in the basement, powder room and small changes in the Bub's bath that made a big difference here: 

simple bathroom updates that make a big difference

planked white walls in bathroom

blue green bathroom makeover


Now that our weather has finally turned for the better (pretty sure for good now), I'm itching to get outside to start cleaning out the flower beds and get planting! Gardening is another passion of mine and seeing the buds forming on everything is so exciting. I'm ready to get some color back to our exterior! 

But I'm on a mission inside the house too -- and I'm determined to finish up before I allow myself to start outside. I need to self impose deadlines on myself like that or it will never get finished. I'm a HUGE procrastinator. 

I'm going through our home bits at a time, using the Konmari method I told you about here. I've been implementing it for the past eight months or so and it's working. Our house is more organized than ever and it stays cleaner with minimal effort. I really thought our house would never feel like this but it's happening, slow but sure.

My latest project was all of the toiletries. Our master linen closet holds most of them for the house and because of the way I've organized it over the years, it wasn't a total disaster to start. I use bins to organize everything and that works for us for the most part. Over the past year or so it was harder to find exactly what we needed because someone was tossing random items in bins. I'm totally throwing my husband under the bus here if you can't tell. I never do that but the man does not pay attention to labels. I try to explain to him that they are his friend, but he doesn't agree. 

In his defense, the labels I had on them were small and some had fallen off. But still. I've discovered as we get older we are going in two different directions as far as stuff in the house -- I find I need and want less and less and he feels the need to stock up more and more. 

My husband gives me free reign with the design decisions in this house so this is a minor thing in my eyes. But I will keep fighting the good fight. It's my fight but so be it. So. My first goal was to go through everything we had. This photo is the epitome of "it gets worse before it gets better": 
Konmari organizing

I find that to be true pretty much 100 percent of the time when it comes to purging and organizing. This is the moment when I have to walk away for a little bit and take a break because I get overwhelmed. I come back refreshed and ready to go. 

I went through every bit of the items we had in there -- down to little bottles of nail polish that I don't use anymore. I consolidated what I could -- have you ever noticed how big the packaging is for so many items? I hate wasted space so I did things like take the random bandaids out of boxes and put them all together in a Ziploc bag. 

I've always kept extra lotions and items because of a mentality I've had all my adult life -- hating to waste items. I'm realizing that letting items sit forever without using them is just as wasteful. Now, if I don't like the scent or don't love it in general, it goes in a donation pile. It's been a really long process and taken a big change of the way I look at things to get to that point. 

I had three bags on hand as I sorted through everything -- recycle, donate and trash. When I was done with this closet (I also did the bathroom vanity), I had a bag of trash and half a bag of recycling. The donated bag will go to Goodwill and the extra toiletries will go to a local women's shelter. (Call around to see if places near you will take items that aren't brand new -- chance are they will.)

My goal was to make the separation of the items easier for both of us (but mainly for my adorable husband who I love dearly). I went BIGGER this time, and I'm crossing my fingers that this will work. I cut down some scrap wood that we had, sprayed it with chalkboard paint and then labeled them: 
DIY labels for organizing

I drilled holes into each side and then attached them to the fronts of the bins with twine.

I think this will work SO much better: 
Organized linen closet

My absolute favorite bins are these Sterilite versions
Best bins for organizing

I use these exclusively in all of our closets and under cabinets. They are super sturdy, easy to grab, hold a ton and are really easy to clean. 

Want to know the best parts?? I got rid of TWO smaller bins and we now have an empty shelf. We've never had an empty shelf!: 
Tips for an organized linen closet

I showed my husband that we don't need to buy body wash or deodorant or lotion for like five years. I've said it before and I'll say it again -- you spend less when your items are organized. I've found over the years that we purchase more of something simply because we can't find it. But now we're stocked up in case there's a national deodorant shortage so there's that.

My one regret when we built this house was that I didn't have lights added in the closets. Seriously every time I open one I curse the fact that I didn't make that happen. I've added a few battery operated lights in them and this closet has these Insta Bulbs
Insta bulb in closet

I have two in this closet and I like them. The reviews aren't great online but I think they let off pretty good light. They do drain the battery quickly if you leave them on but I never have them on for more than a few seconds. I prefer a light sensitive version that turns on when you open the door, but for an inexpensive fix these work great: 
Battery lights for closet

By the way -- I used to roll our towels and I really think it is great for a smaller space. You can really fit a lot in, but on a larger shelf like this they tend to roll open and it drives me crazy. I stick with folding for that reason. :)

I'm so happy to have this spot done! Now I'm moving on to cleaning supplies. It really doesn't get more exciting does it? I mean, I know you want to come to my house today. Do you have any helpful linen closet tips? Feel free to share!

Thank you so much for the well wishes this week! It's been a doozy. This morning I woke up feeling the best I've felt in days but it's still not gone completely. I'm just thankful for some energy and that I won't have to carry the tissue box around with me all day. :)

I'm back today to share a little find I'm truly excited about, especially as a blogger. Lighting is EVERYTHING to a blogger -- especially natural light. Shooting a room with no natural light (especially after you've worked so hard on it) is always kind of a let down because it's hard to capture it without a yellow tint. Lots of camera changes and editing needs to be done to make it look decent. 

Well little did I know this find would change how an entire room looked, for the better. I am talking about the daylight bulb: 
daylight LED bulb
I picked up mine at Lowe's but you can find them on Amazon here as well. Keep in mind I like these two in particular because the base is down low, which allows for even more light. Some LED lights have the base go way up high and those don't let off as much light. 

I was so impressed from the first one I installed I had to share this with you. I mentioned earlier this week when I shared the new and improved bathroom that I changed out the glass on the light fixture. This is the difference the daylight bulbs made with the old glass: 
difference between daylight and incandescent bulbs

See how yellow the incandescent bulb is? Isn't that crazy? I still didn't care for the old glass, even though the new bulb really did help. Here's the difference with the new bulb and the new brighter glass as well: 
Comparing incandescent and daylight bulbs

Holy cats, we couldn't even believe how different it felt in here! It was like there was a window opened and letting the sun in. It is CRAZY the difference -- I'm not kidding! 

Later on that day after I installed these I left the light on, came upstairs and for a split second thought daylight was streaming in the bathroom. I knew there wasn't a window but my mind was tricked for sure. The daylight bulbs make everything their true color. I put the old bulbs back in to show you the difference -- with incandescents: 
easy bathroom makeover
Our counters aren't a mustard yellow, if you can believe it. :) 

Here's the after I shared with you earlier this week: 
Daylight LED bulbs in bathroom

This is what I mean by the real color of the room. It's amazing! So yes, the paint color made a BIG difference in here, but the new bulbs really let it shine. 

Keep in mind these bulbs are BRIGHT -- so this is a matter of preference. I immediately installed a dimmer because first thing on a dark morning they would be way too much. (These are fine to use with a dimmer.) The LED bulb is supposed to last a lot longer too.

Also, I don't think I'd use them in every room. I like soft light in our family room and bedrooms. I WILL be putting them in all the bathrooms and the basement -- I'm really excited to see the difference down there. I put my makeup on in this room with the new lights and I tell you what -- you see a lot more with the daylight bulbs. You know how you think you look pretty good in your bathroom and then sometimes you go out and you're like, whaaa? Yeah. These show you all of that before you go out. :) 

I'm an incandescent lover (I may or may not have bought numerous packages of them before they stopped selling them) but I think these have converted me. I had to share them with you! :) Have you tried them? 

Have a great weekend! 

Affiliate links included for your convenience! 

So every so often I like to update you on projects that I’ve done/purchases I’ve made to let you know how they’ve held up and if I like them as much as I thought I would. I’m always curious to hear that so I like to share in case you are wondering too.

I will say…I think and research and plan things to DEATH, so it’s rare that I regret doing anything. This one I’m still not sure about. :)

I shared our completed powder room a couple months ago and I’m so happy with how it turned out:

planked walls bathroom

We have a huge powder room, right? It’s big as far as powder rooms go. We could have made it a full bathroom (it’s near my office which could have been another bedroom), but we went with the half. Anyway, I’m so glad we have a linen closet in this room.

What you didn’t see at that reveal, and many of you have already seen, was the big honkin’ tube inside the closet:

pipe laundry tube pipe laundry tube

That is something I dreamed about for years and was SO thrilled to get installed. By now you’ve probably read the title of this post and deduced that this is our laundry chute. Smarty. ;) (You can see more about it here.)

What you didn’t see was the horrible, no good, did I mention horrible paint job I started last year. Originally I was going for red walls in this room and thought it may be fun to add a touch of red to the shelves (they needed to be painted anyway):

Ugh. I know. I mean, the photo is horrible but seriously…I KNOW. It was horrible. This one goes in the what was I thinking column.

I was going for white walls and bright red shelves, but somewhere along the way I got lazy and didn’t tape off (WHY?) so the paint got on the walls. And the PVC was always ugly -- initially I tried to get the lettering off the pipe using a method a reader mentioned, but it didn’t work for me. Then I thought, I’ll just paint it! Red! Like the rest of the closet! Brilliant!

Well red doesn’t cover well. Your tip of the day. So I stopped.

Anyway, I fixed it – more on that in a minute.

First up, the main purpose of this post. Would I do the laundry chute again? I’ve thought a lot about this lately and actually, I probably wouldn’t.

There’s a few reasons for this. The biggest – I never do laundry. I just…don’t. My husband does his own and I wait until I am out of clothes to wash my own. I will dig to the bottom of a drawer to find an odd sock before I will do laundry. It’s just my thing. I don’t hate laundry like I used to now that we have an actual laundry room, but I just don’t do it.

It’s my thing.

BUT. Because I don’t do it often, I wait till I can’t wait anymore and then I spend a day washing clothes, so in those instances it is nice to be able to just drop the clothes down the chute. Thing is, you still have to take the basket down to carry them back up when they’re done. So if I’m doing one load here or there I just take the clothes down in the basket because I’m going to have to bring them up in it anyway.

All that being said…our closet is a major disaster right now so I’m on a laundry binge. It’s laundry all the time – and I’ve been using the chute a ton.

Perhaps if we had more kids and more clothes I would use it more? Maybe someday when I’m totally and completely organized (snort) and I keep up with washing the clothes I will find it more helpful.

But for now…I walk the clothes down the stairs as much as I throw them down. I gotta say though – it’s fun. There is pure joy that happens when you throw the clothes down and hear them thump into the laundry basket. It kind of rocks. ;)

So…the chute is staying. Which brings me back to the hideous red linen closet. I finally painted it. The powder room was next on my decluttering rampage and like usual I couldn’t pass up this little DIY that needed to happen.

I used some paint I already had – it was a color called Billowing Clouds that I originally used to paint the powder room years ago. I didn’t want to spend a ton of time on this so I painted the walls and the shelves both the blue color: linen closet laundry chute

Oh, I did prime first that red first, just one coat. Since I was painting the walls it took no time at all. I was able to prime, paint and organize the stuff in here in a couple hours. I’ve put this off for a year, and it took less than two hours. Story of my life!

You may notice the polka dots. ;) Yes, I covered the tube. YES…I obviously have no life. It was just so ugly. I went through a few options in my head for covering it and then remembered I had some contact paper. AND it matched the new paint. It’s like it was meant to be!:

PVC laundry chute

See, I kind of have a life – I didn’t do the bottom part. Honestly it took about 15 minutes to cover it – and the dots make me smile when I open this door. :) I want to get some sticky tiles to put on the floor in there (I didn’t have the hardwoods put in the closet since the cuts would have been so tricky and added to the cost.)

By the way, a few readers wondered if that little bend in the pipe would keep things from going down and it doesn’t at all. Nothing has gotten stuck – even bulky towels and sheets because it’s so slick inside. So as far as laundry chutes go, this is a good one!

After decluttering the stuff in the bins in here I was able to get rid of one (that is a great feeling!). So even though we have half the space in here that we used to, everything still fits great:

DIY laundry chute

And it’s pretty cute, seriously. I say even though other people won’t see a space, if you have to look at it every day it’s your prerogative to make it cute. :)

SO. Overall I do like having the laundry chute, but if I could do it again I would have waited longer before installing it. I think I would have decided that we really didn’t need it after all.

Have you ever done something in your house you are iffy about? Regret any renovations or decisions you made? I don’t know if I regret this one really, I just would have waited to see how things functioned without it.


Good Monday to ya! How was your weekend? I was fighting a cold all weekend but managed to fit in two movies and plenty of DIY, so that’s a good one for me. :)

I’m continuing my no-spend August by wrapping up a HUGE project. I love the no-spend idea – not only do I save money when I do this (no impromptu trips to HomeGoods!) but I get a lot done. Stuff I’ve been putting off for months!

Our basement bathroom is one of those projects. It was thisclose to done anyway, and I had everything I needed on hand…so this one is checked off the list! WHOOT.

Let’s look back at how it looked a few months ago:

unfished basement bathroom

If you’ve been around for awhile you know we finished our basement last year. We did it slowly so we could pay cash and it took about six months total. The basics are in and everything is coming together beautifully, but there’s still a LOT we want to do down there.

So we had it finished but the basement bathroom was still incomplete, as you can see above. The floors were installed earlier this year, along with the main fixtures – the toilet and vanity. Then I showed you how I installed some storage in the form of DIY floating shelves:

DIY floating wood shelves

I LOVE those shelves – I’m still so happy with how that came together.

But there were a few things left to do – back when I painted all the doors black in the basement I pooped out and didn’t do the back of the bathroom door. Soooo…I got that done:

painting interior doors

Three coats and done!

Back when we had the electrical work done for the basement I knew I wanted two lights above the sink, so we guesstimated where the vanity was going to go. Well the outlet for that room ended up being right in the middle of the sink (right where the mirror went) so the guys came out a few months ago and moved the outlet (and one of the lights) for me.

They patched up the drywall and I just hung the mirror back over it and left it:

patching drywall

So yesterday I sanded it down and touched up that paint and a few other spots in the room. I also caulked the rest of the baseboards down there as well. OK, maybe I wasn’t thisclose to done. ;)

I used the mirror that used to be in our upstairs powder room -- it was shimmery brown so it needed a redo bad. I taped it off to prep for spray paint:

taping off a mirror

I’ve seen a lot of people not taping off and just using a razor to clean up on mirrors, but with spray paint that’s too messy (for me). So I covered it with newspaper, taped it all down and checked out my spray paint stash to decide on what to do:

nickel spray paint

I started with the satin nickel color and it was pretty, but when I got it down there it was so…boring. ;) The lights, faucet and mirror were all the same. Then I took it back outside and just went with a basic white – but, duh, that was pretty boring too. I wanted a pop of color on that wall and kept looking to my spray paint to find the right color (not spending money on DIY and all.)

Well I finally found the color I wanted in my regular paints:

light and bright bathroom

It’s the same aubusson blue color I used on this project:

aubusson blue chalk paint

It was PERFECT. And it only took three tries. ;)

The blue brings the color in the towels and shower curtain over to that side of the room:

DIY floating shelves

You can see all the sources for these items in this post (most was from Target).

Originally I planned on using our pedestal sink from upstairs in this space, but when it came time to install it I realized I really wanted something more substantial and something with storage. So I shopped around and found a really inexpensive vanity at Lowe’s that worked perfectly:

bright basement bathroom

It’s really shallow but the sink juts out so it’s still a great size. It’s perfect for this skinny bathroom. (You can find it here online.)

I’m pretty thrilled with how this little space came together! Well…it’s not exactly little -- it’s just long and skinny:

black interior doors

It’s about 11 feet by four feet -- there was no other way to set up the room with the beams in the basement and the rough in plumbing. Also we had to make it this long to incorporate a support column into the wall. When the door is open it goes right near the vanity so there’s actually not much room to spare.

I had a mantra in my head the whole time I was finishing off this space -- “It’s just a basement bathroom.” :) So I went pretty basic with the finishes – the faucet, shower head and lights were all basic, inexpensive finds. We spent a little more on the toilet since this is in the basement – we wanted something that will hold up well (since the plumbing down here has to work against gravity).

Even though we didn’t splurge on much, I think the space turned out beautifully. One thing I don’t regret at all in the building process – I made sure we had a TON of lights in this space. Early on I thought it may be overkill but since I’ve realized it’s a great thing in a room without natural light:

blue green bathroom

We have a total of five lights in this space – recessed lights in the shower and by the door, the light in the fan and two over the sink. I love the look of the two lights over the sink – I did the same in our upstairs powder room. :)

I do have one more thing to do in here – paint all the trim (baseboards and door trim). But I have to do that in the entire basement so I’m going to wait till I can knock it all out at once. (That will be a fun day. Want to come over and help?)

Here’s a look at the before and after side-by-side – my favorite. ;)

bright basement bathroom

I’d still like to add some art or something to that big wall at some point. I have an idea in mind but for now I’m just thrilled to have this space done! I’m knocking things off the to-do list and it feels so good! I may do these no-spend months more often!! (Although I’m starting to get a HomeGoods itch.)

If you have any questions about this space that I didn’t answer, let me know and I’ll get you info in the comments!


Popular Posts