Well hello!! I hope you had a GREAT weekend!

I’m starting to get my project mojo back – I’ve been highly unmotivated this summer. Well, unmotivated to do any painting, sawing, crafting or cleaning. Highly motivated to nap. ;)

But as fall approaches (what is that high pitched squeal? OH yeah, that’s me.) I’m getting the urge to get more done around the house. I thought it was about time I finished up the stairway redo that I started…oh….SIX MONTHS ago.

I’ve been wanting to add molding up the staircase for all that time. My original plan was to continue the skinny molding I installed throughout the foyer, but that stuff was going to be a total pain to work with – long story, but it isn’t symmetrical. So to make the correct cuts, I was going to have to make a jig for the saw and blah blah yadda yadda. You don’t want to know.

So I sat on it for months. Then I saw some new inspiration in a magazine – a different idea -- and wondered if it may be easier to install. Turns out it was. ;)

I didn’t take pictures as I went (bad blogger!!) but I recreated how I went through the process. My inspiration picture used a board and batten type technique, so I went to the hardware store looking for thick slats of wood to use – but everything I found was either too skinny or too expensive. Then I remembered the brilliant idea The Nester had, and I strolled over to the sheets of mdf.

Brilliant I tell you. I had an eight by four foot sheet of mdf cut down into 3.5 wide pieces (eight feet long each). To figure out the angle of the cuts I needed, I held a piece up to the wall and marked the angle of the handrail on the wood:

I marked a line from end to end to get the angle I needed:

Then put it on my miter saw to figure out the degree of the cut. It turned out to be 40 degrees, and low and behold, that cut ended up working for every single angle I needed:


It was SO easy, because the planks were flat and symmetrical so I could use it any way I needed to! Does that make sense? I could flip it every which way and it still worked.

I nailed up the sides first then added the top portions. The middle pieces (that created the “boxes”) went up last. This is what I ended up with:

LURVE. :)

Then, because I consistently ignore my own advice, I had to paint everything after the fact. Which is a total pain in the booty. TOTAL. Argh! I will never learn! From myself. Huh.

Anyway, because I am one of the True Value DIY Blog Squad members (yippeee!), I took my merry little self over to a local store and got some new painting supplies.

Purdy brushes are not cheap, but they are the best, in my opinion. I absolutely love them! I used my angled brush to do a coat of primer and two coats of semi-gloss on the edges of the mdf:

I found a super cool roller at True Value that I had to try out:

Gotta love that Made in the USA! :)

You can angle it in all kinds of directions:


How cool is that? It worked perfectly to paint all of the molding!

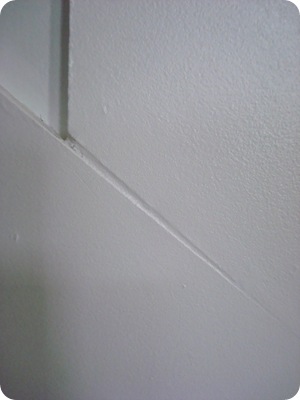
And yet again, the fact that I didn’t paint before installing came back to haunt me. (Curses!) The top edge of the mdf butted up against the handrail molding, was still unpainted and you could totally tell:


I. tell. you. what. Such a pain! Thankfully True Value had a small craft section (yes, crafts! I think I’m in love!), so I picked up some brushes and used one to cram some paint in there:

The cramming worked. Sheesh.

And finally, it was finally time to poly those steps. I went back and forth for months on whether or not I would do it, because I was worried it would make them slippery. I figured I would try one coat and see how it went.

I grabbed some semi gloss polyurethane on my shopping trip:poly

(You want to stir poly slowly – never shake!)

I always use a foam brush to apply poly and it works like a charm! Here’s the difference it made on the steps (top step with poly, bottom without):

poly on stairs

Loverly!! Poly makes the wood so much richer and beautiful – and it has NOT made them slippery at all! I only did one coat, so that probably helps. I still swear the wood steps are less slippery than the carpeted stairs.

I absolutely, positively LOVE how it turned out!!:

stair transformation

I continue to only get craptastic quality pictures of these stairs. Not sure why. But you get the gist. :)

It’s not perfect. Not many of my projects are:

This is why the DIY Gods created caulk and putty.  ;)

I really adore how it turned out! It makes the whole staircase look finished off:

The wall going up the stairs is my favorite wall in the house:

Can you tell why? ;)

All I have to do now is get rid of the brass:

I know they’re small. But they’re mighty. Mighty brassy. And shiny. :) I don’t know if I’ll tape them off, cover everything and spray paint the buggers, or just replace them.

Either way, their days are numbered. Buwahahahahahaaaaaa…

Now, to decide if I’ll continue this treatment up the other side of the stairs:

I’d have to take down the small molding I have up there, and I don’t know if it would even work with the big squares on the back wall.

For now, it will stay as is. :)

Let’s look back, shall we? This is the before, from last Christmas:

The in between from earlier this year:

  And the I’M DONE!! (for now):

The best part? All of the mdf only cost $23! That’s IT! Whoo!

Oh I lurve it. And now I can focus on other things.

Like decorating for fall.

What’s that? Hummmm? It’s still August? Whatever.

:)

To see how I transformed our stairs, go here.

*I was one of the bloggers selected by True Value to work on the DIY Squad. I have been compensated for my time commitment to the program as well as my writing about my experience. I have also been compensated for the materials needed for my DIY project. However, my opinions are entirely my own and I have not been paid to publish positive comments.*

Thank you to my latest advertiser!:


Hello there!! I am so thrilled to tell you about a fun partnership that’s been in the works for the past few weeks. I’ve been chomping at the bit to tell you!  :)

I am very pleased to announce that TDC is one of the ten DIY blogs involved with the True Value DIY Blog Squad:

diysquad-v1_3-large

When the folks at True Value asked me if I wanted to be involved with this project, I may or may not have squealed (just a little), danced a happy dance (in my car) and then said YES PLEASE, thankyouverymuch! :)

You all know the hardware store is pretty much my very favorite place to be. Well, besides home. And New York City.

Anyway, it’s is right up there. A trip to a store with nothing but tools, paint supplies and endless possibilities makes me a very happy chick.

I remember going to True Value stores with my Dad when I was young, so going back is a tad bit nostalgic for me. They just ooze friendly, happy, small-town kind of place. You know what I’m talking about? The kind of place that has free popcorn right when you walk in the door:

popcorn

I mean, really. You serve me free popcorn and I’m yours for life. :) The location I visited last week is in a small town, and the staff was so friendly, I felt like they knew me personally. (And no, I did not wear a sign that said “I’m a part of the DIY Blog Squad!!!,” even though I kinda wanted to.) I grew up in small towns (Channeling John Mellencamp right now – I lived in his small town for years. :) ) and there’s just something about the True Value experience that took me back 25 years to my childhood.

Well, let’s get to the goodies, shall we? I have to say, I was SO thrilled at the selection!! I mean, it was crazy good.

I’m warning you…many of you DIYers out there going to pass. out. from glee when I show you the spray paint selection. I could not believe how many options were on the shelf:

spray paint!Told you, CRAZY GOOD. :) I couldn’t even get all of them in the shot – it was a whole wall of spray paint Squeezies! It just doesn’t get any better!

GLEE!!!

The hardware section alone would take me an hour to go through. I have never seen such a selection anywhere:

hardware

Ack!! Nuts! I was in heaven! There was more too – way more!

There were tools galore, power tools (swoon), a fantastic outdoor section, (including a full nursery!) and even an aisle of kitchen supplies!:

kitchen

I only left because my child wanted to eat. I could have stayed for hours. ;)

So over the next few months, I’ll be sharing some fun DIY and home improvement projects using supplies from True Value. (Squeal!)

I have some great projects in mind, but I’d love to hear your thoughts as well! Is there a home improvement project you want to attempt but aren’t sure how to do it? Is there a tool you’d like to learn more about that I haven’t used? If there’s something I can help you learn, I’d love to try!

There are a number of fantastic blogs involved in the DIY Blog Squad!:

Be sure to check out their True Value projects over the coming months! (I know I will!)

You can also find out more about all of our projects when you follow True Value on Facebook and Twitter.

I am so excited for this opportunity, my mind is positively swimming with ideas. Let me know if you have any as well!

*I was one of the bloggers selected by True Value to work on the DIY Squad. I have been compensated for my time commitment to the program as well as my writing about my experience. I have also been compensated for the materials needed for my DIY project. However, my opinions are entirely my own and I have not been paid to publish positive comments.*

**Stay tuned for a great giveaway this weekend!


Let me introduce you to my nemesis best friend debt free inspiration…Dave Ramsey. I’ve mentioned him a lot lately, and many have you responded, wanting to know our “debt” story.

I’m sharing it with you because hearing the stories of others is what inspired us to become debt free. My hope is that those of you who are drowning in debt right this very second will be inspired as well. I hope that you will see a light at the end of the tunnel. Ours was a long, long, very dark tunnel. :)

We are not debt free…yet. We’ve been working on it for about three years. The start of our massive debt started almost exactly sixteen years ago – the month I started my first year of college.

I went to school that fall not knowing exactly how I was going to pay for it. I had some help from the government in the form of grants, and I had a part time job that made a little, but those together were not nearly enough to cover everything.

My mother had no money. My father had no money. (My parents were divorced.) My home life was not good – and I had done all of the prep for college on my own – registration, picking out classes, applying for financial aid, etc. I had NO idea what I was doing and really didn’t give much thought as to how I would pay for the THOUSANDS I was supposed to shell out that first year. ;)

All I knew is I was going to college. It was a dark time in my life and I needed control of my life, needed to control my own destiny -- and getting that education simply had to happen. At the time, I very much felt like my life depended on it. (Dramatic, but true.)

If you’ve been on a college campus in the first few months of the school year, you’ve seen the credit card companies out en masse – promising free money in the form of a shiny new credit card to kids who make little to no money. I figured I would use it for back up – it would only be a few hundred bucks at most, right? So I applied for one card, got it. Another one. Got it. Another? Got it.

And I got a free t-shirt each time! Or, even better, a two liter of Pepsi! WHO, I ask, could resist that?  ;)

Now, when I look back, I am thankful for those credit cards, because when the first bursar’s bill came due, I went to the ATM and withdrew from each card. Enough to pay my college bill…and I did it every few months for ten months.

After that first year, the balances were growing out of control, and I realized I couldn’t keep up. So I applied for school loans and got them. But by then, I had been living with credit cards for a year, and was HOOKED.

Remember -- I was young. No one had taught me how to handle money. No one had talked to me about debt. We had NO money at home for such a long time, and these little cards were magic to me. I could spend, and then only pay $15 a month and all was just fine.

I didn’t go crazy – but when my school loans ran out each semester, and the part time job money was gone, I went to the cards. It became an addiction. I truly believe I was addicted to credit cards. And then the you-know-what hit the fan and the calls started.

Suddenly I didn’t have enough to pay the minimum  payment on all of my cards. So I paid one, and not the others. And the others called. Then I’d pay those, and not the other, and the other called. I was late on all of them, above my balance on all of them, and it was a very scary time in my life.

The credit card companies would call and harass me, all day long. They yelled at me and mocked me when I cried and said, NO, I had no one I could go to for the money. (I hear they’ve changed the laws on what they can say and how often they can call.) They threatened, and I was scared out of my wits. Finally one day I realized I had do something.

I went to a credit counseling service while I was still in college, and it was one of the best days of my life. They sat with me, went through all of my bills, and set up a payment I could deal with. (One payment that was dispersed to all of my cards.) The service called my cards and got my interest rates lowered, late fees frozen, and I started to get control of my life again.

Let me clarify one thing – this service was FREE. There are credit services that charge for this service and I’ve not heard good things about them. The people I worked with were a not-for-profit agency and they helped me more than I can even express to you.

Fast forward years from that time, and I was still paying off those cards. It was slow, but I was doing it. One day I decided to get my credit report, to see my progress. Then I saw something that helped to turn things around even more -- I found a department store card I had applied for and had forgotten about.

It was the ONE card I had left that I could still use – my credit was so bad I couldn’t get any new cards, and the current cards I had were frozen. So I called that store, got a new card and went and charged twenty dollars on it. And paid it off. Did it again, paid it off. For months.

My credit got better and better. Then, I had student loans I was paying off as well. So I paid those on time. And it helped. I actually was able to get a car loan (with a crazy high interest rate, but it was a loan!) and I paid it on time.

Slowly, I was repairing my credit. But did I stop using it? Nope. I don’t know why I hadn’t learned any better. Maybe it’s because I was making a decent living and living comfortably? Maybe it’s because I was still addicted to credit and had the mindset of someone who is addicted – it’s not that bad, I can control it, blah blah BLAH.

Enter my future hubby, who had created a ton of debt on his own. He had done it over time, even longer than me. And we continued to live like that for years. Then we decided to build a house. I took a second job and we worked our butts off to save for a decent down payment – and we had a little leftover for some new furniture. ;)

But as I’ve mentioned before, we moved into a house with lots of rooms and very little furniture. And I kept getting the itch to fill each space…some of it was big stuff, like the dining room furniture. Some of it was small, like a file cabinet from Bombay Company. But it all added up.

I had learned nothing. Nothing.

Years of harassing calls, years of crying, years of growing debt (again), years of not knowing how to tell myself NO.

I guess I should say “we” – both my hubby and I were equally to blame.

About five years ago, while traveling through the state for my job, I came across a radio talk show that caught my attention. (I LOVE talk radio.) People were calling into a show to talk to some guy named Dave, asking about and talking about their debit issues. And this Dave, in his southern drawl, would bring them back to reality in a hot second…calling them out and making them take responsibility for their lives and their money.

I was intrigued. I went home and couldn’t stop thinking about it. So the next trip, I searched the radio again, and found it again. I was hooked. I came home and mentioned it to hubby. We talked about it, daydreamed about it, but never took any action because it was too overwhelming. We were in it SO DEEP.

Then Mr. Dave’s show came to our local radio, and I listened every day. On Fridays, people would call in and tell Dave how much money they had paid off. One couple I remember in particular had paid off $168,000 dollars. (That’s THREE zeros peeps.) Some callers had paid all but their house. Some had paid everything.

They had NO debt. Nothing. Utility bills and retirement were their monthly expenses. And at the end of their call, they would count down, 1…2…3…and scream “We’re debt free!!!!”

And I would cry for them. Because I wanted to be them, because I was so happy for them, because I wanted to be grown up just like them.

So we started. My husband was still a bit hesitant, but we bought Dave’s book and he read it within a few hours. We were hooked. We were ready. We were SO EXCITED.

We’ve been at it for about three years now. We don’t follow Dave Ramsey’s plan to the T – no rice and beans, beans and rice. ;) If we did follow it exactly as he lays out, we would probably be debt free by now. But we have become more strict on ourselves with each passing month. The closer we get, the less we spend, the more we pay off. The more being debt free becomes a reality. :)

Because my husband runs his own business, we may keep one credit card for those expenses after all is said and done. That will most likely be the Amex that we will have to pay off every month. But we also figure that if the rest of our debt is gone (all but the house that is), we probably won’t need it anyway.

We’re not rice and beans, more like macaroni and cheese. And lots of Goodwill. ;) No more new furniture. Even if we can pay for it in cash – we put the money towards cards. No large purchases. No new cars. We rarely go on vacation. (Most trips we do take are for hubby’s work.) We are paying for my stepdaughter’s college education – NO LOANS. And the gift we are giving her by doing that is overwhelming to me. I know she appreciates it, but I know she will truly appreciate it in about 15 years. 

Yes, we splurge sometimes, and that’s another way we don’t follow the Ramsey plan exactly. But we pay for our splurges. They don’t sit on a credit card for six years. And they don’t end up costing us 3.5 times more than they originally did. ;)

We work on one credit card at a time, and when another one is paid off, we are like little kids. Giddy.

Paying off credit is so much more fulfilling than spending money we don’t have.

It is JOY. Pride. It is delayed gratification. It makes me feel like an adult. :) And it has created SO many possibilities for our family. Dave Ramsey talks about the new way of life you create for the generations of your family after you… and that is so true. When we are debt free, we will be able to save for our children, mentor them, lead by example and then one day pass along what we have saved to them.

It is exhilarating. It makes me want to cry at what is possible for our family without this monkey on our backs.

So how much have we paid off?

In the past three years, we’ve ridded ourselves of approximately $60,000. Actually, that’s probably pretty conservative. It’s car loans, credit cards, department store cards, student loans, furniture loans, you name it.

It took a long time to create it all, and it’s taking a long time to pay it all off.

We still have a big chunk to go. I won’t say how much till we’re done – don’t want to jinx anything. :) But we are pretty sure we will be debt free by the end of this year, if not in a few months.

The thought of it makes me so emotional. When we pay that last payment, it will be the first time in my adult life I will be debt free. It is overwhelming. And fantastic. And so worth it. I cannot even express to you how worth it it will be.

And the day we make that last payment, we will call in to Dave Ramsey’s show and scream

WE’RE DEBT FREE!!!

And I will cry.

I’ll let you know when that day comes too. ;)

P.S. If you want to know more about Dave Ramsey, click here.


Anyone else glued to the Bachelorette tonight? ;) Don’t worry, I won’t ruin it for anyone. But it was GOOD. (YES. I have watched every season of the Bachelor and Bachelorette. Good stuff.) Ohhh Lordy, the rainbow part just about KILLED me!! Sniff.

Hubs and I were so taken with the shots of Tahiti, we were searching to see how much a trip there would cost. Let’s just say we need to wait till Dave Ramsey will let us. ;)

For this month’s party, I transformed a $3 Goodwill find, and it took all of ten minutes to complete. Score!

Cloches are BIG right now – and I luuuuurve ‘em. I’ve found a few -- my favorite (and biggest) one was a Goodwill find:

(I have since sprayed the base cream, but I think it may go back to black. OH the wonders of spray paint!!)

Some I have no idea where I got:

cloche

One was a antique find:

cloche

And one I made from other stuff and called it a cloche:

cloche with pears

;)

Well, that was how this one worked out as well. And it was SO easy. I found one of those clocks under glass jobbies at Goodwill:

I saw the idea somewhere in blogland months ago, and I have NO idea where it was. (If you know, will you let me know so I can link to it?)

**Molly did one, you can find it here!

It look about two minutes to take the screws out of the bottom and take it all apart:

 009 011

The base was plastic (other than the glass dome, everything was plastic!), so I spray primed it, then sprayed it in ORB spray paint as well.

I found a $1 mirror from Michaels that fit right over the top of the base, to hide the holes and that was IT!

Now the only problem is finding the perfect tchotchkes to put under it!

Too squatty:

Too white:

Too tall!:

Good for now!:

026

(The vase doesn’t have water in it, but it looks like it does! Weird!)

I thought about adding something to the top as a handle, but it’s just fine as is. It’s not the fanciest, biggest cloche I’ve ever seen, but it’s pretty darn cute for just four bucks total! (And about ten minutes of work!)

So my before and after for this month…

Before, my $3 Goodwill clock:

After, a pretty adorable (and cheap!) cloche!:

clock turned cloche

I can’t wait to see what you’ve been up to this month!

I would love it if you would link back to me in your post, and use this button if you wish:

beforeAndAfterButtonOnly links to your actual post (not your blog address) will be accepted. (Right click on the title of your post, click copy, then paste the html into the linky.)

The party will be open till next Monday, so link it UP! Have fun! :)


Hello all! Hope you had a fabulous weekend!

This is a long, long, LONG, slightly annoying tale (for me anyway), of finding a desk I love into our den. I started the redo of this room a few months ago, but then the kitchen, foyer, family room, dining room and bed making kind of got in the way, so I didn’t work on it for quite a while.  ;)

We’ve always had a Bombay Company corner desk in the room:

Nice sippy. ;)

But with the addition of a laptop, the tall corner desk with the pullout for the keyboard wasn’t working anymore – it was WAY too tall. And, I was tired of staring into a corner when I did work at that desk. (I’m usually on the couch, but whatev.)

So, we took that one downstairs for hubby to use, and switched out his desk for upstairs:

desk

This baby was a $20 Goodwill find, and when I found it, it was a NEON green. (Not kidding. You’ll see in a minute.) I painted it, added new knobs, and we’ve used it in various spots over the years.

Because I was trying to spend very little money on this room’s redo, I had a new vision for the desk and forged on with my changes.

I worked for HOURS taking the paint (my two coats of black, and the previous owner’s crazy neon paint) off the top of the desk:

YIKES. Told ya! I got the top down to bare wood, finally…and then started my next phase. I had a beautiful white desk in mind, with a dark, luscious stain on top. Because the desk was unfinished on the back, I figured I could cover it and wrap the three sides with something and then paint it:

I used plywood first, to even out everything on the back, then installed beadboard panels around the back and the sides. I got baseboard molding to finish off the bottom. Then I primed it…and it sat.

And sat.

For days.

Weeks.

MONTHS now.  :)

I know pretty quickly when something isn’t workin’ for me, and when I’m not digging it, I basically ignore it. Sometimes a new vision will come to me to fix it. Sometimes I realize it’s just an absolute train wreck.

This one was a train wreck:

Nothing was looking how I had in my noggin. I didn’t even paint the front of the desk:

That is a hot. mess. Smokin’ hot.

So…I’ve been searching Craigslist for my next vision – a table instead of a desk. Because of another change in here, I don’t need desk storage anymore. (More on that soon.) So the idea of a table was really growing on me.

It would be open, light, and would show off the molding treatment I have planned for the room. It would have much more surface space, (unlike the current desk), and it would just be pretty darn it! :)

In my head was a curvy table top, beautiful legs and it had to be just the right size – not too small, not too big.

Translation:  next to impossible to find.

Till this weekend.

You know how when you are looking for a job, people always say “It’s all in who you know?” Well, this weekend I found that to be true in decor as well. ;)

A friend, and her friend (who is my friend), and her friend’s friend (HUH? Stay with me peeps!) had a garage sale this weekend. My friend came over for a visit and showed me the great stuff she had bought from the third friend involved with sale.

I was drooooooling.

Then, she was telling me what was left. One item was a medium-sized table.

Ears perk up.

It was all pretty and curvy on top.

Shut up.

It had spindly legs and looked vintage.

Um. Hello? That is the one in my head!

Best part? It was only $15.

Shut. the front. door.

So after some late night texting to friend number two, I got some pictures of said table, then went over to look at it today, fell in love, came home and took some measurements (height, length, width were all PERFECT), and immediately texted her again and said SOLD!!!:

It is LOVELY:

And in really, really bad shape. :) The third friend who sold it had painted it and kept it outside. You can see the brown paint on the picture above. (It’s literally falling right off, and there’s very little left.)

But there’s a few issues. The wood has patinated to a beautiful grey color, but it’s also got some mold growing it as well:

I should stop here and mention that mold fareeeeeks me out. So until it’s addressed, it’s staying in the garage. BUT, there’s only two spots, and my Dad told me some bleach should take them right off.

I did some research online, and found that the fear most (that would be ME) have of mold it largely exaggerated – most molds aren’t a danger to most people. But I’m not messing with this stuff. It looks like black mold, which sounds like is fairly harmless. I found instructions on how to remove it, so I’ll let you know how that goes.

The other issue is the wood itself – obviously being out in the elements has not done it any favors. I’m so afraid that I’ll go to sand it and it will start falling apart.

Part of me wants to clean the mold off, scrape off the paint, then just poly over the whole thing and save that beautiful grey.

The third issue is that the legs don’t match the orientation of the table:

The wide part of the table is the short opening of the legs, the shorter width of the table is where the legs are further apart. Does that make sense? The table has two leaves that fold down, and the previous owners reinforced it underneath with wood, so the leaves don’t go down anymore. But that makes the legs and table not match in their direction.

I need the width on both to match up so I have room to put my desk chair. So I’ll basically have to take the legs off, then turn them and reattach the long way. It shouldn’t be hard to do.

Argh! I said it out loud!! That’s the kiss of death! ;)

After all that, I think I’ll have a perfectly lovely (and safe) desk. Swooon!

So…anyone out there know anything about removing mold from wood? Am I right about the black mold? I read to make a mixture of detergent, water and bleach and clean it with a brush. (Wet it first, wear a mask and eye protection as well.)

Here’s to hoping the third time is a charm!! Wish me luck. I think I may need it.

P.S. Please join me at the August Before and After party tomorrow night!

P.P.S. Anyone want a beadboard desk? Partially complete? (Crickets.) No?


Popular Posts