As many of you know, it can take me eons to finish up a room makeover. It's usually because of two things -- we pay cash for everything so I only make updates as the budget allows. And since I try to do most of it myself, it just takes longer than it would if I hired out. I don't mind this usually because I think I make better decisions when I take my time. 

I'll take even longer if it's a room we don't use often (like our guest room) or one that we use mostly (and guests don't see) so I'm not as concerned about it getting finished up quickly. I've been working on our mudroom for more than three years now -- well, even longer than that if you consider all of our changes -- but I've been making updates for a few years to get it the way I want it. 

And it's FINALLY DONE. Whoot! You may have seen the most dramatic changes I shared last fall, but I wasn't calling it done till we got the storage shelf built and finished up. Now it's finished and because this room looks so different from where we started, I'm sharing a bunch of before and after pics. (My favorite!)

This is one of the biggest transformations in our house, but probably one of the simplest in terms of what we did to change it up. When we built our house the laundry room and mud room were combined. And I hated it from day one because no matter what we did, it looked like this every day: 
Mudroom makeover BEFORE

You can't tell from that pic, but I had already made some changes to the room. I painted it yellow with black accents way back in the day, and then installed inexpensive vinyl floor tiles

What you CAN tell is that the room was a disaster. ALWAYS. It drove us both crazy. There was no closed storage, there wasn't enough room and washer and dryer became our dumping ground for everything

Thankfully, when we finished our basement we added a laundry room. When people ask me if we mind it in the basement I cannot help but express my JOY. ;) We actually quite like it down there (upstairs would be awesome, but we were working with what we had) and I love love LOVE that it's out of this room now. 

Later on I made some additional updates like adding more beadboard around the room where the washer and dryer were, we had some sconces added, and I built the DIY mud room bench:
Mudroom bench made out of kitchen cabinets

Oh my, I miss that fluffy cat every single day. :) 

I was trying to do something different than my normal style with that peacock blue trim and walls, but I grew tired of it. Although I still LOVE that color, it just wasn't our style and didn't mesh with the rest of the house. 

Last year I took on the huge job of painting all the trim and the walls. It made a HUGE difference:
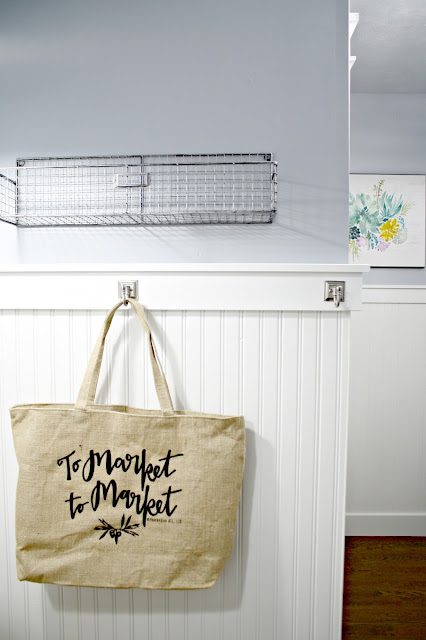
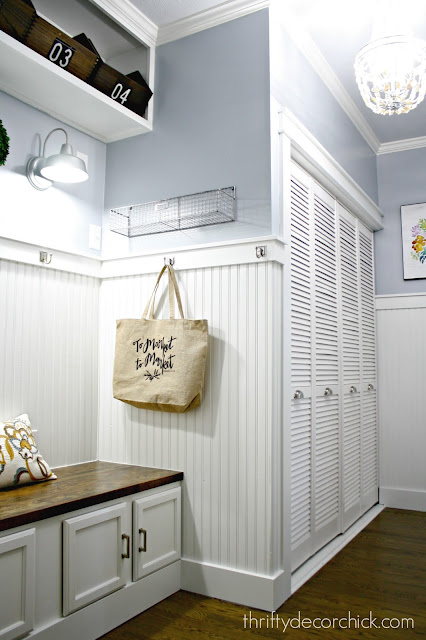
Canvas market bag

There were only two things left that I wanted to tackle -- storage above the bench and crown molding. Last fall we got help with the simple cubby build and then I painted that and the crown molding. 

I looked for weeks to find the right storage baskets for the shelf and ended up with these cubbies from Target instead: 
Pillowfort Target wood cubbies
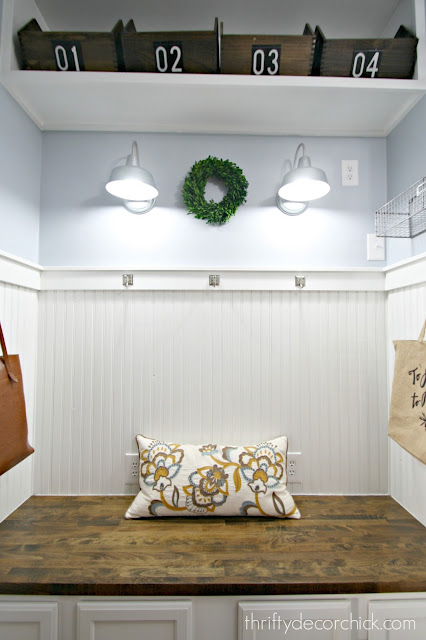
I ended up staining them and adding metal house numbers I found at Home Depot to the front. NOW the room is done!: 
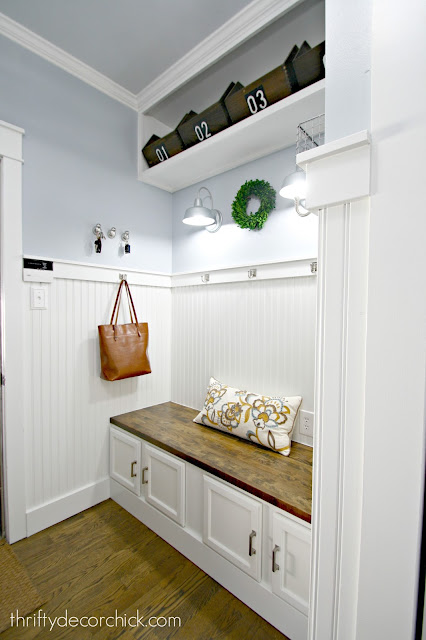
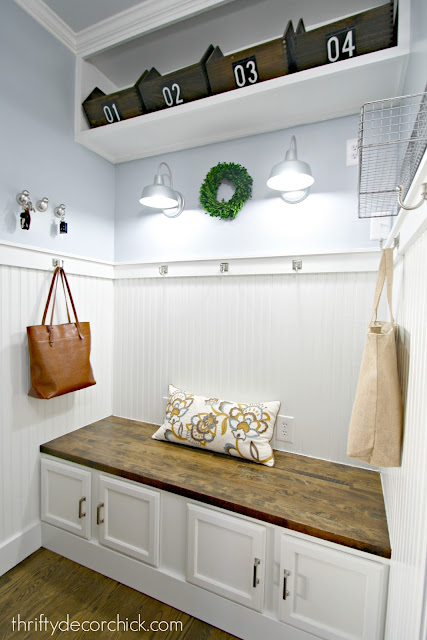
Bright laundry room turned mudroom makeover

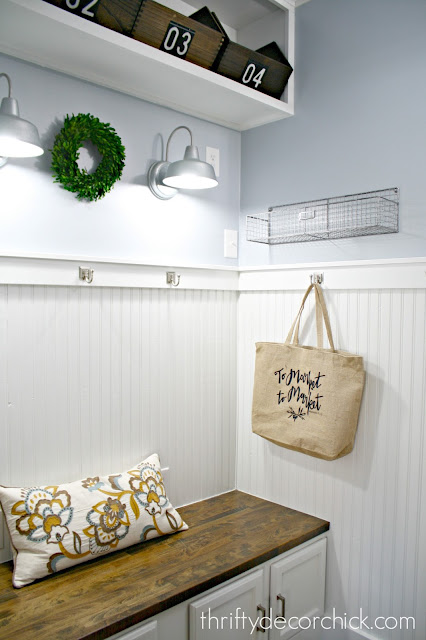
I wish I would have gone a little lighter with my stain on the cubbies -- it's the same color as the bench but that soft wood soaked it up! I just love them though -- they are easier to access than baskets and I love how they look! We use a small stool to get to them and as I mentioned, they hold items we don't need to access very often. 

I've kept the decor in this room really simple -- and the storage is simple as well. The bench holds our shoes, there's a metal basket on the wall that holds items we need to take out to the car and the cubbies above hold off season items and extras. It's a perfect spot for random stuff in our house! I'll list all the items and the paint colors at the bottom of the post. 

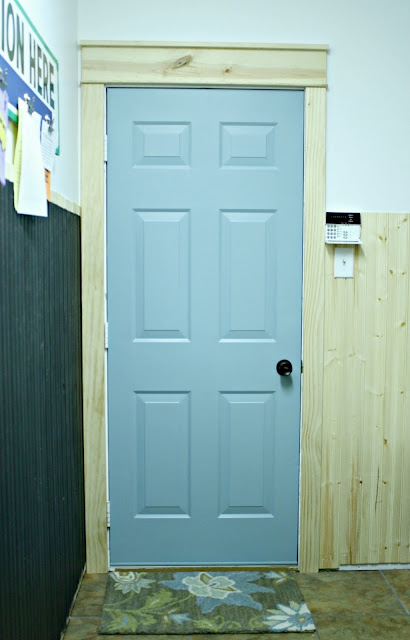
When I started the process of transitioning from the black and yellow to the dark blue and light walls, I added my craftsman/farmhouse trim to the three doorways in the room. I also went light blue with the door, which I didn't love long term:
Light blue interior door

I switched some lights around in the house and removed the fluorescent light we had in here. This small chandelier used to hang in our closet: 
Peacock blue walls with trim

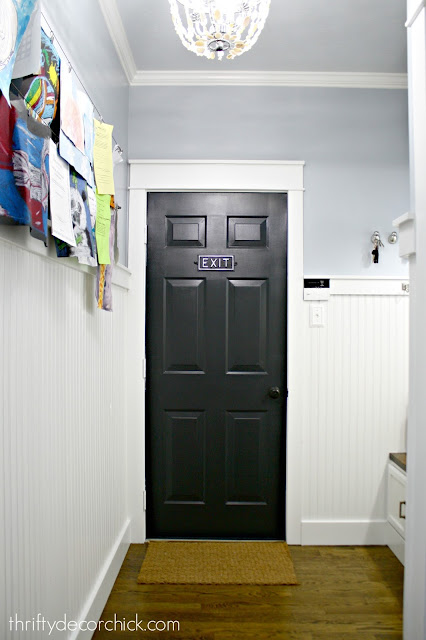
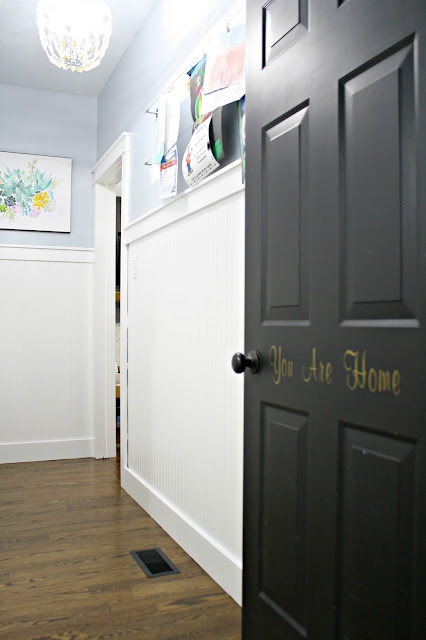
I kept trying to live with the peacock blue, but it just wasn't meshing. We have black doors throughout our house and once this one went black I knew it was the right move: 
Black interior doors

You can see here that I never moved the washer and dryer to paint the room yellow 😬: 
Moving the laundry room

And no one knew till we moved them. ;) This room felt SO MUCH better just with the simple addition of hooks there -- like it was supposed to function this way all along. 

I painted the room white and we added a bench for storage for awhile: 
Making a laundry into a mudroom

And now that same angle looks like this: 
Laundry room turned mudroom makeover


Light mudroom with wood accents

Our mud room is actually fairly large -- but half of it is a long hallway by the utility closet. Years ago I changed out the inexpensive metal folding doors that we used to have:
Black and yellow laundry room

To some nicer wood ones -- I added the handles to them and it was an easy upgrade. You can see how I changed out the door trim here as well:  

When I painted the room last year, I simplified the art wall straight ahead with one pretty piece instead. We have enough going on with the IKEA command center I installed (and still love):
IKEA wire art display

The addition of crown molding made a big difference in here: 
Bright mud room makeover

I LOVE that I don't even mind that utility closet anymore -- it used to stand out like a sore thumb. I considered spraying them the dark blue color years ago and I'm so glad I didn't! 

Here are some final looks at this space -- I'm so pleased with it and as always, I did the majority of the projects myself and we only made changes as we could afford them. I'm so glad we waited too -- now it functions perfectly for our needs. We didn't need a TON of storage in here -- hooks for coats, a spot for shoes and storage for odds and ends were all that were needed: 
DIY mud room storage

Beadboard mud room with blue walls

Bright and light mud room with DIY bench

Classic white mud room with black door

Changing out the light bulbs to daylight bulbs makes a HUGE difference too. This room doesn't get any natural light so the new bulbs make it feel so much brighter.

Here's a list of the items from this room -- some were purchased years ago but I'll add them anyway:

Utility doors: Lowe's
Wood cubbies: Target (Pillowfort line)
Metal numbers: Home Depot
Magnetic bird key holders: Container store (this option (affiliate) is cute too!)
"Exit" sign on door: HomeGoods
Sconces on wall: Lowe's (see more and a link here)
Pillow on bench: HomeGoods
Metal basket on wall: HomeGoods
Hooks on wall: Home Depot
Command center: IKEA
Art: Target

Paint colors: White, Pure White by Sherwin Williams
Walls: Krypton by SW
Door: Graphite by Benjamin Moore, mixed in SW

Let me know if I've forgotten anything!


So I've used a LOT of tools over the years and feel comfortable with all of them. But I still get intimidated when I use a new one! (The tile saw made me sweat the first time, till I realized how easy it was to use!) If someone is interested in learning how to use a new tool I tell them to do two things -- do a ton of research (blogs are a GREAT resource 😉) and take your time and "get to know" the tool before you use it. 

When I'm trying something for the first time I take my time unboxing it and putting it tougher, and read all of the paperwork that comes with it. This helps to ease me into it and makes me feel more comfortable. I also look up videos to see how people use the tool. 

Recently the folks at Dremel asked me to share a DIY project using their Dremel Maker Kit and I was honored they asked...but nervous to try something new!:
Dremel maker kit review for burning and cutting wood

I laugh when I think about that because I feel totally comfortable using my huge compound miter saw but these little Dremel tools were intimidating me. I think it happens to everyone -- and I think it's a good thing because you don't want be overly confident when you use a tool for the first time.

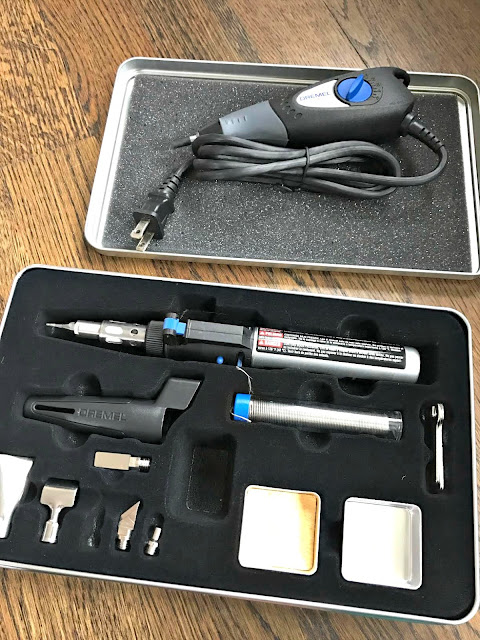
This maker kit comes with three tools -- the Dremel 200 rotary tool, which can be used for a variety of DIY projects. The Dremel engraver is for engraving stone, metal and wood. And the VersaTip soldering torch, which I was most excited about, is for burning into wood, soldering or cutting: 
Dremel three piece tool set

I had a project in mind and I knew either the engraver or the VersaTip would work:
Dremel tool kits

I worked in the garage on a large scrap piece of wood and started trying them out (after reading all the materials on operation). 

I tried the engraver first and it was so cool and incredibly easy to use: 
Dremel engraving tool

I knew right away this wasn't the look I wanted but I am thinking of ways I can use this one on metal or glass in the future. 

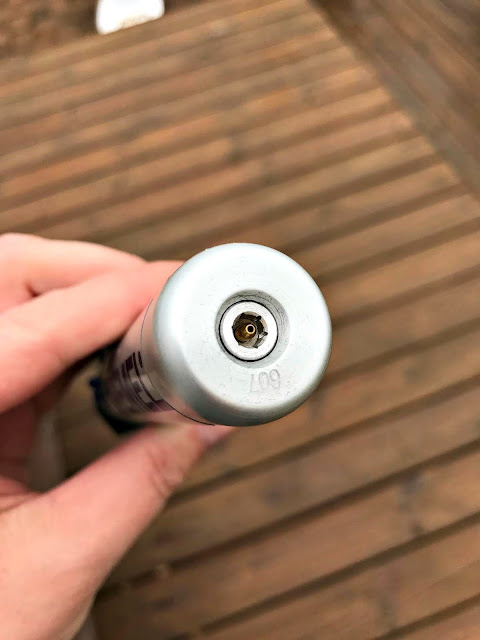
I really wanted to give this project a burned look so I decided to try the VersaTip instead. You need to fill the tool with butane -- we already had some for filling our candle lighters. You flip the tool upside down and then press the butane nozzle into it. It only takes a few seconds to fill it up -- you'll feel the canister getting cold: 
Butane Dremel wood burner

You need to let the butane warm up a bit and then it's ready to use! 

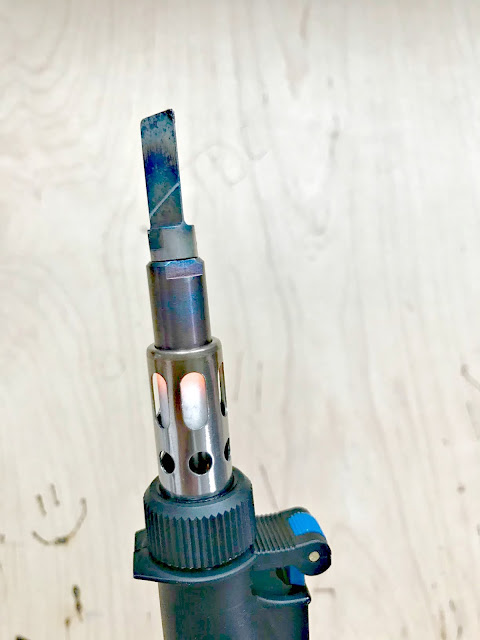
It was incredibly easy to operate -- there's a safety switch but once you flip that up it's just like a lighter. You'll hear the torch start burning and you'll see it as well: 
Dremel VersaTip for wood burning crafts

You can smell the butane a bit -- that's another reason you may want to try this project outside. It's not overpowering by any means. This tool comes with a bunch of tips for different projects -- from cutting to soldering to burning. I found this one above to be the easiest for this project. 

On a side note -- I was thrilled to learn that I can use this tool for caramelizing foods as well. I've always wanted to try making creme brûlée at home and now I can! :) 

Once I was comfortable with using the tool, I printed out what I wanted to burn into the wood. A friend of ours is getting married later this year and I thought this would be a cute addition to their gift. I LOVE adding a handmade or personal gift for weddings or baby showers and used to do it a lot. I'm trying to get back to that. :) 

I found a package of wood slices at Michael's for this project and taped the image onto the wood: 
Burning wood with Dremel tool

Then I traced the letters with a pen to transfer the image to the wood like I showed you how to do here

On some of them I found it was helpful to trace the imprint with a pen before I started with the tool. I took the paper off (don't leave it on there with a flame!) and started burning the shapes into the wood:
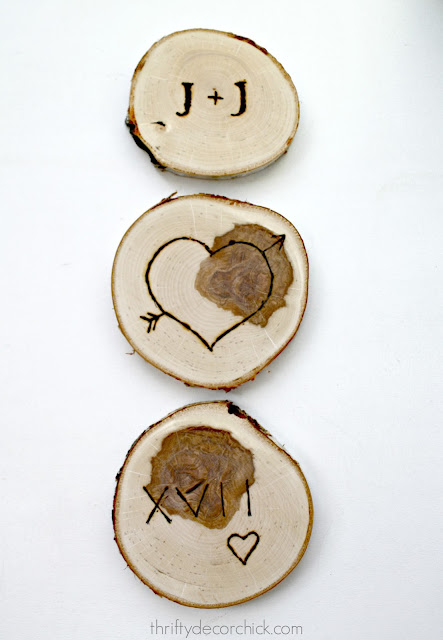
Wedding gift wood coasters

This is not a quick project -- you'll want to take your time and be methodical about it. I started with a lighter hand to get my shape and would go back over it to get the darker burnt look. 

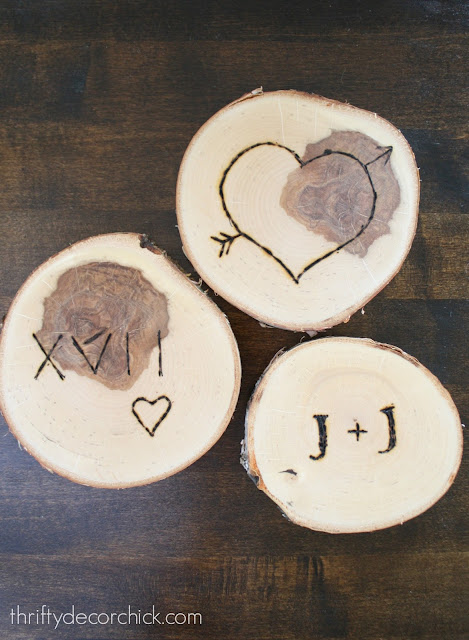
I think they turned out SO cute. I'm kind of in love with them. In my head I made these planning to gift them as coasters so I added a couple layers of wipe on polyurethane:
DIY wedding gift/craft

But really, they could be used in so many ways!

I added some felt stickers to the bottom of each one so they don't scratch: 
DIY wood slice coasters

I tried to do wedding-type images -- their initials, the heart (like one you would see carved into a tree) and the Roman numeral for the day they're getting married and the year: 
DIY wood slice wood burning craft
I think they'll make great coasters! But they could be used in so many other ways too -- I could see them as super cute ornaments if they decide to drill a hole into the top of each one. I also think they'd be fun as art in a shadow box or placed on top of a black background in a frame. They could also be used as small trivets for dishes -- there are so many uses!

I just think they're plain cute and I smile when I see them. The bride and groom are a fun young couple and I hope they'll enjoy them too: 
Wood burning craft/gift with wood slices

I'm so glad I tried this tool and got over being intimidated by something new. Of course after I used it I realized how easy it was! We have a Dremel cutting tool that I've used in the past but this set is more for precision crafts and items where you want to add more detail. I highly recommend it if you are interested in doing those types of projects. 

Have you tried this tool for any crafts or DIY projects? I though it was fun and it wasn't nearly as intimidating to use as I thought it would be. I felt comfortable with it within minutes of trying it out and burning the wood was fun. My mind is swimming with ideas for future projects! Now I'm off to make creme brûlée! ;) 


Hello there! First of all, I know there is a weird redirect going on with my site and I'm trying to get it figured out. I'm still here! Go ahead and click through if you get the notice and hopefully I'll have it fixed shortly. 

You all have been so helpful the past couple of weeks! If you missed my review of our family room sectional earlier this week, check it out here. You all had some great ideas that may be helpful for you those of you with similar issues. I've already tried adding a pillow to our cushions and it made them way too thick, but I'm going to keep working on it. 

I have a whole post planned soon about the best way to hang your TV without seeing cables and cords everywhere (safely). But this post goes into more detail on how we hid our electronics in our family room. I didn't want to have the components out if we could help it and this was a perfect solution! 

When we took down a wall and extended our family room years ago we had to build our gas fireplace out into the room. Usually there's a little "dog house" bump out outside that your fireplace sits in, but ours had been a corner fireplace. Adding that bump out would have required permits and a lot more time. 

Since the fireplace was going to come out into the room anyway, I figured out a solution to reconfigure kitchen cabinets (like I do a lot in our house) and make them into built ins to hide the electronics:

I didn't do that part personally -- the guys we hired expanded them in the back so they would be deep enough to hold the electronics. We used upper cabinets because the lower ones were too deep for what we needed. I had them extend these to 18 inches deep instead of 12 inches like the original cabinet. 

I later cut the center part of the doors off and then installed metal sheeting so the components could breathe: 

I love that the sheeting lets air flow, but also still hides the items inside pretty well. The best part -- the remotes still work! 

Here's how it looks inside: 

THIS is important and I will go into this more at a later date -- do not run power cords through the wall. I learned years ago this is NOT the correct way to hang a TV. We had an electrician/AV professional install the proper outlets and plugs behind the TV. (Power and receptacles for all HDMI, etc.) 

I had the fake wall built above the fireplace so I could recess the TV back into it and have it sit flush with that wall when it's pushed back:

I love that you don't see the wires behind the TV or the mount when the TV is in it's regular position (it also pulls out, swivels and can go up or down). I highly recommend this little trick if you are considering hanging your TV -- especially with a mount that pulls out!

The other cabinet is pure storage which is awesome! Those fabric covered bins are from IKEA and I have all our extra remotes, phone accessories and random electronic stuff inside. I LOVE having this storage in the family room:

I love even more that there is empty space in there! :) 

This fireplace wall is the focal point of our family room for sure. I think it turned out so well. The fact that the electronics are hidden away makes it even better:

I still haven't hidden the subwoofer, but now it doesn't even bother me. Years ago I was going to  build some kind of cover for it, but now we hardly notice it.

These DIY tricks are what completely transformed this wall -- it's another spot in our home that looks good but also functions wonderfully as well.

Here are some more helpful projects from this wall if you are interested!

How I used $13 to panel the wall behind the TV:


And I just did this again this morning! I share how to clean the (inside) glass on your gas fireplace

It's actually quite easy! :) Ours gets yucky every year and this helps tremendously! 


Hello all! Sorry for the silence on the blog on Friday -- our boy had the flu and my husband was out of town. I was focused on getting him comfortable and feeling better. :) It's been going around and it was a doozy! 

I like to update you on some of our bigger purchases occasionally and this one was probably our biggest furniture purchase ever for our home. I get asked about this piece ALL the time, even years later. We bought our family room sectional from Arhaus six years ago (the Landsbury) after we paid off our mound of debt. I was SO excited about this purchase and researched the best sofa for months

I updated you on it a few years ago and it was still doing well for the most part. But over the years since then I've grown more and more frustrated with this sofa and decided it was time to share our review after years of use.

Because our experience, we won't be spending extra on a sofa again. There are definite pros and cons with this one and I'll be sure to list those below. 

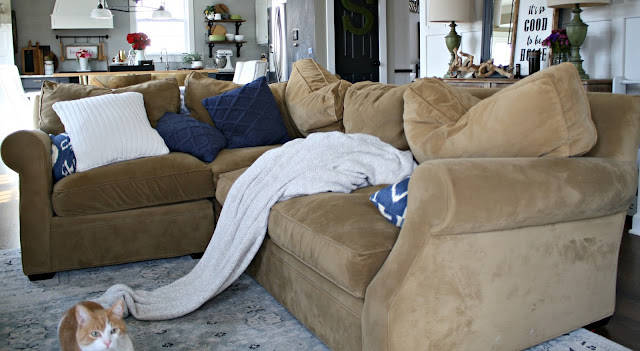
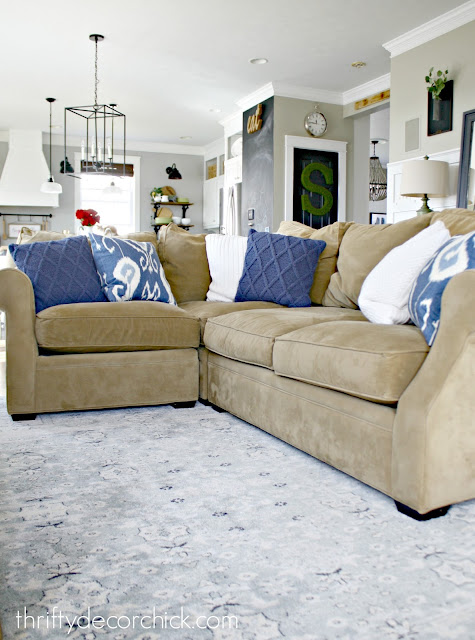
Here's a look at the sectional as it looks 95 percent of the time: 
Landsbury Arhaus sofa review after six years

Usually the pillows are on the floor so this is pretty good. ;) 

Overall the construction of the sofa has held up beautifully. It is a solid, heavy sectional and there is no give or creaking or any sign of it falling apart any time soon. For six years old and daily use, that's pretty good. 

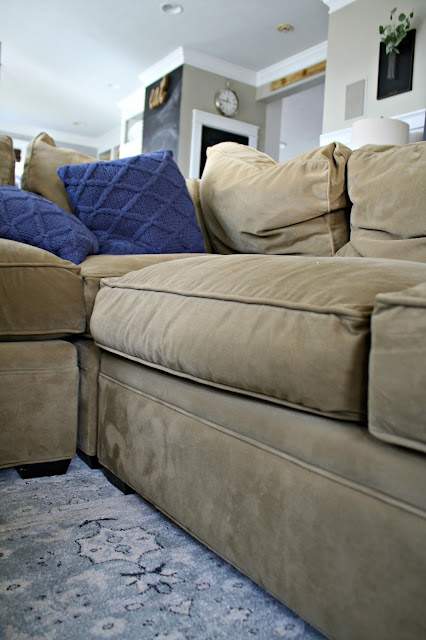
Our issues are with the cushions. It has gotten to the point that they drive. me. crazy. Most of the seat cushions are still holding up well, but one has started to flatten out: 
Arhaus sofa review

It's hard to see just how much it's changed shape here, but it looks different than all of the other cushions and the front on one side sticks out quite a bit. (Probably a good three inches past the base.) I've tried to fix it but nothing works. You'd think it was from overuse but I rotate the cushions (flip and move locations) every few months. 

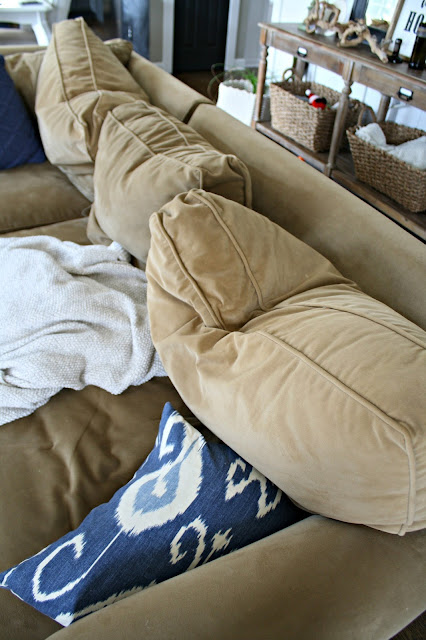
The bigger issue and the reason this sofa has started to drive me crazy are the back cushions: 
Down filled back cushions on couch

For two reasons. One, you can kind of see here that every back cushion is now two-toned. :) The top part is a different color from the bottom. We purchased the protection plan but when we called about this issue we were told this wasn't covered. Of course. 

The bigger problem is that they do not hold their shape. At all. Ever. It is so frustrating: 
Down filled back cushions on sofa

We purchased this sofa specifically because it had down-filled back cushions. That was my mistake, but I had no idea it would turn into this. They are comfortable -- but I would much rather have a firm back pillow that holds it's shape instead. 

I used to be able to fluff these up with my hands pretty easily, but those days are gone. The fill has separated inside and I have to take the entire cover off and try to move everything around to make them even again. 

And finally -- the fabric is called micro denier and for years I was thrilled with it. It is very similar to microfiber but without the "shadows" look that the latter has. I didn't want the shadowy look -- although you can see in the photos above that there is still some of that. 

It was like this magical fabric for years -- anything that spilled on here we could wipe off with a wet rag. No cleaners, just water. It was AWESOME! I don't know what is going on lately (I'd say the past six months), but it's stopped working. I can't explain it. They'll wipe away a bit but when it dries it comes back. I'm pretty sure a professional cleaning would take care of it, but I miss how easy it was to clean! 

I have NO idea how long a sofa should last. Maybe six years with daily use is pretty good? Who knows. Here are my thoughts on the pros and cons of this Arhaus sectional: 

PROS:
  • The construction of the actual sofa is excellent. It doesn't bow, wobble or make noises when we sit. It is a solid sectional. 
  • For years I loved how easy it was to clean the fabric. LOVED.
  • We needed a small sectional and they were the only store I found that could offer such a small sectional (not just a sofa with a chaise).
  • The seating on the sofa is deep and comfy. 
CONS:
  • The back down-filled cushions drive me MAD. They do not hold their shape and always, always look messy. Unless I spend 30 minutes punching and reshaping them that is. :) 
  • The fabric discolored quickly and the protection plan does not cover it. 
  • The seat cushions are starting to lose their shape as well and there's not much we can do about that.
Would I do it again? Probably not, not for what we paid. I expected it to be a quality sofa for a good 10 years. 

Here's how it looks after some fluffing: 

Review of Arhaus sectional

Review of Arhaus sofa after six years

But two of us sat on it this morning and the dog plopped onto the back and now it's right back looking like it did in the first photo. ;) I've honestly given up on trying to keep the back pillows tamed -- when we have company over I just do my best to make them look decent. 

Someday I want something a little more streamlined in here (now I'm more drawn to something with a smaller arm like our sofa in the living room), but for now we continue to enjoy the comfort and hate. the. cushions. Ha! 

Have you had a good or bad experience with this sofa? Do you have one you love? I know this is a topic many of you are interested in at one point or another! 

Edited to add: Arhaus contacted me and graciously offered to replace our back cushion inserts. We are so appreciative! 


I'm sending out an SOS! I got my act together last year when I finished purging our whole house using the Konmari method. It's one of the best things I've ever done for our home.

BUT I ignored a small section of the house. Going through our photos was too overwhelming at the time and I knew it would take me at least a month. So I told myself I would tackle it later. Later has come and I'm totally intimidated by the thought of it.

This is what I'm going to tackle over the next few weeks:

That's not even all of it -- the rest goes back into the corner of the closet. As you can see, most of it is at least in some kind of box. MOST. When we try to access something up there at least ten photos rain down on us. :) 

Although it doesn't look like it, I treasure these so much. I actually have quite a few old, vintage photos from our family (on all sides) through the generations. Because my home life was crappy for a few years in my teens, I lost pretty much everything from my childhood. All I have left is in a small storage box and these photos -- so I want to do them justice. 

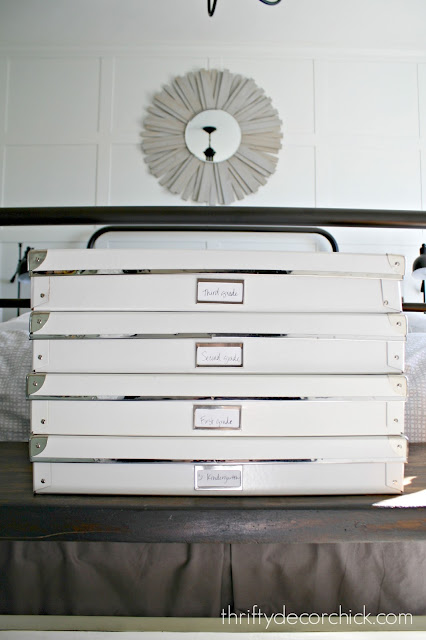
The only part of this that is slightly put together (although it doesn't look like it) are the boxes I use for our son's school artwork and papers:
Organizing and storing kids papers and artwork

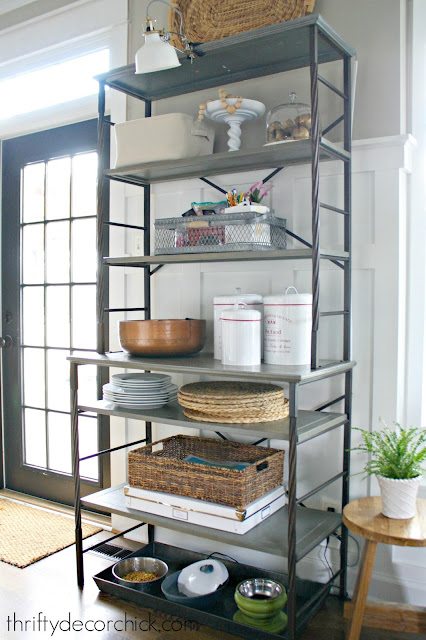
I get them every year at the Container Store and use one box for each grade. It's super easy to slip art and papers in the box -- we keep it on our shelves in the kitchen:
Pretty and useful kitchen organization

Someday I'd like to do even more with that, but for now the photos -- those are my nemesis. And the thing is, we've barely added any photos over the past ten years and that's something I'd like to change. I know...I've got enough to deal with here, but I actually want to add to the photos because everything sits on our computers and phones. I really want to start printing them out and adding them to photo albums. 

So I HAVE to get this figured out. This is my plan and then I need some advice on my questions below: 

1. Take everything out of the closet. 
Loose photos need to go into boxes -- I don't even care what box at this point, I just want them put away. 
2. Go through every single photo. 
This is going to take forever. I just know there are so many random pics that we really don't need to keep, as well as plenty of duplicates. (Remember when we used to get film developed and got doubles? Yeah, I did that a lot.)
3. Organize the photos by box. 
I actually did this years ago -- those photo boxes used to have labels. No idea where those went along the way. 😳 I had a box for travel, one for high school, college, family...etc. Need to do that all over again. 
4. Go through boxes and start filling photo albums. 
I'm not sure I want to get a ton of photo albums and fill those, or use the boxes for most of the pictures. How do you do it? I DO want to fill a few albums (I already have them) because I know we would pull them out to look at them a lot more often than heavy boxes.
5. Organized large photos
I have quite a few old family photos that are especially large. I think I have a solution for that but I'll let you know how that turns out.

Number five is why I really want to tackle this -- I realized recently that our son doesn't often see photos of himself from years ago unless we show him something from Facebook or our old phones. It makes me sad! I want him to be able to go through the albums with us and I want the albums organized so he can have them someday if he wants them. 

This is where I need help!
  • Do you use boxes or albums for your photos and why? 
  • Do you print photos off your phone on a normal basis? My sister uses the Meijer app and is SO good about sending off some to be printed on a regular basis. I want to do the same. Is there an app you like or a store that does it? 
  • Where do you store your photos online? I used to use Photobucket for personal photos but haven't really done that for years since most of our photos are on our phones. (Although I think they have an app -- I need to look into that.) Are there apps you like that store photos? 
  • I'd really love to start making the photo books I see out there -- maybe for specific trips or for a year at a time. Do any of you do the printed books on a regular basis? Is there one you love? 
  • How do you store photos long term -- on your computer? An external drive? Online? 


Whew! See? I need help! I want to get this part of our life under control, but I also want us to start enjoying all of these memories a bit more. 

I feel like this is the final organizing frontier in our home...everything else has a place and is organized fairly well. Once I get this under control I know I will feel great about it. And this is another one of those things that I want to have organized for our kids -- I try to be cognizant of what we're leaving them. (God forbid if anything happens to us.) But even long term, I want to have our memories put together for them in the future. 

I'd love your advice! You are all a wealth of information so please feel free to share! :)


Popular Posts

Blog Archive