Hey there! I'm back with some slight progress (but still progress) in the loft/craft room that is my project for the summer. I told you about it here and it hasn't moved as quickly as I'd like just beceuase we've been out of town so much this summer. Since I shared this room last I've had extra outlets installed and wiring for sconces run. The lights just came this morning so I'll put those up today to see how they look -- I will show you soon!

I'm building a wall of storage/desk in this room and I'm going back to my standard when creating built ins in our home -- unfinished upper kitchen cabinets. I've used these a few times in various ways throughout our house and I keep going back to it because they work every time! They always turn out looking fantastic so I'm sharing how I get them to that point today. 

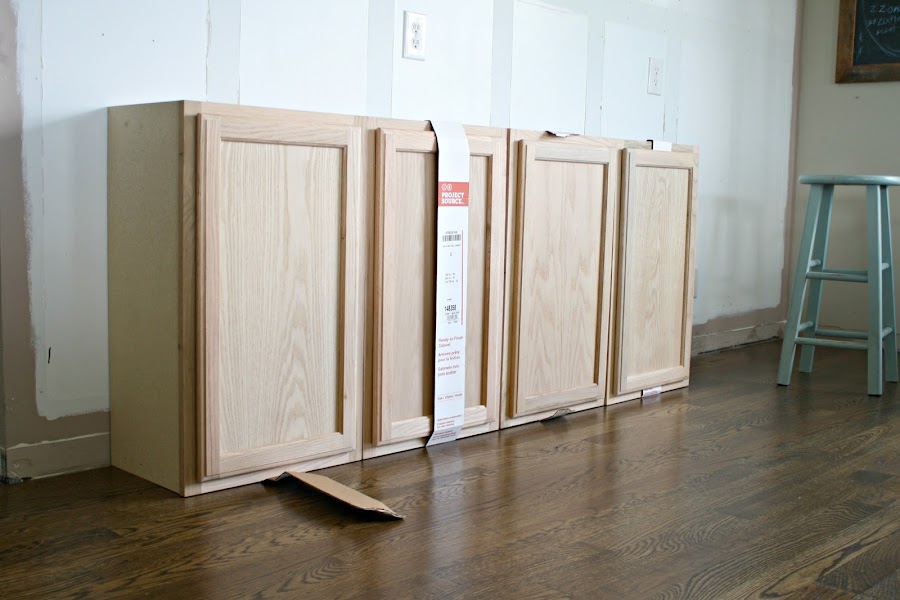
I played around with the measurements and finally came up with a plan for cabinets that would fit without any reconfiguring on my part. I want this to be easy. :) This wall is about 11 feet and I am leaving room at both ends -- one end for a long window seat that will go along a wall and the other end I'm planning to leave an open spot: 
Making built ins from kitchen cabinets

I still have two more cabinets to buy but this gives you an idea. I'm leaving about six inches at the end where the wall stops because when we move someday this room could be turned into a fourth bedroom. I think it would help our value quite a bit to do that so I want to leave plenty of room for a wall to be put in there. My design for this room will work great even if this room is ever closed off. 

These are 18 inch wide by 30 inches tall -- since I add a little height the desk area will be a little higher than standard height. I've already found adjustable desk chairs that will work perfectly. :) I plan to pull these away from the wall just a bit (I'll build brackets that will attach into studs and then connect the cabinets) so that the counter area is bigger than the 12 inch depth. I'm thinking at least 18 inches. 

The first step to making kitchen uppers look like built ins is raising them up a bit. If you just put them on the ground they look out of place. I use 1x4s and nail them into the sides around the bottom of the cabinets: 
How to make cabinets into build ins

The center piece is for added support. To make these look custom I wrap the bottom with baseboards and this pulls them up off the ground so that's possible. I add scrap wood around the bottom to make it flush with the cabinet before I install the base -- otherwise your base would tilt back into the open space against the 1x4. 

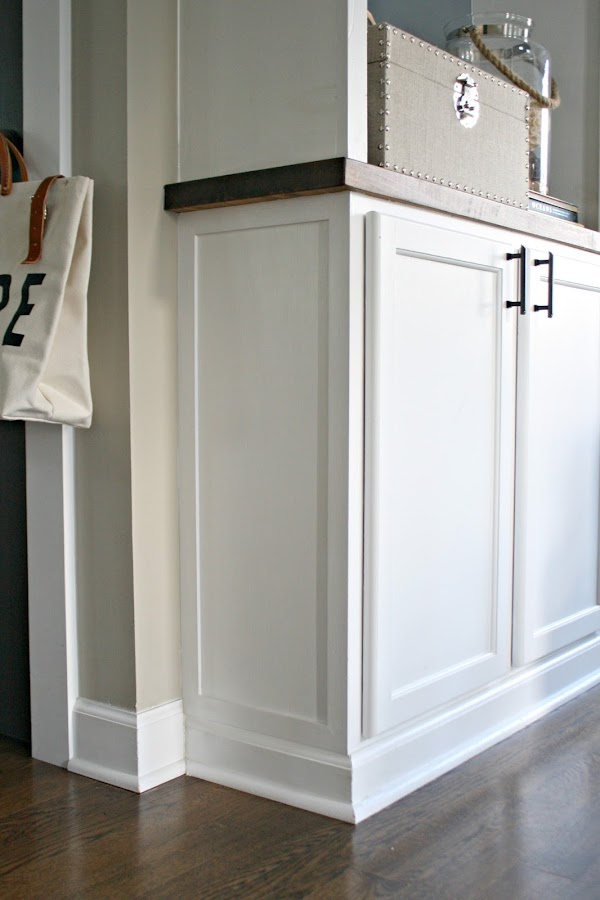
When you add the base and and then some simple trim on the ends to dress it up, it gives it all a much more sophisticated look:
Using kitchen cabinets to build a bookcase

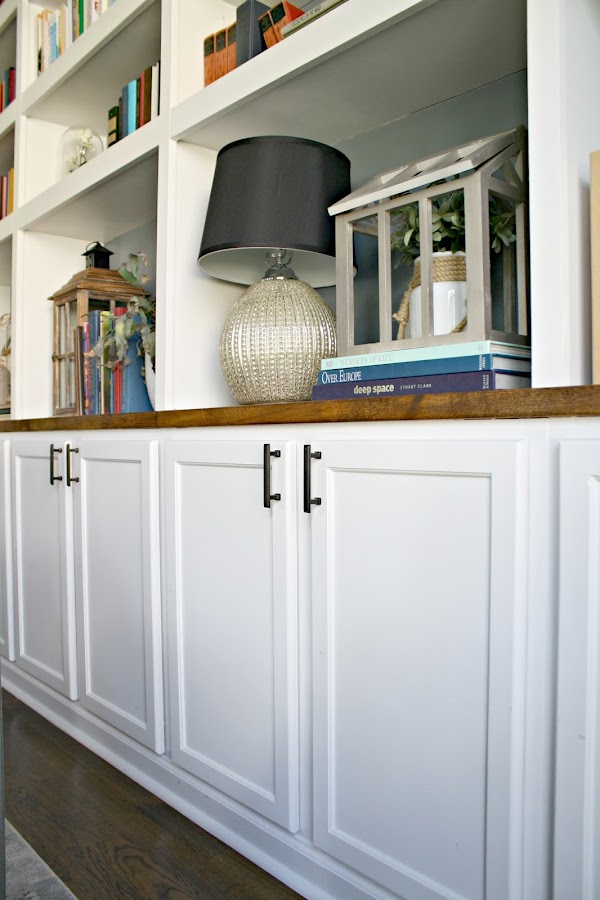
Of course the butcher block counter offers some nice contrast and makes it feel even more custom: 
Kitchen cabinets as base to bookcases

Right now I'm planning a butcher block top in the loft too, but that may change. 

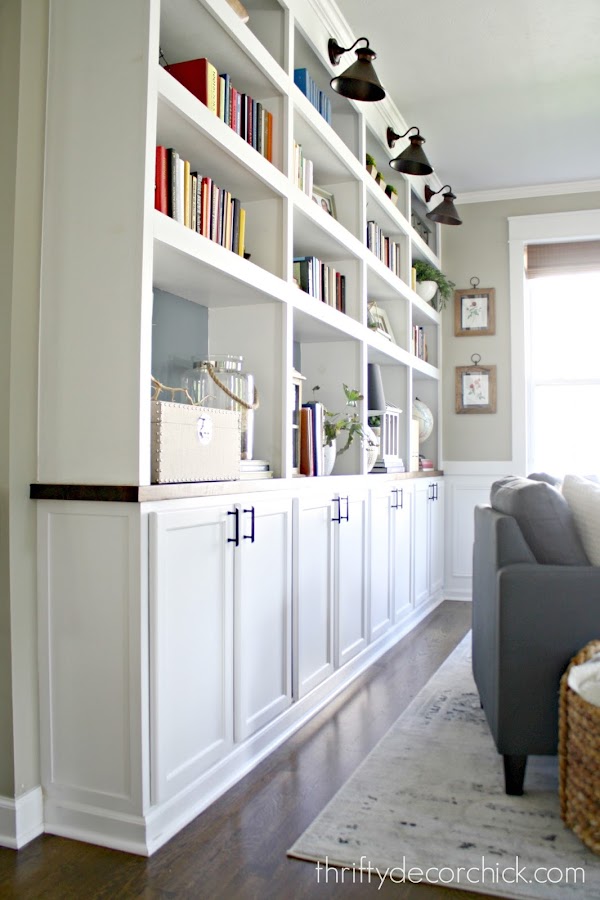
This built in is in our dining room turned library and I've shared it a million times, I know. But we easily saved a couple grand by doing this project ourselves. The inexpensive cabinets make it a really affordable project!: 
DIY built ins with kitchen cabinets

It is truly the best combo of form and function -- those cabinets are only 12 inches deep but they hold a ton! (Think of how much they hold in your kitchen.)

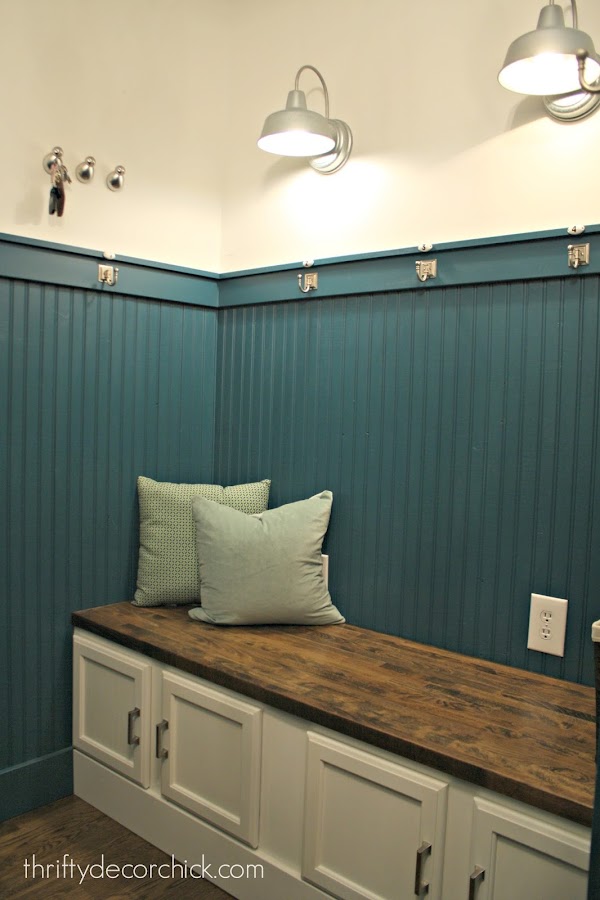
I used the upper cabinets that go over the fridge for our mud room bench:
Mud room bench from kitchen cabinets

And my first project with these was another project I did with my Dad for my son's bedroom
Blue and red airplane room

I have Dad to thank for this idea -- he's the one who thought of it for this room and I've kind of taken off with it. :) I think the loft will be the last place I do this though -- I don't foresee anymore built ins in the house! 

Have you tried this trick to build custom built ins or bookcases? I'm thrilled with how they look in our home and I hope to share you a lot more progress in the loft very soon! 


Hey there! How was your weekend? We worked hard outside and it's looking so beautiful! A few of you have asked about the backyard tour this summer and I'll have it up as soon as I can. We're so behind this year because we've been working on getting bigger projects done that only happen every few years (like deck and playset staining). We still have to have the house trim painted and then we will mulch, then I'll be sure to share it with you! We've been working so hard but there's so much to be done. Having outdoors spaces is WONDERFUL but a lot of work!

We've used the backyard more that ever this summer because it's turned out so beautiful. We absolutely love it. I shared our new outdoor dining room with you a couple weeks ago:
Outdoor lights under pergola

I LOVE having the table up under the pergola. We already use it so much more now and I love that we don't have to worry about soggy cushions to enjoy it. 

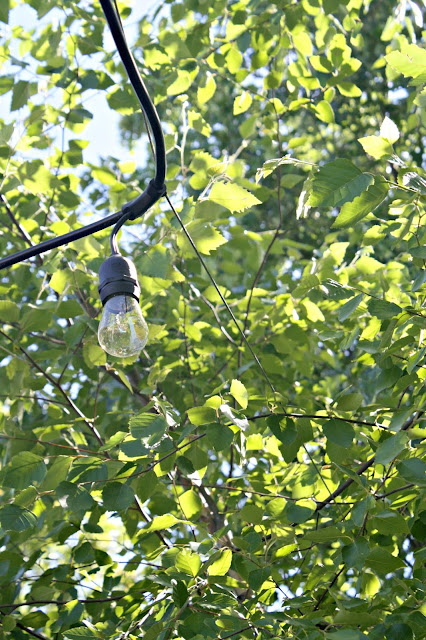
One of the smaller projects we got help with out here was one I've planned for a year now, since we added those pretty lights you see up there under the pergola. I shared more about those lights here and they are still holding up incredibly well, even through the winter. They are the best we've found and I highly recommend them. They are industrial quality -- I see the same ones at restaurants all the time. 

I bought three strands last year and planned to use the third one for this project. I really wanted to string another set out between the trees around our patio, but the river birch aren't strong enough for these heavy lights. Like I said, they're industrial quality so the cords are thick and would weigh down the trees and break them, especially in stormy weather. 

So we asked our guys who help us out with projects what they recommended and it was just what I had in mind -- using wires. When I see these strung over patios at restaurants they are usually hung on wires. I believe it's because they are so heavy -- just stringing them alone would pull on the cord too much and they would sag quite a bit. 

They ended up getting wire from the hardware store and large eye hooks like this one: 
Tips to string outdoor lights

They used some kind of bracket to close down on the wire to keep it taught. These
look like an even better option:

These come with the eye hook and I believe you tighten the wire by twisting. 

One end went into the pergola and then they strung it way out to our bigger trees in the back. It was quite a span -- I'd say a good 15-20 yards of wire at the longest section? We have more mature trees back there and they won't bend with the tension. They took another wire over to some bigger trees on the side of the yard as well. 

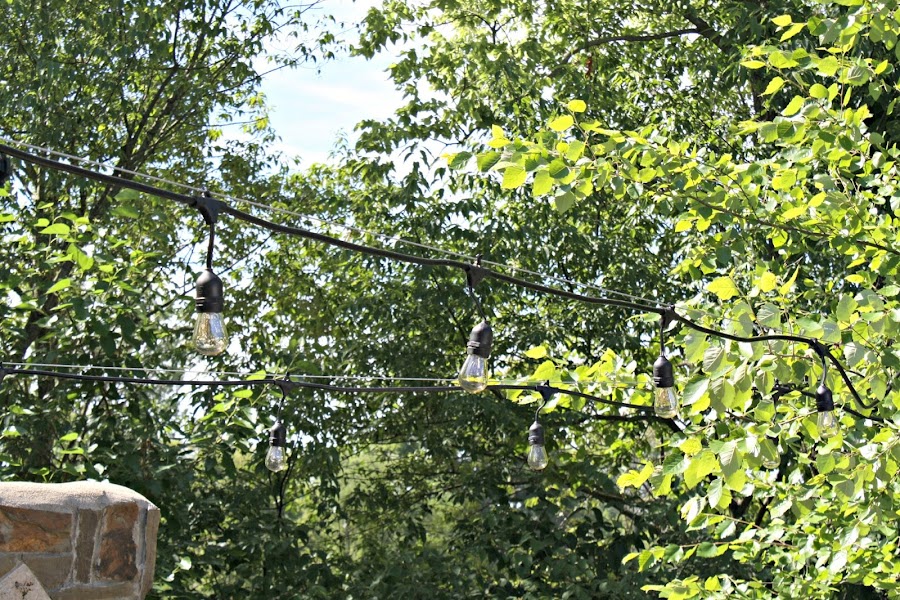
Then they were able to hang the lights buy using zip ties -- as long as you get them tight the the lights won't move anywhere. Here's a closer look at a corner: 
Using wire to string outdoor lights

See the wire going over through the trees? 

And here's a wider shot of the wires and lights:
How to string outdoor lights

I actually wanted a more "droopy" look then what we ended up with, and was almost going to take a few of them off the wire to give that look, but decided against it. I think the more support the better, and the straight look has grown on me. I think it looks clean and keeps them out of the way. 

If they couldn't get the wire out to the bigger trees I was going to have them place some poles in the ground, but that would have been a lot more work. (You'd have to dig and use cement -- but it's an option if you don't have strong trees.)

Sometimes you can see the wires a lot and sometimes barely at all. They don't bother me though because they made it possible to have a truly dreamy space underneath. The first night we sat under the lights and giggled like little kids because it was just SO pretty. It's just silly how gorgeous it is lit up. 

I was going to take a photo from under the lights for you but we had storms last night. I may update this if I can grab one tonight. For now this is the finished result from further back:
How to string lights over patio

We have quite a grade to our yard so getting high enough in the trees was going to be difficult -- that's why we hired this one out. If you have a flat backyard and something to attach the wires to it would be a pretty easy DIY project. 

Just when I think it can't get any better out here, it does! :) They add so much ambiance out here, we just love the look. 

P.S. Here's a look at night! :)


Affiliate links included for your convenience!

Hello my friends! I hope you had a great week! We just got back from a great week away in North Carolina. Our son did the Duke basketball camp and we can't recommend it enough. It was a fantastic program and we'll be back next year for sure. 

It was so great to be away for a week -- my husband and I truly relaxed and just enjoyed not doing much of anything. Except eating, drinking and taking naps. :) 

Now we're back home and I'm refreshed and ready to tackle stuff at home again. I have a new energy about a lot of projects and my mind is swimming with things I want to get done. 

Today though, I'm talking about another aspect of the huge purge I completed weeks ago. My biggest nemesis when it comes to clutter has always been PAPER. Can I get an amen? It's the thorn in my side, the pain in my neck, the fly in my ointment:
how to stop paper from coming in the house

But you know what? Over the past couple of years I've mostly conquered it. Almost. Enough that I don't feel like it takes over our kitchen table and my car anymore. 

These are my tips on mail specifically -- when it comes to papers from school, good luck to you my friend. :) No really, I do try to handle that stuff immediately, and whatever we need to address hangs on the command center in the mud room. That process does work well for me. 

This is for those of you who want to try to control the paper and lessen what you bring into the house. These tips work and I promise your paper load will lighten if you try them yourself. I will address what I do after all of this in a future post. 

Step 1: Go electronic for bills

If you can go electronic -- do it. We have already with many companies, but still have a list to go.

I'm slowly going through the utilities, investment companies, bank statements and everything else we get on a monthly basis. I used to hesitate when it came to not getting a paper statement, but I'm slowly getting with the times. I realized, how often do we really look at them? Bank statements more so than anything else -- but I think it's far more secure to keep them virtual than on paper. (I know that can be argued but in general, yes.)

Also, it takes mere seconds to log on to see a specific statement. I used to keep them all in the file drawer and that took a lot more time to dig through. Most companies will gladly switch you over and I find it far easier to keep up with. And LESS MAIL. That is our goal folks!

Step 2: Unsubscribe from catalogs and junk mail

I looove a good catalog. They are my jam. But sometimes we grow out of them, I just don't care to get them anymore, or we get on a list we don't want to be on. If this is the case for you, try Catalog Choice. I've used it for years and it works. 

You have to create an account and then you can search literally hundreds of catalogs to unsubscribe. It's awesome and within a couple months they will stop coming to your door. 

I made the mistake of signing up for Restoration Hardware once…and if you get them you know that their catalogs are RIDIC. I feel like I kill a tree every time they send them out. This is a great option to lessen the load in your mailbox and in your house. 

Also, did you know you can opt out of all kinds of offers and junk mail? Many don't realize this but it helps lessen the paper you'll bring into your home tremendously. I use DMA Choice for many marketing mailings. Sign in and you can opt out of catalogs, credit offers and magazine offers.

Then you can go and unsubscribe from pretty much anything else at the National Do Not Mail list: 


As you can see, I don't want any of it (that I don't specifically ask for)! You can get pretty specific with this one too. Can you imagine not getting a million political mailers this fall? The dream may be realized. :)

Remember you'll need to do this for each of you in the home who get mail. Marketers focus primarily on women in the household so even if just the woman does it, it will help tremendously. 

Step 3: Get rid of it before you walk in the door

I keep three bins by our door in the garage -- one for recycling plastic and metal, one for paper recycling and one for shredding. My goal is to get rid of 90 percent of the mail before I even walk in the door. Sometimes it's 100 percent. ;) 

I use similar bins from the Container Store: 
Ours are white, not clear, and IKEA has nearly identical ones for a lot less. I like the ones with lids so they keep the items contained. 

When I keep up with this -- getting rid of most of it before I even walk in the house, the paper clutter is kept to a minimum. 

All of these tips work to bring you less mail and paper to begin with. You can tailor them to what you want and can alway go back and edit most of them if you change your mind. I can guarantee the paper you'll bring into your home will lessen within two to three months. And that is the first and most important step to getting control of it. 

Do you have any tips when it comes to mail? I'd love to hear them! 

Have a great weekend. :)

stopping junk mail


Hello my friends! I hope your weekend was great. I have lighting on the mind lately -- I picked the wrong lights for the wall in the loft/craft room redo that I'm working on and need to find something else that works better. I don't often misstep with that kind of thing but the ones I got are crazy big!

I need to reevaluate and I think I know the direction I'm heading. I have a trend in my own home and it comes from my love of sconces. I adore them. But the kind I like, with beautifully arching "necks" or swing arms that are adjustable ALL seem to be ridiculously expensive. Like, $200 and up a pop. For one I may spurge…maybe two. But usually you use more than one:
lights above windows in kitchen

Goodness, that kitchen is dreamy. I want black window mullions in a bad way. 

Anyway, I just love the look. They look great in kitchens, in hallways, over windows and doors, in stairways, workspaces…everywhere:
swing arm lights in kitchen

I learned years ago that the price was more than I was willing to pay, so I started thinking outside the box. The answer? Outdoor lights! I've done it again and again and they give me the look I want for a fraction of the price. 

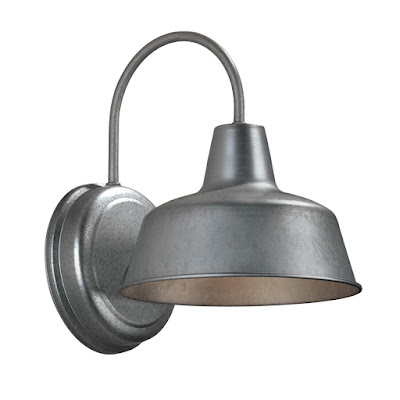
I used this galvanized light from Lowe's in a couple spots in our home:

galvanized dark sky outdoor light
It's $30 and super cute. I used a couple in our mud room
DIY mud room bench

I love that galvanized look! 

And also over the window seat in the kitchen: 
window seat in kitchen

Most of the outdoor lights I find that I like are rated and described as "dark sky" which means they cast the light down below (this helps lessen light pollution outside). For inside this means ambient lighting that is perfect for cozy spots or areas you need task lighting. 

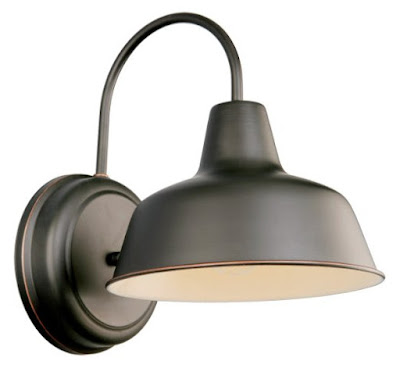
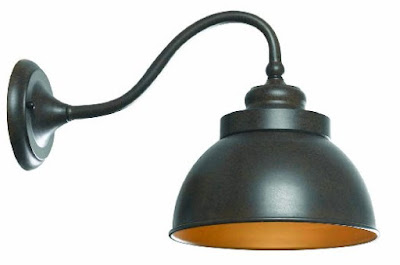
I found a dark bronze version of this one here

bronze outdoor sconce

I think the first time I ever used an outdoor sconce inside was in my son's book nook I created years ago: 
DIY book nook in closet

I still think it's the cutest little light ever and I found it for only $12 at Menards! Seriously, the outdoor lighting prices are a steal compared to indoor sconces. 

I can't find that one anymore but I LOVE this one too. It has the cage look on the bottom, which is very industrial and farmhouse-y:
bronze light with cage
I knew I wanted to add the same look on a large wall in our kitchen, but didn't want to spend a ton. I found the perfect solution with these dark sky lights


gooseneck bronze lights for kitchen


I ended up spraying mine black and I LOVE them in our new kitchen
DIY stove hood with lights

I put the vintage bulbs inside for a soft glow (and they are dimmable). They are one of my favorite parts of our kitchen! 

I looked for MONTHS to find exactly what I wanted over the DIY bookcases my Dad and I built for our dining-room-turned-library. I mean, it was driving me crazy. Of course when I looked at the outdoor section at Home Depot I found something that worked perfectly: 

bronze outdoor lights for inside
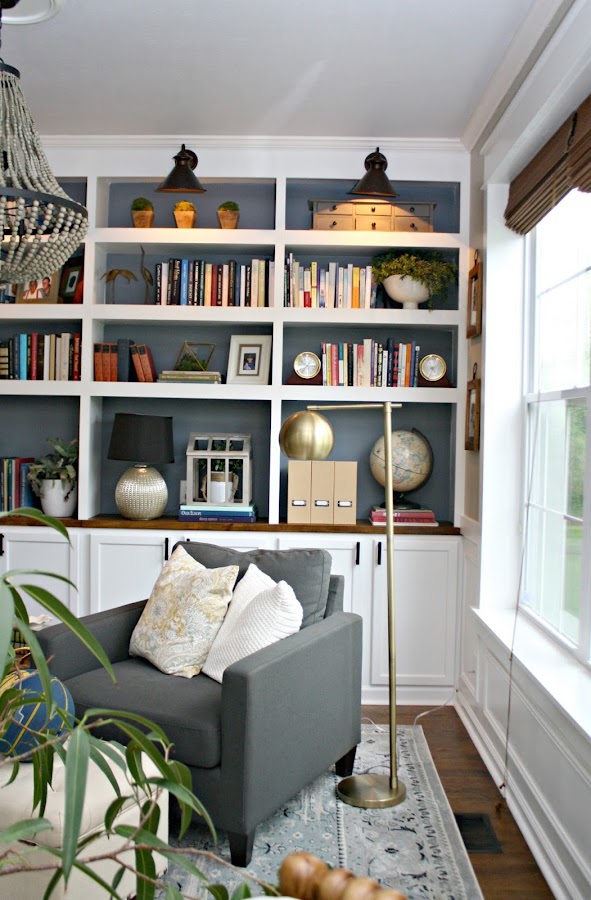
I wanted these to tilt and shine onto the bookshelves, so I bent them ever so slightly and it worked! They are lovely and I adore the added light in here:
How to build bookcases with accent lights

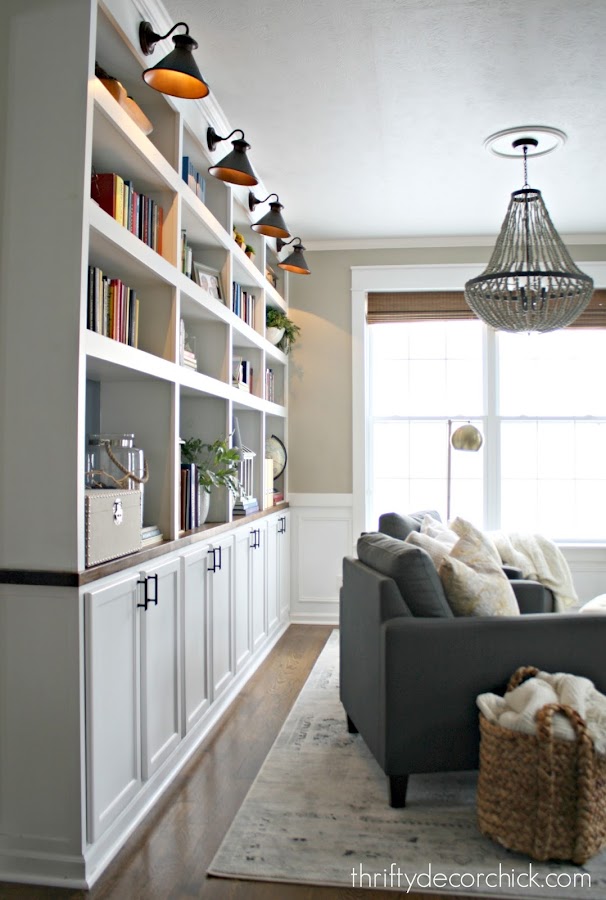
I needed four and at only $30 each these were a fantastic find. Unfortunately I can't find these exact versions at Home Depot anymore but you can still find them on Amazon here. I love how the bronze glows underneath when they are lit up:
DIY bookcases with accent lighting

There you go -- a much more affordable option if you love this look as much as I do! These sconces are one way I love to add character to our home -- they make it feel so cozy and older than it really is. It's a timeless look that I just love. 

So if you're on the look for that perfect sconce, check the outdoor lighting! I bet you'll find something you love! I'll be back soon with an update on what I pick out for the loft project. :) 

I'll be back this Friday as I'm taking a few days away from the computer to hang with my family this week. See you back here then! :) 

Some affiliate links included for your convenience. 


Hello there and happy Friday! I'm super excited about this project -- one, because it turned out beautifully. Two, because it's a piece that means a lot to me and I'm thrilled to have given it new life.

I work with Minwax occasionally and share ideas using their products because I LOVE them. This time they asked that I share a do-it-yourself project involving a family heirloom or something significant that holds meaning for our family. Unfortunately I don't have any furniture passed down through our family. All of mine are vintage pieces from other families I found on Craigslist or Goodwill. ;)

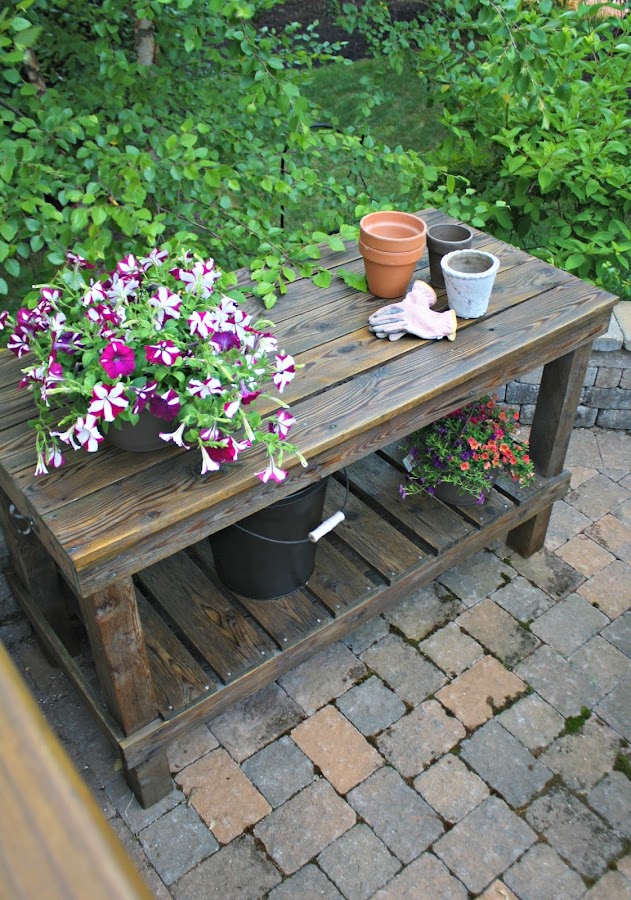
So I thought hard about something that means a lot to me in our home and came up with the perfect item…and it desperately needed an update. Five years ago I shared the DIY pottery bench my dad and I made:
I'm really good at looking at most of the items in our house as just "things" -- with a young child and a cat who is a little cuckoo and goes around knocking items off of shelves willy nilly, you learn to let go. There are certain things that I would be upset at losing though, and this bench is one of them.

My Dad and I had some tumultuous years, to say the least. We were estranged for awhile and around the end of my time at college we started rebuilding our relationship. It is one of the great joys of my life that we have become so close again. I am so incredibly thankful. Dad has seven kids but makes a point to spend one-on-one time with each of us as often as he can, including the five grandkids. The day we made this we spend the whole day together -- writing out our plan, shopping for materials and then building the bench. I have wonderful memories of that day and we still laugh that it went together so easily -- that's rare for both of us! :)

When we built this I spent the extra on cedar and am so glad I did. I had planned on just giving it a natural stain or protective coat and leaving it at that, but time got away from me. I knew the cedar could hold up to the elements so I kept putting it off and putting it off…and this is how it looked years later:

OK it wasn't usually a total mess like that. I took that picture to share what a disaster our patio and deck were years ago. :) But the wear got worse -- this was taken two years ago. 

So this week I finally tackled this project. I knew I could get it looking great again, it would just take some work. This is how it looked before I started: 
Refinishing weathered cedar

I feel so awful I let it get to this point. Really, I'm mad at myself that I didn't do this sooner. But being outside it was easy to forget about it. 

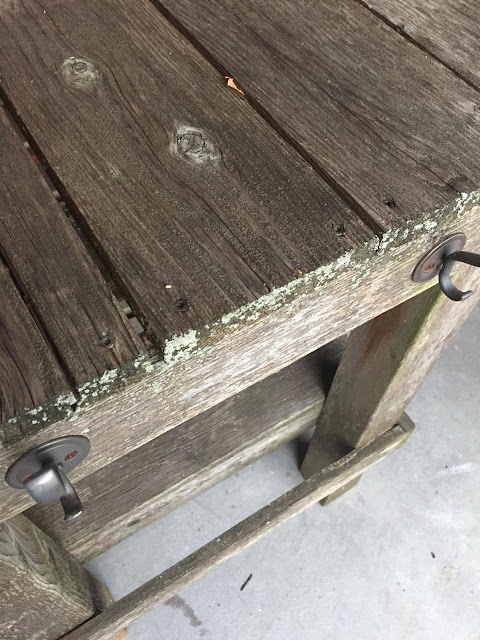
It even had stuff growing on it. ;) It truly became a part of the nature. Yikes: 
Weathered cedar

The funny thing is those hooks have held up amazingly well! Ha! 

I started sanding it down with my orbital sander. Be SURE to wear protective gear while doing this -- I wore a mask over my mouth and nose and safety glasses. There will be a lot of dust, even with a nice sander. This is the one I use and I've been really happy with it: 

Sanders I've used in the past have left "skipping" marks on my wood and this one does not do that. Love it. 

I used 80 grit sanding pads on it to start taking all of that grime off: 
Sanding down old cedar

I was so excited to see the wood coming back again! I used a LOT of sanding pads for this -- at least ten. I didn't get every little crevice sanded perfectly because it would have take a whole day and my hand was buzzing for an hour afterwards as it was. 

Also, I didn't mind a little patina. I really wanted to get the majority off and get it smooth again -- those were my main concerns. The sanded wood was so smooth to the touch, which was nice after it being coarse for so long. 

Here's a look at it after I finished the sanding on top: 
Sanding down old wood

And the side that I showed you above with the green, now looking much better: 

I kept at it, getting as much off as I could. Then it was time for the Pre-Stain Conditioner:

Minwax pre conditioner

I didn't use this for years and kick myself for that. I LOVE staining so I'm always in too much of a hurry to get to that part, but this is a must my friends. It preps the wood for the stain and evens things out wonderfully. This opens up the wood so it will accept stain better:
Pre stain for wood

You can see that you get a little peek at how the stain will bring out the wood tones when you use it. You can apply your stain pretty much immediately and it dries pretty fast. 

Then it was time for the stain and I picked this Weathered Oak color -- it gives the piece a nice rich look with a slight gray undertone: 
Minwax weathered oak stain
I use a foam brush to apply my stain -- I just think these work best and they're super cheap:
Weathered oak stain from Minwax

Something to consider -- make sure you stir your stain up well! I thought I did but as I got further into the can the color got more gray. I ended up doing another coat on top (I usually just do one) to make sure the whole thing was the same color. 

This stain goes on very gray (when mixed well) but when it's brushed in and then wiped down it doesn't look nearly as gray. It's a lovely warm color with a hint of the gray tone. 

As you stain there are a few things to remember: 
  • Keep a "wet edge" -- don't let it dry in the middle of the project or do it halfway. Make sure you have time to tackle each section so you can get it all done at once.
  • You don't want it to be soaking wet -- be sure to wipe most of it into the wood. 
  • Let the stain sit for awhile before wiping -- the longer you wait the deeper it will stain. (I usually only wait a few minutes and it's sufficient every time.) Don't wait too long though, or you'll have a sticky mess. 
  • Use a clean, line-free cloth to wipe away any excess. If you'd like to add more coats to deepen the stain, use steel wool or a very light sanding between coats. 
Since this piece stays outside I knew it would need a protective layer after the stain. Minwax has a great outdoor urethane that's perfect for projects like this: 


Minwax outdoor urethane
Follow the instructions for when to apply it -- you want to make sure your stain is dry. I used a brush this time for this application, just because the wood had so much texture to it. I wanted to make sure to get in all the crevices well. Be sure to add more than one coat for the best protection.

I cannot even tell you how much I love the finished project! I've always enjoyed this bench but it's truly beautiful now. The finish is perfect:
Weathered oak stain

I said it before -- staining is one of my very favorite projects. It's instant gratification. :) I just love seeing the beauty of the wood come through before my eyes.

I'm thrilled to have this piece looking pretty and that it's finally protected from the elements:
Weathered oak stain Minwax

I love that I didn't sand every bit of the patina off too -- I think it adds some character to the piece. 

Here's a view of the side I showed you earlier: 
How to build a potting bench

I use this bench all the time for planting, even in the winter. I'll run out here even in the cold to transplant or pot houseplants. That ash bucket holds soil and keeps it nice and dry all year: 
DIY potting bench

Having this spot is great for a gardening lover like me, but we also use it all the time when entertaining out here. It's fantastic for serving food and drinks as well!:
Staining outdoor furniture

I am so glad I finally took the time to get this done. I've felt so bad leaving it exposed for so long. Now it's a beautiful addition to our backyard: 
How make your own potting bench

I didn't even plan it, but the stain goes so nicely with our newly stained deck I showed you earlier this week. 

Here's a reminder of how it started: 

Man that's an awful before pic! Ha! 

And here's what it looks like today: 
How to stain old cedar

Look how much our trees have grown in too! Love it.

Thank you again for the kind comments on our pergola this week. The beauty of this space is not lost on us. We feel so incredibly fortunate to have this beautiful backyard. It is truly an oasis.
Refinishing outdoor wood furniture

Minwax has a whole campaign around revamping pieces that are important to us called Made With Love. I love this! Over the next few months they will be sharing how people have created and renewed future heirlooms. This sweet video is perfect for Father's Day weekend:


If you have any questions about this refinishing process please let me know! I always try to share all the steps but I know there may be more questions if you haven't tried this yourself. And be sure to check out Stacy's lovely project over at Not Just a Housewife as well! Have a great weekend my friends! 

I have been compensated for this post by Minwax but all opinions are my own. I only work with products that I use and love. 

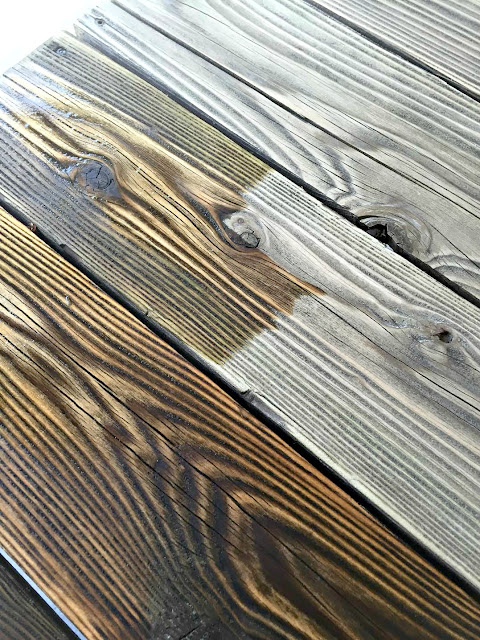
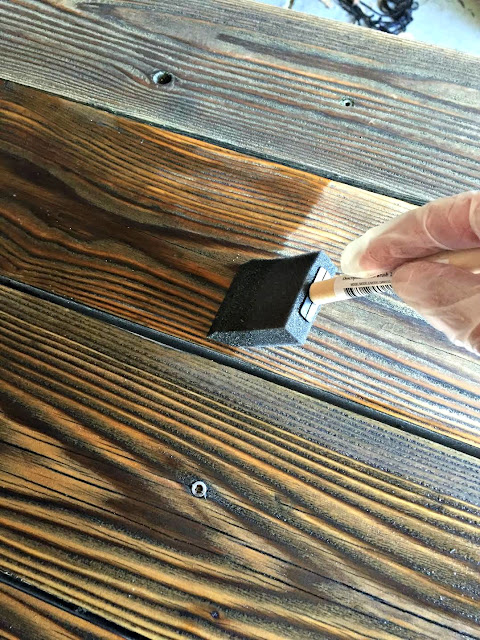
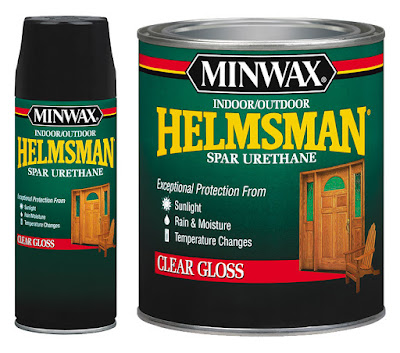
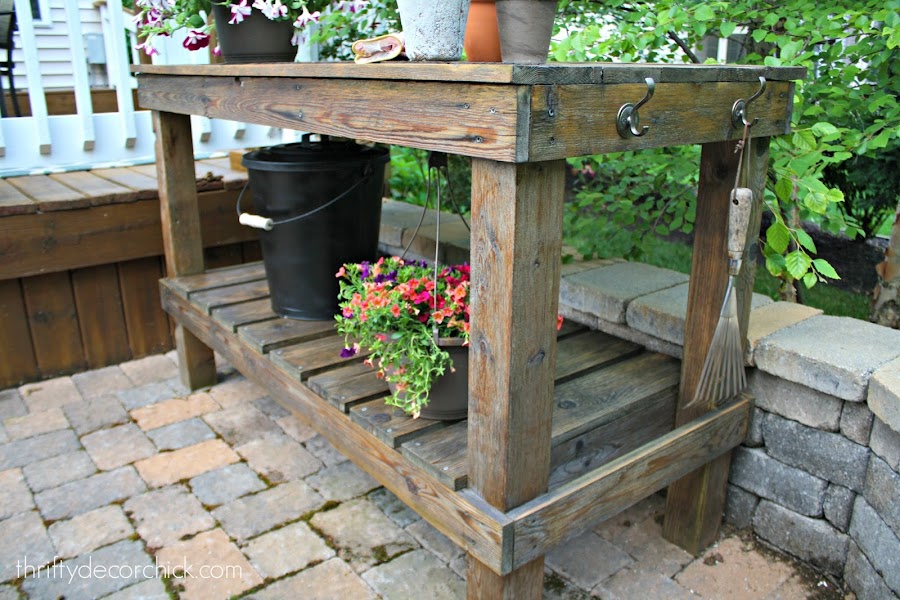
Check out two of my latest staining projects as well! 
kitchen shelves with brackets

wood planked shiplap wall


Popular Posts