YAY, it's the start of the best time of the year my friends!! Are you preparing for a week full of friends, family and food?

I've gathered a fantastic group of bloggers and we're sharing our favorite products-- holiday-themed and otherwise -- over the next few days with you!:
stuff we love round up

You can find the links to all 18 bloggers at the bottom of the post. I've gathered a talented group that spans beauty, fashion, decor and DIY! This has become a favorite tradition of mine for this time of year. I absolutely LOVE this week, don't you? So much to look forward to. 

You can see my previous favorite posts here and here with all kinds of great stuff. This year I'm gathering some favorites I've shared throughout the year as well as some new goodies. I'm in love with all of them and use them all of the time. 

First up, one of our more recent purchases. I have to first confess something to you all...there are times when I get kind of obsessed with the cable shopping channels. Especially during the holidays, I get in a zone when I watch them and can sit there for quite awhile. It's oddly calming to me...and yes, I know I'm weird. 

So anyway, I saw this on there weeks or maybe even months ago? I can't remember. I just couldn't get it out of my head so we looked on Amazon and there were only a few left. I ended up getting this slightly more modern design but they have a more traditional look too: 
large duraflame lantern space heater
It's a HUGE Duraflame lantern that doubles as a space heater. I'm totally in love with it. It packs a lot of power and looks good while doing it! It comes with a remote and you can turn on the candle, a light from below, the heater or all three. It also comes with white and black rocks that you lay on the bottom. (We chose the white and I'll show it to you soon.) It really does heat the space well, I was pleasantly surprised with the power. We're all impressed with it and love how it looks! It's so cool! 

Next up, a beauty product I shared with you in this post, but I love it so much I'll keep bragging on it: 

bare minerals bareskin foundation

This Bare Minerals Bareskin foundation is by far the best foundation I've ever used. I've tried a lot of them and this has the best coverage and you don't feel like it's caked on. Mine came with a brush that makes it super easy to apply too. (I'm not sure if they call come with that brush though.) I LOVE this stuff! (Just be sure you get the right coloring for your skin tone!)

When I finished the loft space upstairs I knew we'd need a second printer. We have one in my husband's office in the basement, but for convenience sake, I knew we'd want one upstairs. (#lazy) I didn't want to spend much and I wanted something super compact. I searched for "small printer" and this HP desk jet printer came up: 
HP compact deskjet printer
I LOVE IT. I'm telling you, I wish I had known about this years ago, because we wouldn't have paid what we did for a much bigger, bulkier printer we use downstairs. This one is so small, which I love. It's also pretty, instead of a ginormous dark one we've always had. It prints color photos and printables beautifully and easily scans and copies. The only difference I can find is that it prints slower than our larger one. I'd definitely be fine with that for the size, convenience and cost. We paid $50 for it and the price has gone up a bit -- I'm guessing it will go down again for Black Friday and Cyber Monday!

For years I searched for affordable and pretty sconces for our home. I always had heart eyes for the swing arm versions but they were always at least a couple hundred bucks, if not more. When a lovely reader told me about this sconce from Joss and Main I jumped on it: 
affordable swing arm sconce
I now want to put them everywhere in my house...but I don't have anymore spots for them. ;) Sad. Hopefully you can enjoy them! 

I love that you can direct the light where you want them and they look fantastic in our loft/office/craft room!:
office and craft room combo

Joss and Main has changed the name of them from the Tanya sconce to the Camilla and for awhile the price was inching up to over $110. Thankfully they are lower again right now -- it is very hard to find this look for this price! 

Speaking of lights...these cute little twinkle lights are my latest favorite. I've used colored ones at Christmas before but these are even prettier
fairy lights with timer

This photo doesn't do them justice -- they have pretty, delicate wires and are so dainty. They are called fairy lights and they truly look like them. They operate on batteries and also have timers, so they stay on for a few hours at the same time every day if you wish. You can put them in glass or wine them through wreaths or greenery -- the possibilities are endless. I showed you how I used mine in this post but I have plans to use them all over this Christmas.

OK, this one was a random grocery shopping find but I'm obsessed with these little sandwich baggies
sandwich toasting bags for toaster

They say they're for grilled cheese and they do work well for that, but I prefer them for warm sandwiches in general. You load up your sandwich with what you want, then put it in the sleeve and then put in your toaster. It's like a much easier, quicker toaster oven. They ROCK! The sandwich comes out with perfectly toasted bread and warm insides. I use them for toasted peanut butter and jelly too -- delish. Mine came with two bags and you can use them over and over -- it says up to 50 times! I wash it out and let it dry before the next use. 

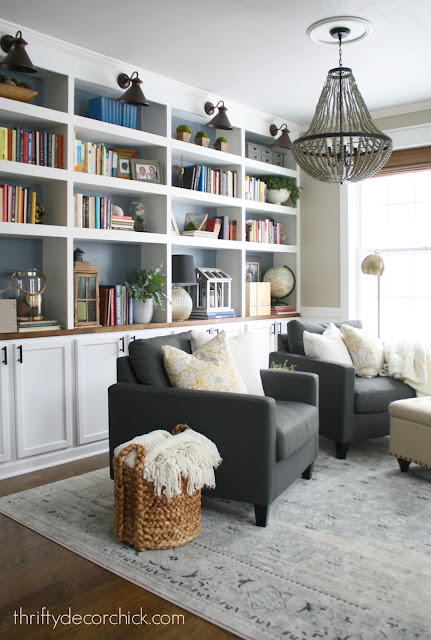
Next up, my favorite place to find super affordable rugs. I love HomeGoods too, but you never know what you'll find on each trip. RugsUSA has the BEST sales -- anywhere. I've purchased at least four rugs from them over the years and all have been wonderful quality. Our rug in the library was the latest: 
DIY bookcases from kitchen cabinets

It's such a pretty rug! If you catch them on a sale you can get the rugs up to 80 percent off...no joke. I'm talking 8 by 10 rugs for less than $250. And the shipping is always super quick! 

This is the Treasures Vintage Abstract and it has held up really well: 
vintage abstract rug blue

I'm actually considering this same rug for another spot in the house...is that even allowed? ;) I say yes. I know Rugs USA is having another sale this Black Friday so be sure to check it out! (And no, I'm not being paid to say that, they are just a great resource!)

I shared this photography tool earlier this year but it's another one worth mentioning again. It has made such a difference when it comes to shooting photographs inside our home!: 
Neewer speedlite for camera

It's the Neewer TT560 Speedlite and this very inexpensive tool clicks on to the top of your camera and gives you extra light for darker spaces. It makes the photos super clear and bright and I'm always shocked at the difference it makes. If you go to this post you can see all of my before and after photos -- seeing is believing! :) 

And finally, another great find I picked up a few months ago that I adore. I like to diffuse oils occasionally and have a basic plastic diffuser I've always used. I wanted something that looked a little nicer to keep out all the time but didn't want to pay what the oil companies charged. 

I found this beauty at Bed Bath and Beyond and it was still an investment but with 20 percent coupon it was much easier to swallow (and it's still a lot cheaper than the ones available through the oil brands):
ellia oil diffuser white and wood
It's the Ellia diffuser and the design is simple and beautiful, but it has some surprises. :) First of all, it comes with a remote, which I love. It also plays music -- there are a few options and all are very soothing. I think the coolest part is that it lights up. You can pick from a bunch of colors or a morphing setting that goes through all of them. AND it runs for 10 hours at one time. I just love it and they have more pretty designs that cost less. It is definitely a favorite in our house! 

Have you tried any of these goodies? Many of them would make for great gifts or stocking stuffers but I'm not mad at ya if you want them for yourself too. ;) Tis the season! 

I'll be away from the blog for the rest of the week to spend time with my family, but I'll be back next week! Be sure to check out the rest of the fabulous ladies on the round up over the next few days (see below)! And have a WONDERFUL, safe Thanksgiving! 

MONDAY


TUESDAY 

WEDNESDAY

Affiliate links included for your convenience! 

OK, I have a quick but AMAZING recipe for you today! This would be a perfect treat after the pumpkin pie next week. Or this weekend. Tonight? 

We had friends over last weekend and one of my girlfriends brought brownies. Now I like a good brownie...it's just not always my pick for a dessert. If you offer me one, duh, I'm going to take it. But it's not one I'd pick to make on a whim. 

Until now. :) 

I must introduce you to the most amazing brownie...EVER. There is a special, secret ingredient that will rock your world. I asked my friend for the recipe, thinking it was some super special family thing passed down through the generations -- and had to laugh when she told me she made them with a box recipe. ;) 

First of all, I didn't even KNOW about dark chocolate brownies. Um, hello. I didn't like dark chocolate till a few years ago and now it's my favorite. There's actually two secret ingredients but one didn't surprise me as much as the other...can you guess?: 
Simple secret ingredient for the best brownies

The cinnamon wasn't a big shock, I mean, have you had chili with cinnamon? Next level stuff. But the kicker (literally) was the chili powder. Man oh man...these are DELISH. Hands down the best brownie I've ever tasted. 

You make them according to the box (she subbed coconut oil for vegetable oil and I do the same) and then you add three teaspoons cinnamon and one to two teaspoons of chili powder. 

That's it! You'll notice something different, but it's not overwhelming -- just GOOD. I used one teaspoon of chili in my batch (I had to make one to, uhh, show you all) and it was perfect, but I will definitely try more. 

It's hard to describe why these are so good, you just have to try them for yourself. We were all standing around and oohing and ahhing over the flavor. So yummy. I wish I could give you all a sample. :)

I love to share simple, delicious recipes and this was one! You really must try it. Have you tried this trick in your brownies? I bet it would be good in chocolate cake or cup cakes as well...I'll try that next. 

Have a wonderful weekend my friends! 


Hey all! I've been working my butt off (I wish literally) on this fireplace tile project in the basement! If you remember I last left you with the new mantel and hearth
DIY electric fireplace wall

Those tiles were just leaned up against there so I started with that bottom part -- because it was the easiest. :) 

I've been working on it on and off on this for the past couple of weeks and finally hit it hard again yesterday. I was so hoping to get it done but I ran out of steam. Today is the day! I'm determined! 

This is the stone we're using, from Lowe's: 
desert quartz ledgestone Lowe's

I've had to visit three different locations to find enough to use because some batches are more pinky toned than others. I prefer the more natural tones so I've had to mix and match boxes. The great thing about this stone is it looks fantastic no matter what! 

This is the adhesive I used, from Home Depot: 
easy to use adhesive for tiling

This stuff is awesome and SO much easier than mixing thinset. You pay a little more but save in time and mess. It's nice that this is ready to go and you don't have to worry about getting the mixture just right. 

You'll need a trowel -- but make sure you get one with "teeth" that are the right size for your tile. Mine was the 1/4 by 1/4 size and the adhesive container tells you which one to use: 
the right trowel for your tiling job

After installing a few tiles and realizing not all of them are shaped exactly the same (most are), I started laying them out on the floor to make sure they all fit together OK:
how to install stacked stone

Some tiles are shorter on one end and won't work, and I had to take a couple tiles down because of that, so this part is important. 

Tiling itself is actually quite an easy process, especially with this tile. It just takes TIME. You start by spreading your adhesive on the wall: 
using a trowel to tile

Fill in the general size of the tile on the wall -- I've learned over the years that it doesn't have to be caked on. You're wasting the adhesive if you go crazy with it: 
how to tile a wall

The reason for this is, you'll add more to the back of the tile. I have found that I waste less if I spread it on with the straight side of the trowel first: 
spreading adhesive on tile

Like frosting! ;) This stuff is so easy to work with. 

And then I'll use my towel and put the notches into it: 
how to add adhesive to tile

The design of the trowel gives some more grip to the adhesive. 

And then you just put it on the wall: 
stacked stone from Lowe's

I wiggle it around a little and then leave it. You'll have a few minutes to easily work with it but it grips right away -- no worries about them falling off. I've tiled many times onto drywall and it holds up great -- you do not need special drywall or backing unless you're doing a wet location. 

As far as the install goes, straight lines go fast and easy with this tile. They fit together fairly well so you can go pretty quick. Areas like the sides of the fireplace took more time and work because I had to do a lot more cutting. You can see that sometimes I started on the left side, sometimes on the right, so the seams don't always match up: 
how to install stacked stone

The beauty of this tile is it does not have to be perfect! It is very forgiving because the design is so irregular and natural. 

To fill in spots I would measure the width I needed and then mark my cut line with a pen or pencil: 
cutting stacked stone

I borrowed a tile saw for this project -- I find this tool to be one of the easiest to use. You check your line with the saw while it's off, then turn it on (make sure water is running) and then run it through slowly: 
how to use a tile saw

Things to consider: 
1. Think about where you want to start. I started in the middle for my long runs but this tile is so forgiving it's not necessarily needed. 
2. Always wear eye protection when using the tile saw!
3. I didn't have many problems cutting this tile but you do have to watch where your cut will be -- if it's going to leave a little sliver of a piece it will most likely get torn up by the saw. Tiny cuts are very hard to do with a saw like this so make your measurements accordingly. 
4. Keep all of your scrap tile till you are done -- you never know where you can use a small piece that may be too hard to cut. 
5. You do not need to grout with this tile, which saves a ton of time! There are a few spots where you can see the wall between the pieces (if you look really hard), so I may fill in a few spots with some tile caulk. 

You will have smaller sections to fill in and I've saved most of these for last, since I know I'll have scrap I can use:
stacked ledgestone from Lowe's

Also, I originally planned to cut the tiles at the ends at an angle so they would fit against the wall. It was going to take SO MUCH longer to do that though, so I went with a straight edge and I'm so thankful I did. It would be so difficult to get mitered edges to match up perfectly. 

I will share the full reveal when I finish the tile, do the final coats of poly on the wood and after I decorate it! I can't wait! But here's an idea of how this looks installed: 
desert quartz ledgestone

It has such a warm, cozy feel and we're so excited about this area! Can't wait to see it decorated for Christmas!: 
stacked stone around fireplace

Have you used this tile in your home? Many of you shared photos of your projects on my Facebook page and I love it every time I see it used! 

Here's an image to pin if you are interested in tiling sometime in the future:
how to tile tutorial

And you can see how I tiled a smaller area with marble tile in our family room here: 
gray fireplace with marble surround


Hello my friends! I hope you had a great weekend -- we had a lovely one with friends and family. It was a good distraction from the sadness I've felt lately. My sister is moving away tomorrow and I've been dreading this day for months. I don't know how in the world I'm going make it a week without seeing her or my baby niece. I was reminded this weekend that it could be so much worse, and I know this. I'm trying to keep in mind that we'll be able to talk whenever we want -- I will just miss them so much. 

If any of you live in the Wheeling area of West Virginia and could hug my sister's neck for me once and awhile, please let me know. :) I'm glad to be writing to you all today because it always makes me feel better! 

I've been busy working on our basement fireplace and hope to have an update to share with you this week. I'm so excited about it! I'm thinking about my next steps for down there and I was reminded of my absolute favorite addition when it comes to decorating. I've said it for years but it's worth sharing again -- nearly every room can take some black accents! 

Whether they are small (frames or small furniture) or big like walls, I am absolutely obsessed with the understated drama that black adds to a room. I've always said it grounds a space and it never fails. 

I went mostly white in our office/loft makeover this summer but I knew all along I wanted the contrast of black in here as well -- I added that with the lights and the large DIY chalkboard
office space with large desk and chalkboard
The beauty of black is that it works even when your walls aren't white. I know some worry that it will  make a room feel heavy and it can...but if you have a fairly neutral space it will only add to your space! 

I recently transformed this old table into a bar cart and knew it needed to be black. It was the perfect contrast in this spot: 
DIY bar cart

I discovered that green and black is one of my favorite combos when I moved one my favorite dressers up to the guest room earlier this year: 
black dresser green walls

I also love our black metal bed in that room too. There are a few colors that it doesn't pair with as well -- I used to have a yellow and black laundry room and it went a little bumblebee. ;) 

And if you already have dark walls it may be a little much to have solid black pieces. But especially in rooms with gray, white or neutral walls like ours, it looks fantastic: 
black accent wall stairs

I would totally paint a room black and was going to paint my husband's office dark, it just hasn't happened yet. :) If a whole room is too scary for you, you can do a smaller accent wall like I did on the stairs. I still love it! It demands your attention but doesn't make it feel heavy at all. 

I love chalkboard walls and it's not because they are fun to write on (they are). It's that pop of black: 
chalkboard wall in kitchen

This small wall in our kitchen was perfect for it and now it's a great spot for doodling and lists, but also gives some nice contrast. 

This painted dresser in our family room is one of my favorites -- the white trim around the room makes it pop: 
Graphite black paint color

And that hardware that I didn't like before is now perfection against the dark color. Funny how it completely changed how I felt about that brass! 

And you know what? I don't even mind TV's that are hung on the wall, because they give you the same feel: 
dark gray fireplace with built ins

There's a hint at one of my favorites in that picture -- if you don't want to go dark on furniture or walls, you can always do the doors
black interior doors how to

All of our interior doors on the main floor and basement are black and I would do it again a million times over. They are classic and I love them against the white trim. 

One of my first dark doors was our glass pantry door
black glass pantry door


I'm itching to get started on the upstairs but there are seven to do! It's going to take me another year at least. :) 

I have black accents in nearly every room of our house, and I'm always looking for ways to add it to the rooms that don't! 

Do you use black paint in your home? Have you taken the plunge with black doors? It doesn't have to be anything large!The black lines of a coffee table, frames on the wall or even the legs of a chair all help to give you that look. 

To see the paint colors I used in these spaces go here


Hey there! I've been thinking a lot about projects I want to finish up before the end of the year -- especially those that I promised myself I would finish up. One is our guest room and I only have a couple more projects to do that I've put off for months! 

I finally bit the bullet on a bigger one the other day. I decided I was going do it in the quickest and easiest way possible because sometimes you just want to get it done. This is a tutorial on the fastest way to paint furniture for when you're feeling the same. :) 

I told you about these inexpensive IKEA dresser/night stands a few months ago: 
Rast dresser transformation

I also shared some of the many ways you can dress them up. The possibilities are endless with these unfinished pieces! For now I didn't have any grand plans in mind -- I just wanted to get them painted. I may add to them later but I actually a little in love with how they turned out. 

In general I'm not one to say you need to do things perfectly when it comes to DIY projects. I think it discourages people from trying to do things themselves when people like me say it needs to be perfectly done. YOU will be the main person seeing what you do in your house. As I've said many, many times -- if someone notices that something isn't perfect then they get a cookie cause that means they are super observant. But really, it better be your mate, sister or best friend who would actually tell you it isn't perfect because anyone else saying it is just mean. Ha! ;) 

I will tell you -- this job would be much easier if I had done it before I built the dressers. Keep that in mind if you purchase these. I could have just painted the frame and the drawer fronts. But because these are made to "catch" and don't slide out all the way (unless you remove some stuff), I just taped them off and covered them with paper: 
Prepping dresser for paint

Usually I paint furniture with a brush and roller, but we're talking fast this time. These dressers are so small I knew spray paint would make much quicker work of it. 

I've tried two primers in the spray paint version -- BIN and Kilz. I prefer BIN out of the can but their spray drives me nutty. It has never sprayed well for me. This time I used the Kilz spray and it performed MUCH better: 
Kilz spray primer

I will be using this brand from now on when I need to spray prime. 

This furniture is super inexpensive because it's made from cheaper pine and it has knots in it. If you want to paint these a lighter color you'll need to prime well -- those knots will bleed through if you don't. Sometimes it takes a while but they always will (with white). Even sometimes with great primer they'll come through white paint -- I've touched up many spots over the years. 

Because of this I did a few coats where there were knots:
Covering knots in pine

It's important when spray painting to use short, quick bursts instead of long ones. Don't hold the nozzle down and just spray. Numerous lighter coats will work much better than one heavy one. 

I used this light gray color to paint the dressers: 
Pewter gray krylon

Here's a video to show how you should spray: 


I always do a light sanding between coats, whether I'm using rollers or a spray. You'll want do a sanding after the primer as well:
Sanding between coats furniture

It doesn't have to be intense -- a quick sanding is fine! 

I picked this color for the night stands because I wanted to pull in the light blue/gray I'm using in this room:
Light gray night stands

Then it was time to decide on the knobs! I really didn't want to go buy something new right now -- even at the cheapest place I've found they probably would have been three bucks each. I knew I could make the wood knobs that came with it work: 
Finishing wood IKEA knobs

I sprayed them with the same primer and then white paint and started on my little crafting project. I thought it would be pretty to add a little design to them and knew the perfect item to do that -- paper napkins!:
Decoupaging with napkins

I had these already and the color worked perfectly! (I've used napkins on a few projects but these coasters are a favorite gift idea.) I used the cap to my decoupage glue to trace the size I needed.

I cut them out and then put a layer of the glue on the knob:
Making plain knobs pretty with glue and napkins

I flattened out the napkin: 
Using napkins to decoupage knobs

And then put another coat on top immediately: 
Decoupaging knobs

Then you can use your finger to smooth everything out. I made sure the napkin was flat during this part. After they dried for about 20 minutes I did another coat. When these dry they are hard and cleanable! 

I had Mod Podge but chose to use some Decoart stuff I had in my craft stash because it dries in a glossy finish. These glues come in both matte and glossy and either work fine! 

This seriously turned out so cute. I'm a little obsessed with these pretty knobs! I've walked into the room a few times just to look at them: 
DIY custom knobs

This isn't a dramatic makeover by any means but goodness, I really like it. It's simple and pretty and perfect for this room! 

If something strikes me eventually I may add more detail someday but I'm really happy with them: 
IKEA Rast dresser makeover

The color is so nice and soothing, just like the rest of the room. They work so well with the gray/blue colors in the bedding. And those knobs are a sweet little detail that goes well with the nod to farmhouse style in this room. 

Spray painting furniture is quicker for sure! I was able to prep and paint both of these in less than two hours (including dry time). Sometimes you just want to get it done! Remember you can also use a paint sprayer to do a custom color if you don't like your spray paint options:
IKEA Rast dresser

The only caveat with using spray paint is it can get expensive if you're using it on larger pieces. I used nearly a can on each dresser (two coats each). You just have two weigh the convenience with the cost. 

Now, just one more project in here and I'll be sharing this whole before and after transformation! I'm determined to finish this one up before the end of the year. 

Here's a quick in progress shot I took for Instagram that you can pin if you'd like to try this technique on knobs: 
adding detail to knobs with napkins

And here's a quick list of the items I used again for easy reference: 

Have you tried this technique on knobs? Paper works too but it will not conform to the round edges like napkins will. Do you have any furniture pieces that you've spray painted? Another bonus to spray painting furniture is that it's oil based paint and gives you a great, tough finish once it cures. 


Affiliate links included for your convenience! 

Popular Posts