Hey hey all! It is GORGEOUS here today!!! Whooooo! I am so stinking excited to mow the grass later – isn’t that ridiculous? I’m so happy for the warmer temps. :)

I mentioned a couple times I recently took a quick trip out to Salt Lake City to speak at the Snap! Conference. It was lovely and I was so happy to get the chance to see bloggy friends I knew and meet new ones too!

I spoke with two lovely ladies – Amy from The Idea Room and Desiree from The 36th Avenue on basic blogging tips. We thought it would be fun to share some of our session with all of you! Well, those of you who are thinking about blogging, just starting blogging or have done it for a while anyway. If you aren’t a blogger you can read on for a peek into how we think. ;)

basic blogging advice

I wanted to speak about engaging readers because it’s near and dear to my heart – I feel like I have connection with you all and I don’t know if that can be explained into nice little bullet points, but here are a few tips that I think help! NATURE BRIGHT LAUNDRY BOOSTER & STAIN REMOVER

Here’s the thing – you can’t blog in a bubble. If you want to put stuff out there and welcome the emails, comments and responses – you need to be prepared to respond. And it will take waaaaay more time than you ever imagined.

I’m sure people who don’t blog still laugh a little to themselves when those who do talk about it being time consuming. It is. (Don’t laugh at me!) It’s FUN time consuming, but it can be busy. But it is so important to let your readers know you are listening (and appreciate them!).

I do my best to respond back to questions in my comments section (the “reply” option in Blogger makes that even easier) and most of the time will respond to that same question via email. So I’m answering it twice but I want the person who asked to see it and readers in the future. Am I perfect at this? Absolutely not. There is only so much time in the day. But I make a concentrated effort and I think that’s important.

Social media adds a whole other level to this though – don’t forget Facebook and Twitter and Instagram and all that good stuff. I LOVE interacting with my readers on Facebook and I am pretty good at responding to questions there (it may take a couple of days but I do). It’s easier for me to respond there than to emails for some reason.

So respond – interact with your readers, let them know you’re there. Say thank you. Answer questions (as many as you can). You would be blogging to an abyss in the world wide web without them. :)

party

The linky party has become HUGE in blogland. If you are a reader and you don’t know what that is – an example is the before and after party I host at the beginning of the month:

beforeAndAfterButton

I like it because it’s a chance to give some traffic to other bloggers. You link up and visit each other and hopefully find inspiration and new blogs to get hooked on. ;)

I like linky parties that have a theme but with that you may not have quite as many link up. I mean, recipes would be hard to link up to the before and after party, you know? (Well, now that I think about it maybe not!) I know of some bloggers who do them once a week and some only do them a few times a year (or never!) and the timing is up to you. I would say be careful about having them too often because you’ll have a CRAZY amount of outbound links on your site which isn’t a great thing. You want to keep that somewhat under control to keep the SEO stuff in your favor. ;)

party

So here’s the deal. I operate my blog in a way that I would want to read one. Does that make sense? So if I get an offer (and I get a lot) that feels spammy or whatever, I don’t do it, even if they are offering a ton of money. If it would feel weird for me to read it on another blog, I don’t do it.

So the same goes for just letting your readers know what to expect – as human beings we crave some consistency. So decide how often you want to or can post and try to stick to it. (Try is the key word – I know life gets in the way.) If you want to post once a week you CAN! Just don’t post five times one week and then once a week for three. Readers will get hooked but then may fall away.

I post four times a week on average. During the summer it will probably go down to three – but I think consistency is key. No, you don’t have to pick certain days and stick to them. Just keeping the frequency the same week to week will help your readers know what to expect from your blog.

OK, here’s the thing – this next part is a struggle for me. My kid is cute people. I mean…Cute with a capital C. Precious!! But I decided long ago when I started blogging that I didn’t want to put many pictures of him on my blog. It’s absolutely a personal decision and there is no wrong or right one – it’s just important to me to have a bit of my life just for me since I share so much here.

That being said, sharing your family and precious pictures of your kids definitely creates a bond with your readers. Sometimes I wonder if I should just because my readers feel like friends and I want to share him with you all – but there’s a little nagging voice in the back of my head that still holds me back. (And if you’ve read for a while you know I do share pics of him, just not often and usually not a full shot of his face.)
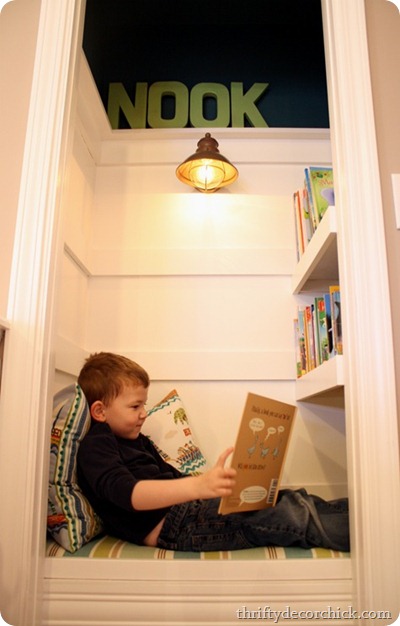
book nook(In his book nook.)

Sharing personal information is a tough one – I still struggle with it. I want to write so many things and don’t because I don’t know if I want the world to know. (And that’s the thing – if it’s out there the world will know. It may be a smaller piece of the world if you’re just starting out, but you never know when your blog might blow up.)

I have tried to strike a balance because I know sharing our struggles in life ultimately HELPS so many. We learn from these things and come out with knowledge and experience that will be useful to someone else. That’s why I touched on some of my personal history last Thanksgiving here and of course I have shared our debt free journey here.

I did hesitate to share both of those but now the debt story especially has brought me great JOY – just the other day I got an email from a reader who won one of the financial peace packets we gave away and she was telling me how she’s paid off another debt and it is the BEST feeling hearing that.

So…you have to figure out what’s right for you. I love reading personal stories about bloggers I love, but there is a fine line where it’s too much information. Only you can decide where that line is for you and your family.

friends

I also talked about partnerships during the session, and a lot of what I discussed when it comes to advertisers I covered in this post.

But there is something I want to emphasize to bloggers – please don’t be afraid to share the love. When I started blogging I would hesitate to link to someone else because I was afraid my readers would see their awesomeness and forget all about me and never come back. And I would have cried. :)

But the longer I blog the more I realize you need to become friends with other bloggers, share with other bloggers, link to other bloggers – you get the idea? ;) As a reader of blogs, yes, I only have so much time in the day to read the ones I love. But if you have me hooked I’m going to keep coming back to you, and I’ll love you even more for introducing me to new sites I can fall in love with.

One of the BEST things people ever say to me is that they found “so and so” through my site – I love hearing that. As readers and bloggers we all share a sweet connection and I love how we remember things like that – who brought us to who.

So there you go – a little insight into what I think makes for a great blog. I’ve been at this five years and still don’t know html from whatever, but I do enjoy creating a connection with my readers and other bloggers. I’ll keep focusing on that and keep ignoring the html as long as I possibly can. ;)

And as always, thanks to you all for coming along for this ride! I couldn’t do it without you!

Head over to Amy from The Idea Room and Desiree from The 36th Avenue to see their tips on blogging as well!


Hello there and happy MONDAY!! It’s feeling like one to me today. ;)

So you remember that one time when I started two bathroom renovations and took for-absolutely-freaking-EVER to get them done?

Yeah. Well, it’s time to get them done. I’ve set a rule for myself – no gardening or outside projects till the bathrooms are DONE. I may cheat a little only because I am just one person and DANG it takes a long time to finish it all up.

The basement bathroom has come up from nothing, and I have only really showed you the tile so far here. Other than that the big stuff had been installed – the sink, toilet and shower. But the room sat half painted for months.

I was determined to get this bathroom done last week and I almost got there. Just a couple more projects to finish up and I’m moving on! WHOO!

This is how the space looked up till last week – you can’t see that the wall to the left is half way painted but just imagine it. It was pretty:

basement bathroom

Since I hadn’t installed baseboards yet I just had to tape off the shower and light fixtures with my loverly Frogtape in preparation for paint. I’ve gotten pretty good at cutting in on the ceiling so that saves a lot of time.

I finished up the paint (I listed all the paint colors for the basement here) and realized again that you can’t even tell the difference between any of the colors – I could have just painted the whole basement the same color. But OH WELL. It’s done. :)

I installed all the baseboards and quarter round: thick baseboards

It looks like poo there but just wait till you see the power of caulk and filler. ;) Wish I could use some caulk and filler.

Once I got the trim done it was time to address the little nook next to the shower. Yes, the shower is tiny. When it came time to decide what we were doing we realized the space would only allow for a couple shower inserts (I had originally planned on tiling the shower but didn’t for cost and time reasons). The size that worked best was this shower – and it is small.

But I have to keep reminding myself this is a basement bathroom – we will hardly EVER use this shower. Some guests might, but even that will be rare. So I would rather have some storage than a big shower we’ll never use.

So storage it was – I had the guys frame out a little spot in the empty space by the shower. All along my plan has been to put some shelves in there, and I finally got it done!

I started by adding supports – I just used scrap wood from the garage every 18 inches or so:

diy wood floating shelves

I was going to add a support along the back but realized it wouldn’t be needed since the space is so narrow. I only installed these with a nail gun – on our library built ins and the pantry redo I used long screws, but I knew this wouldn’t be holding a ton of weight so the nails were easier and faster.

I had a piece of 1 by 12 I cut down to use as the shelf, but it was just a smidge too small:

diy wood floating shelves

I ended up finding more scrap wood in the garage, took it to Lowe’s and had it cut just a bit wider than the other wood, and it worked pretty well – I stained them before I installed (for once! Are you proud of me?):

diy wood floating shelves

I used the dark Kona color I used here as well. Love it.

I just nailed the shelves down into the supports:

diy wood floating shelves

I made sure I had the right thickness of wood for the fronts before I started – I wanted it to cover the top shelf, the supports, and an extra board I installed underneath to give it a finished look:

dark wood floating shelves

I actually had most of that front trim too – I only had to buy one small piece to finish it up.

I absolutely LOVE how it turned out! It’s a great use of an awkward little spot:

diy bathroom shelvesbathroom shelves

Let’s talk about that shower curtain shall we? I went through my normal Goldilocks routine to find that one (the one I LOVE).

I started with this one, but the blue tone was off with the walls:

target shower curtain

I really loved this one and the colors were perfect:

ikat shower curtain

I’m trying to go with a slightly funkier vibe in the basement and I thought that was fun. But I wasn’t crazy about it when I got it up – too graphic for this little space I think?

And then I found the one that was just right. It had a bird on it:

bird shower curtain Target

And there. you. go.

Since the shelves only cost my $3 for a small piece of trim (BOOYAH!), I had fun gathering a few new accessories for this spot, at Tarjay of course (all Threshold items):

decorating bathroom shelvesdecorating bathroom shelvesdecorating bathroom shelves

I LOVE EXTRA STORAGE! Are you with me??

Here’s my little secret – I only had so much scrap wood so I didn’t even put the bottom piece on the two lower shelves:

diy wood floating shelves

You’d have to be sitting on the floor looking under them to notice so I’m not worried about it. Does it need to be perfect? NO.

I love having a little spot for the trash can too:

wood shelves in bathroom @ thriftydecorchick.com

It’s the little things. ;)

Oh yeah – I told you caulk and filler make a world of difference:

thick baseboardsthick baseboards

Oh my, they are my BFFS. For real.

I adore how the shower curtain looks in here and ties in the blues and greens and even the dark wood tone:

diy wood floating shelves

I’m SO glad to have this space (almost) done. I’ll show you the whole room soon, but for now I want to look back to see how far I’ve come:

before

This was back in January I think?

And here’s a finished spot that makes me super happy!:

wood shelves in bathroom @ thriftydecorchick.com

It’s a skinny little bathroom but it is turning out so pretty and functional. Love!!


**This giveaway is now closed. The winner has been contacted via email.


Hello all! Happy FRIDAY! It is just beauuuutiful here today and it makes me happy. Dare I say it -- I think spring is finally here to stay! Mother Nature has been in a MOOD, for real. Now let’s hope we don’t jump right into 90 degree temps.
This giveaway is coming just in time for spring cleaning – ‘tis that time of year for organizing, cleaning and decrapifing the house! I can’t help you too much with the decrapification, but I can help you with the cleaning part. (No, I’m not helping you clean, nice try.)

My friend Bonnie introduced me to Shaklee products years ago and I’ve been hooked ever since. I LOVE THIS STUFF. I’m not just saying that either – if I say it I mean it and I’m saying it so I mean it. Got it?

shaklee-logo

After trying the products for the first time I ended up going through our cleaning supply stash and donating most of what we had because the Shaklee stuff took the place of it.

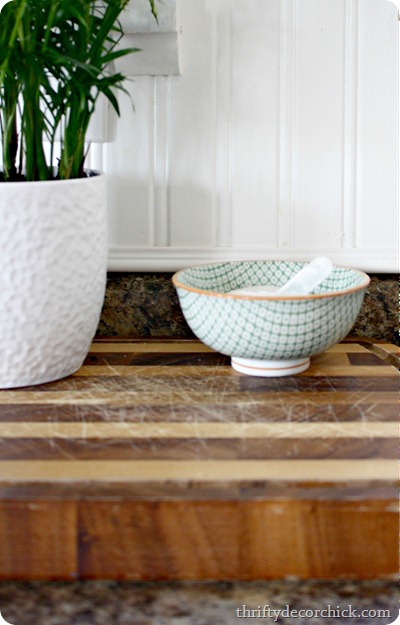
I have tried nearly everything at this point, but two of my very favorites are the dish washer detergent, which I keep next to the sink in a pretty bowl:

dishwash detergent in bowl

I gotta make stuff pretty if I can, it’s a sickness. ;) Two little scoops for each load, that’s it.

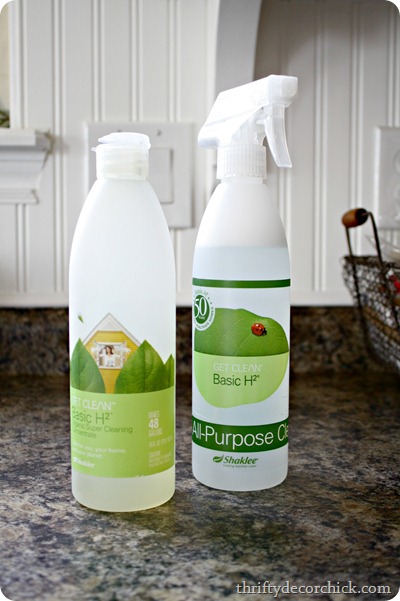
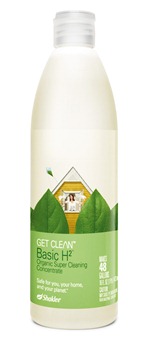
And the amazing Basic H cleaning concentrate – it has lasted me FOREVER:

shaklee

I was hesitant to try these products at first because I assumed they would be so expensive, but I can’t stress to you enough how long the basics last – I’ve had this bottle of concentrate for years now. And every time I say that I wonder if people think I clean my house – I do. Sometimes. Seriously, you just need a 1/4 teaspoon to mix up a whole bottle and it lasts forEVA.

I think I’m going on three years with one bottle of concentrate? (It was $12 I think?) And it cleans pretty much everything you can imagine – I usually do a slightly bigger dose of the concentrate for the “degreasing” version and use it on counters, mirrors, windows, appliances, sinks…everything.

I started using these products when the Bub was younger and I was honestly surprised they work so well – I expected the more “natural” items (no harmful fumes or hazardous chemicals) to not work as well. Not sure why, I just had that thought in my head, but I was proven wrong and have been a fan since.

Bonnie shares some great cleaning tips over at her blog, and this recent post shows how well the products work. (I forgot about the Scour Off on the oven – it’s awesome and smells. SO. good.)

I’m super excited about this giveaway because one of you will get a whole Get Clean Starter Kit that includes the following:

Basic H2® Organic Super Cleaning Concentrate, 16 oz. (1)
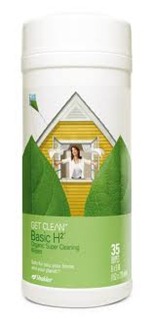
Germ Off Disinfecting Wipes, 35 Wipes (1)
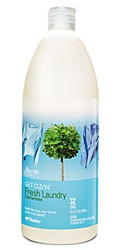
Nature Bright® Laundry Booster and Stain Remover, 32 oz. (1)
Dish Wash Concentrate, 16 oz. (1)
Dish Washer Automatic Concentrate, 32 oz. (1)
Fresh Laundry Concentrate HE Compatible, Regular Scent  32 oz. (Liquid) (1)
Soft Fabric Dryer Sheets, 80 sheets (1)
Dish Washer Automatic Concentrate Dispenser (empty) (1)
Nature Bright® Dispenser (empty) (1)

  shaklee basic H basic H wipes shakleedish wash concentrate shaklee shaklee dish wash detergent  nature bright shakleedryer sheets shaklee laundry detergent shaklee


Seriously, you’ll be in cleaning HEAVEN! It’s a $115 value and I promise you it will last you a LONG time!

Here’s how to win the $115 Shaklee cleaning starter kit:

1. Leave a comment here. Boom. Please tell me it’s feeling like spring where you are too!

2. Visit Bonnie’s Shaklee site here and take a look around. Find a product you’d love to try out and come back to let us know what it is.

3. Go to Bonnie’s Facebook page and “like” it here. Let us know you did in another comment. (If you already do, just let us know!)

* You can enter using one, two or three methods – it’s up to you! All options are not mandatory to win.

* Remember if you comment anonymously or you have a private blog, please include your email address in each entry, and spell it out with “at” and “dot” to avoid any spammy emails coming your way. (I have turned anonymous comments back on for this giveaway!)

This giveaway is open to the US only. It will close this Monday, April 29 at 9 a.m. EST. Have a wonderful weekend!!


Hey hey all! The sun is shining, my garbage disposal is fixed – it is a very good day! It’s still not warm – but better. I have hope. :)

So I totally got the idea for this post from a reader – Laurie commented on this recent pic of mine on Instagram:

farm fresh eggs

It’s a shot of some eggs from a local farm – it’s probably silly but I think they are SO pretty. When Laurie mentioned how they would make a great paint strip an idea was born – why not make one?

So I pulled out my Sherwin Williams paint deck and looked online to find colors that were in this palette. They’re not exact, but I tried to find tones that played nicely together.

And there you go: a farm fresh egg inspired color scheme:

Paint palette inspired by farm fresh eggs thriftydecorchick.com

I love the names too – wouldn’t that be a fun job? ;)

Some of the blueish ones leaned more aqua, the lighter ones were a really pale blue. The brown eggs had a bit of a pink tone to them, so I tried to go with taupes that are more warm and less pink. (You know how I dislike pink walls.)

Fun right? I particularly love the Rhinestone and Moroccan brown together. The Snow drop and Colony buff are so pretty too. OH and Brooklet and Outer banks – LOVE.

These light, pretty colors have me completely rethinking the colors for the powder room. I was going to go with a deeper color but there’s certainly something to be said for a calming combo. I am in a constant struggle between painting rooms deep and dramatic or light and bright – I’m drawn to both!

So there you go – a color palette for your home inspired by nature. It was fun and I will do this again in the future for sure. Now I just need to go find more inspiration. ;)

Have you ever pulled a room color from an unexpected source?

**SW has a tool that does this for you that I told you about here that’s fun too. And this is not a sponsored post of any kind, I just love paint. :)


Popular Posts