Well hello all and happy Friday! It’s time to bring this month to a close and review the big projects I completed over the past few weeks. This review is one I’m pretty excited about since it was a self-declared no-spend month for me.

I’ve done this before on the blog and this time I accomplished even more, but it was a little bit harder too. I mean, I still spent money on other stuff, just not DIY or decor. My Instagram feed was incredibly boring this month with zero shopping excursions. Lots of pictures of my cats. Very exciting.

BUT I got a ton done. The to do list is still long but I’ve made a dent.

Here’s a few of the projects I completed this month without spending any cash! I started out with a redo of an old cherry 80’s nightstand:

painting 80's furniture

I’m really happy with how that turned out – I was surprised I liked it as much as I did. ;)

Our outdoor hoses were an absolute mess and I was tired of trying to step over them when I needed to water the plants. So I downsized a bit and then created a hose holder (without digging in the ground):
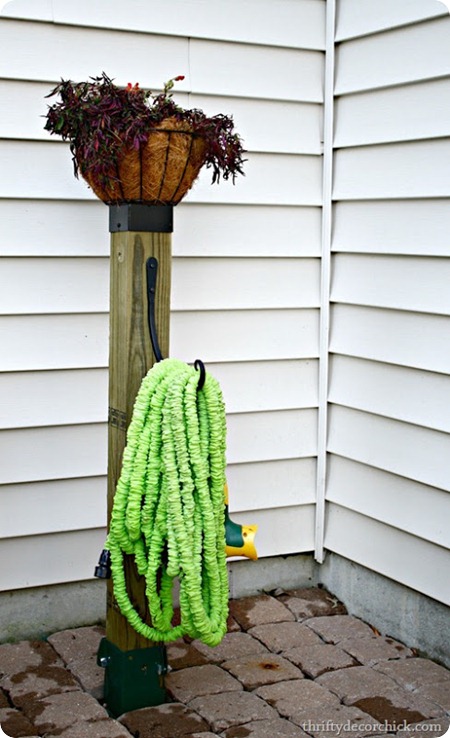
DIY hose holder I’m obsessed with those hoses. Many of you mentioned they gave you problems, but we’ve used ours for about two months without any issues. Crossing my fingers they hold up!  

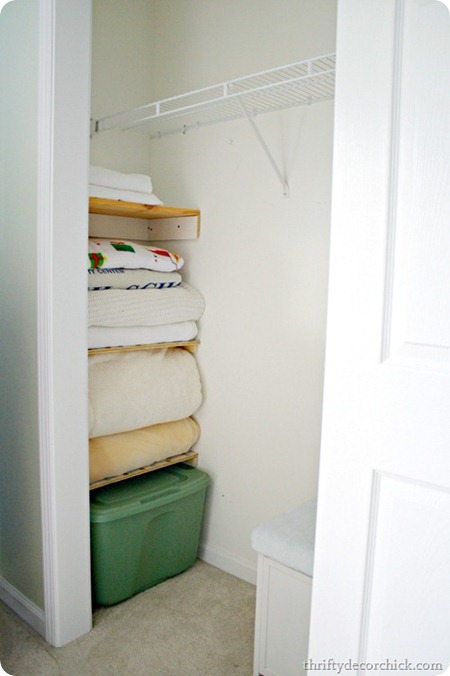
I started the house-wide decrapification in the guest room and cleared out a TON. I made better use of that awkward space in the closet too:

using wasted space in closet

SO much better. I can now close the doors without stuffing things back in. :)

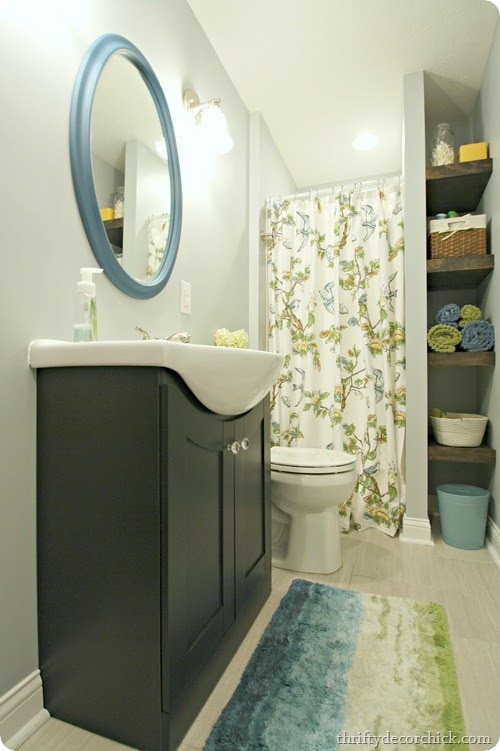
I finally finished up a few details in the basement bathroom and called that one done:

blue green bathroom

I really love how that space came together!

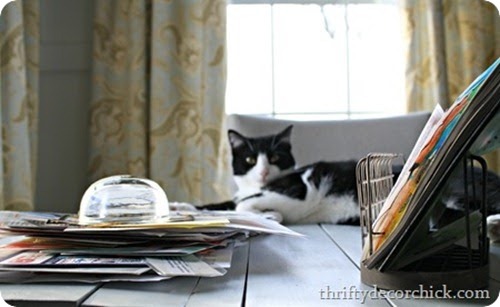
I don’t have it all figured out when it comes to managing all the paper that comes in our house, but I do have a few tips that have helped a bunch. I shared them in this post:

paper cutter

I am figuring out a few things when it comes to keeping plants alive – slow but sure. I shared our tiny little garden and how we grow a lot of food in a small space:

square foot gardening

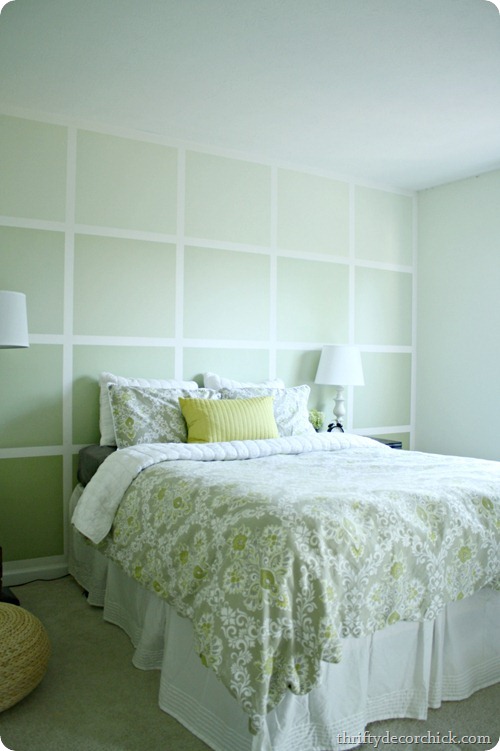
Earlier this week (wow, it’s been a LONG week!) I shared another big project I completed this month. Our guest room has needed a paint job for years now and I finally got to it, with a little ombre:

ombre painted wall

Honestly, if I hadn’t done this no-spend month I would have found five other projects to do instead. I’m SO glad I finally just got it done!

As I decluttered our craft/play/I-don’t-know-what room I got sidetracked again and decided to line the drapes that have been hanging there for years:
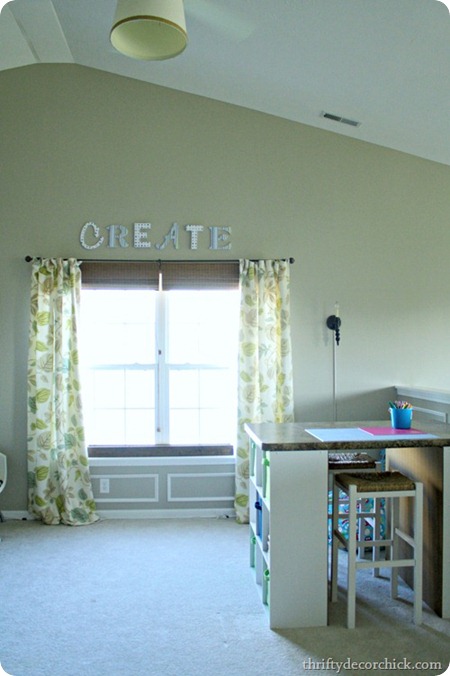
how to line drapes I shared a quick and dirty tutorial on lining drapes and the unexpected source I used for lining. ;) Use what you’ve got – that’s what this month was all about!

Finally, I cleaned up the front yard a bit and made our outdoor planters new again with some spray paint:

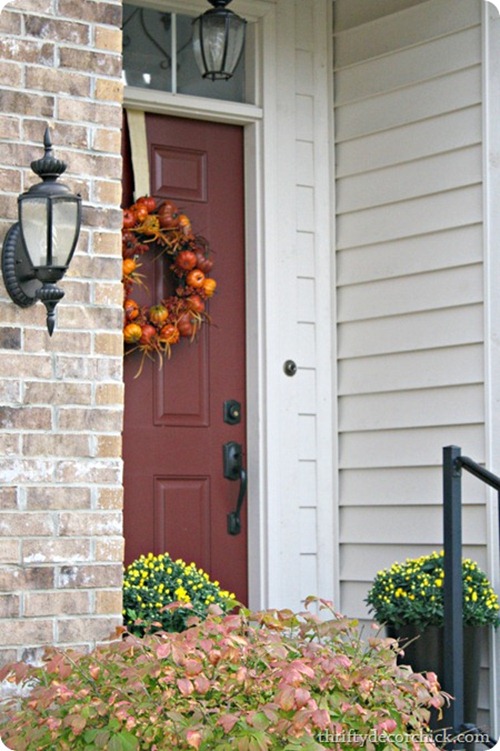
red front door

And added a teensy bit of fall. It’s time.

I did a bunch of smaller projects too, I’ll show you those some time soon. I gotta say, I’m kind of proud of myself for getting so much done this month. Usually in August (summer in general) I’m busy being sloth-like so this is pretty big for me.

Have a great Labor Day weekend folks! I’ll have the Before and After Party up on Monday – it just may go up a little later than usual. You can grab the code for the button here if you’d like to add it to your post ahead of time.

Hello all! Well the no-spend month is coming to a close and I’m so thrilled with what I was able to get done -- but also a little ready to buy something…anything…fun. ;)

I’ve focused SO much on our backyard this year (you can see the spring tour here) that I’ve completely ignored the front. Completely. I plopped some ferns in the planters on the porch back in April and haven’t even watered them much since (they just get rain water).

Since I fall is coming, like it or not (LIKE!), it was time to do some clean up and add some fall touches to the front. We have a teeny tiny porch but I think even small ones can make a big impact, especially this time of year.

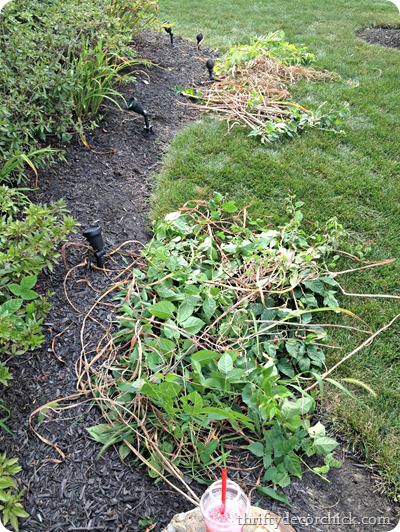
First thing I needed to do – get rid of the weeds that had grown three feet tall and the trees that were sprouting in the beds:

pulling weeds

Told you I hadn’t touched it in months. :) Pretty. We get a lot of random trees growing in our beds and if I don’t stay on top of it they are a pain to get rid of. Annnd these are going to be a pain – I’ll need to watch them because some were so thick I just cut them down, I couldn’t get them out of the ground.

I cleaned up those, the weeds and the dead leaves and stalks on the lillies:

fall clean up

Yes that is a cherry icee. A girl needs sustenance.

Next up was a trip for new plants for the porch. Yes, I cheated a little bit, but do flowers count? Probably not. Probably. *hangs head in shame*

I checked out my local True Value – the one I visit (in Pendleton, IN) has a great floral selection. I always ogle all the planters too:

outdoor planters

Seriously, they have a ton! (You can see their online options here.)

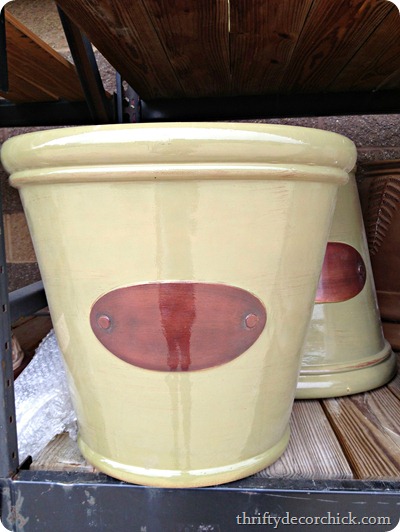
I fell in love with these:

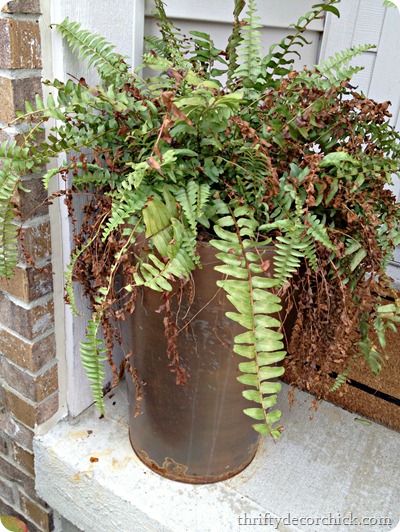
But they were a little too wide for our porch. We don’t have a lot of room to work with here. I found the perfect set years ago, but they’ve not done well in the elements:

copper planters

Yeeah. The ferns aren’t doing so hot lately either. Moving on.

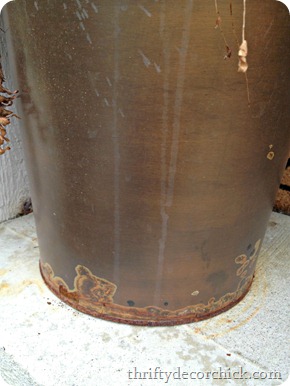
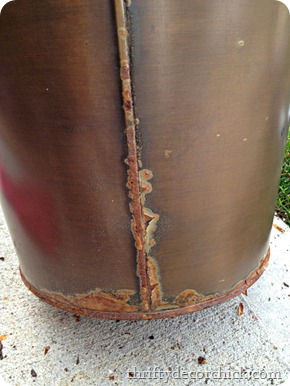
So here’s the thing – I love the copper tone of these, but they are not holding up well. At all:

prepping metal for spray paint

They are also leaving rust marks on the cement which is always super fun to clean up.

I love how tall and skinny they are and I only need them to work for a few more months. I’ll get/make something else next spring.

Soooo…spray paint to the rescue! I cleaned them off well:

prepping metal for spray paint

This is important! No need to sand metal, but you do need to clean it well. I used a brush and started knocking some of the metal flakes off, but that got to be a can of worms. It was just going and going so I just decided to paint right over them. If you are going to try to keep something for an extended time you’ll want to get all that off. Again, I’m just trying to make these presentable for the next few months.

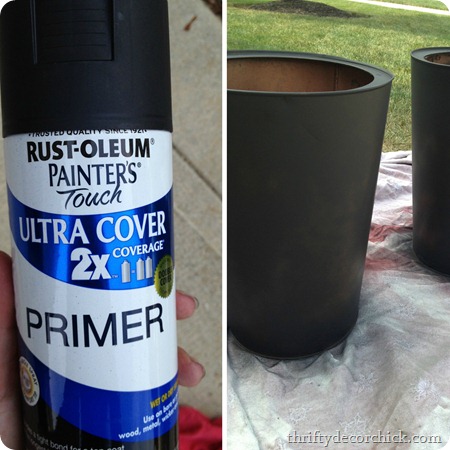
I usually skip the primer but since these are outside I figured I should use it. I had black primer so I used that:

priming metal spray paint

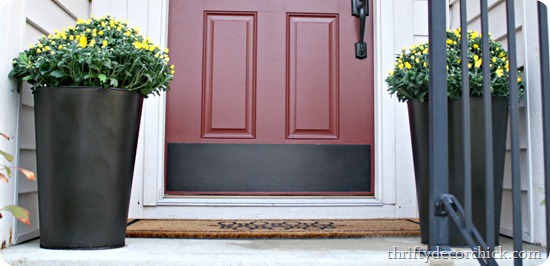
Then I gave them a coat of my oil-rubbed bronze spray paint. I don’t use this stuff nearly as much as I used to, but it matches the kick plate (that I spray painted!), the hardware on the door and the coach lights I sprayed a few years ago: 

spray painting light fixtures So I figured it would tie in well.

I picked out some bright yellow mums at True Value. They are just about to explode:

yellow mums fall

And then the joyous deadheading begins. ;)

See how it all ties together?

spray painting outdoor planters

Much better than this:

Because it’s in the 90’s this week and 90 degree temps makes me want fall, I dug out my DIY pumpkin wreath from last year and hung it:

pumpkin wreath

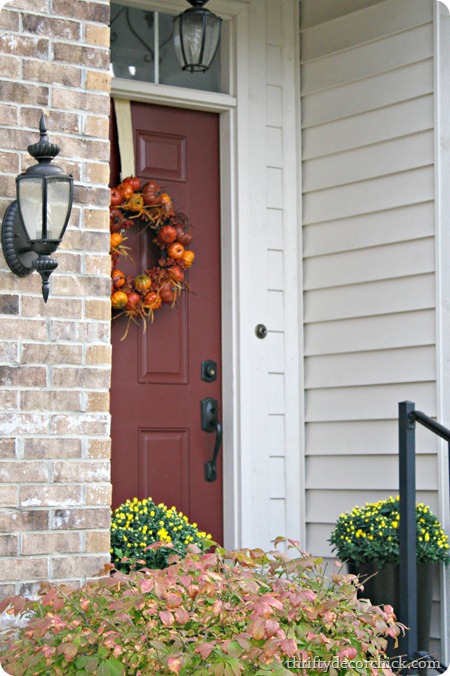
It’s almost September. It’s allowed. I love how it looks on the red door!

I painted those coach lights three years ago and they still look fantastic!:

fall front door

I’m a little shocked at how well they’ve held up, honestly. I don’t even think I primed them? They’ve withstood the elements better than the original finish did.

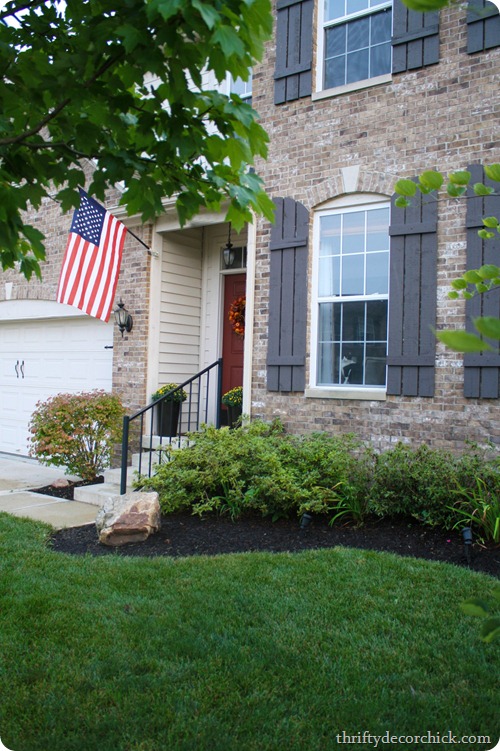
A few weeks ago I read that the flag should hang to the left of the door – I had no idea. It was always getting caught on the gutter anyway so I moved it over:

fall front porch

Technically they’re supposed to be lit up at night too, so the coach light takes care of that. ;)

I’ll add some more fall touches out here as we get into the season, but I’m loving the warm welcome we have going right now:

      red door brick house

This one likes it too:

:)

This just goes to show that even the outside items can be salvaged with a little cleaning and new paint. Those planters are completely washable and will hold up well even outside…at least till the end of the year. (If they weren’t rusting I have no doubt they’d last much longer.)

Have you started any fall decorating yet? Are you ready? Have you picked up any mums? Do YOU believe in the power of spray paint? 


I was one of the bloggers selected by True Value to work on the DIY Squad. I have been compensated for my time commitment to the program as well as writing about my experience. I have also been compensated for the materials needed for my DIY project. However, my opinions are entirely my own and I have not been paid to publish positive comments.


Hello to you all! I have a fun little project for you today – the afters aren’t anything earth-shattering, but it’s one of those to-do items I’ve had on the list (in my head) forever. And I did it without spending any money!

I mentioned earlier this week that I’m going room by room in the house decluttering (and cleaning). It’s taking me a long time. Eons. I don’t see an end in sight. Help. me. I have our bedroom and bathroom (and I’m ignoring our closet like usual) and then I’ll move on to the other floors. Working my way down sounded like a good idea when I was all gung ho about this idea weeks ago.

Anyway, part of the reason it’s taking so long is because I’m taking care of little (and huge) projects along the way. I try to ignore them but then I start twitching and I can’t concentrate and the annoying voice in my head goes “Oh it won’t take long, just do it!”

So I do. This is one of those. Our drapes in the loft/playroom/craft room have been hanging for a couple years, but they’ve really been pieces of fabric hanging, not drapes:

P. Kaufmann blue green fabric

It’s what I do. ;) It’s not the first time I’ve done this. If you don’t mess with the drapes you can’t tell too much. It depends on how much light pours in the window. These are a linen-like fabric so very light and sheer and they were looking kind of awful not being lined. Did anyone ever notice it? I doubt it. But it’s something that was bugging me.

So I went to my fabric stash for some lining. I went through all of it a few weeks ago and knew I had some bigger pieces. Well…I had two that were about a foot too short and nothing else that worked. And at this point I’m ready to do this thing so I’m racking my brain trying to think of what I could use.

I was about to just save it for another day (a non no-spend month day) when a light bulb idea hit me. (LIGHT. BULB. Name that movie.) I knew we had an extra set of cream sheets for our king-sized bed that we haven’t used in a long time. We have two sets we rotate and this was a cheap extra set we never use.

So I threw the flat sheet on the floor and realized if I cut it down the middle it would totally work. SCORE! I’ve seen this done a million times so it’s certainly nothing new, but it worked for me since I’m not spending on decor/DIY this month.

I figured I’d give you a quick how-to-line-drapes tutorial – but keep in mind I’m not a GREAT sewer. (Seamstress?) I just do things they way they work for me and they’re not perfect.

The big thing here – you need to lay your fabric with the print side down. If you’re doing a pillow, both printed sides need to face each other. When you’re done you’ll pull it back inside out so the good sides are out. This hides your seam:

how to line drapeshow to line drapes

I don’t pin the whole thing to start – just the top. I get that where I want it and pin it, then sew that part first:

how-to-line-drapes4

Speaking of sewing. Do not be afraid. This is your friend:

brother sewing machine

I promise, if I can sew, you can sew. I’m not good at sewing. Not a great sewer-of-straight-lines. But the thing is, no one will notice your lines aren’t straight. YOU won’t notice. (Unless you’re sewing something with vertical stripes and in that case good luck to you my friend.)

Half the battle is learning how to get the machine threaded and it’s not hard. It shows you how to do it right on the machine and takes about a minute.

Then you sew. Like a boss:

how to sew

I love hemming tape, and for years I used just that. But we have animals and I found I needed to throw stuff in the washer occasionally. The hemming tape will actually hold up for a wash or two, but after that not so much. And honestly? Sewing may even be faster than hemming with tape and an iron. Once you get going it’s super fast.

You really want your lining to be slightly smaller than your fabric, so at the end you can iron the edges over so you can’t see the lining. Does that makes sense? You want the printed fabric to be seen from the side, not the lining. (I kind of help that along with the way I hang them too.)

The ironing afterwards took longer than sewing each panel, no lie:

how to line drapes

Here’s an idea of the different the lining makes. It makes them less see through, yes (you can get black out lining from the fabric store) but it also makes them fuller and they hang prettier:

difference between lined and non-lined drapes

Wimpy on the right, lined on the left.

Since I was at it, I took care of another quick little project. You can see in the pic above that the bamboo shades were hanging inside the window. I’m obsessed with getting as much natural light in this house as I can so I moved them up.

They now hang on the wall above the window:

hanging roman shades above window

It’s a little thing but it all looks so much better to me!:

lining drapes with sheets

I use the little clips to hang my drapes but hate seeing them, so I use this trick to hide them from view. It gives your drapes the look of pleated ones (that are way over my head).

This room is way in between decor-wise, but at least for now it’s decrapified and clean. And the window looks nice. :)

line drapes with sheets

The “create” is coming down next. I think I need a break from words on my walls. ;)

So do you know how to sew? Have you ever used sheets to line drapes? I use sheets from Goodwill for my spray paint “tarps” occasionally – but I may need to start looking for more to use as lining. After a good wash of course. :)        

**You can see more about my DIY craft table here.

**The fabric is called Spring Vine Opal from P. Kaufmann.


Hello all! How was your weekend? Oh people…we’re finally getting summer around here and it hurts a bit. Looks like we have another week of high temps and then things get awesome again. I knew it had to happen…and at least now that it’s hot I’m now completely ready for fall. I wasn’t before. ;)

So I’ve had a specific project on my to do list for years – paint the guest room. A fairly simple thing, right? A lot of projects take me forever but this one may win for being on the list the longest. This room was my stepdaughter’s room and our guest room, and I felt sorry for those who would come to stay:

squares of color on wall

I mean…I know.

It was completely adorable for a 13-year-old (we did this when we moved in more than nine years ago), but it was a little much for anyone else. The wall was actually kind of special to us – soon after we moved in she and about five of her friends did all the painting after I had taped off those squares. There was a paint fight, lots of laughs and they had a BLAST.

I got new bedding for the room a couple years ago but still never painted the room:


And like most guest rooms this space got the hodge podge furniture that didn’t really work anywhere else in the house.

I’m on a house-wide decluttering rampage right now, and it’s taking forever. I keep getting sidetracked by little (and BIG) projects along the way. That’s how this redo started – with the decluttering and organizing in here I shared a couple weeks ago.

For some reason I couldn’t handle this wall one. more. day. The great thing is, I already had the paint I needed to change up this pastel wall:

blocked paint wall

I bought the paint about six months ago I think? I had a look in mind for those squares. I wanted to try to keep them since I knew if I just painted the wall I’d still see the lines of the squares. And I really didn’t want to mess with sanding it all down – I just went with what I already had. What better time to finish this up then in my no-spend August? I had all the paint tools I needed, so I went after it.

First up – taping. This is what took the longest part:

taping off lines on wall

You can see there how the paint job by the teenagers wasn’t perfect – I never fixed it. ;)

I used my trusty Frogtape and had to tape off each side of the squares – years ago when I did this I used a two inch tape but the thickest Frogtape I had on hand was about 1 1/2 inches.

It took a while because I was trying to tape off just right so I didn’t see any of the old color. I also had to tape it so the new paint would cover the seepage from the tape I used the first time I did it:

taping off paint lines painters tape

Like I said, this took awhile. But it was good, mindless, relaxing work. Sometimes not thinking much is a very good thing. ;)

And then I was ready:

squares with painters tape

Months ago when I picked out the paint I went through a ton of options. Originally I planned to go with a gray in this room but I just couldn’t bring myself to do it. This room is SO bright and cheery, and it could certainly take the gray. (Not all grays are dark and dreary.)

I wanted it to be light and pretty. I wanted to work with the bedding too, but the green in that is more of a chartreuse color – not exactly something I want on the walls.

So I went with something that didn’t match just right and I don’t think the world will stop spinning:

light green wall colors

Yes, all of those colors.

I went ombre:

ombre paint wall

Obviously I went darkest (Pond Reed) on the bottom and moved up. All of the colors are from Porter Paints (I had them mixed them in a cheaper paint):

ombre squares on wall

(See the story of that nightstand-from-the-trash here.)

I REALLY love it. Keep in mind nothing else is done in the room so you are seeing this way in between, but I like sharing progress as it happens.

The rest of the room got painted as well, but first I had to remove my horrible trim idea from years back: removing trim from wall

I was trying to do an easy crown molding look all those years ago, and it FAILED.  I’ve learned a few things over the years -- one, don’t use two inch nails to install trim. Two, don’t use Liquid Nails, ever. Ever, ever, ever. Did I mention ever? Unless you are SURE you will never change your mind. 3. Thin, inexpensive molding doesn’t look like crown molding, no matter how hard I try. Ever.

I just painted over the glue for now but I’ll have to do crown or something to cover it up later. Nice.

I painted the rest of the room the lightest color on the ombre wall, Dew White:

dew white porter paint

Here’s another tip – covering blue walls with a light paint will take two coats. Get enough paint. ;) I didn’t and will need to get more to finish up a couple of the smaller walls.

There’s lots left to do in here, obviously. Drapes for sure and paint the old dresser:

dew white porter paint

The nightstand that matches that dresser got a redo a few weeks ago.

The room as is is very…dewy. :) But drapes and art and accessories will help to tone that down a little. Thing is – I probably wouldn't use this color elsewhere in the house, but it’s just so dang pretty and light in there. I fall in love with it more every time I go in that room. 

I’ve had this little garage sale chair forever, and I don’t know why but I love it:

ombre squares on wall

Well, the shape of it I love. Not the 70’s fabric. I was sitting there yesterday thinking I could totally recover this myself. I have totally lost my mind. I’ve done it before and said never again.

That little foot stool thing won’t stay, it’s just here till I figure out what to do with it cause I love it. I’ll also DIY a simple headboard at some point too.

My list is long but at least I finally painted!! HUGE project done. Even if I get nothing else done in here for awhile it looks SO much better:

ombre paint wall

My plan is to still add some dark gray/black in here to play off the light green and black combo that I love. It will also be some nice contrast. I think it’s such a fresh look and I hope I can make it work.

Can you believe I finally got this done? THIS is why I need to do no-spend months every year. I’m getting so much done. I do have a short list of things I can’t wait to go out and buy on September 1st though. Is this month taking longer than most or is it just me? ;)


Popular Posts